


Track Webflow Forms Submissions in Google Tag Manager with this Free GTM Recipe
A free, tested Google Tag Manager recipe that captures Webflow Forms submissions and turns them into a trigger you can use to fire conversions to Google Ads, Google Analytics and more.

Google Tag Manager is a common way to send conversions to Google Ads, Google Analytics, etc when someone submits a Webflow form on your website.
The problem is, it's quite difficult to set up. Webflow submits forms with its own JavaScript, which means Google Tag Manager's built-in form submission trigger is unreliable, so you're left having to write custom code to detect the form submission, send an event to the dataLayer, and build a trigger on top of that.
And unless you're a developer or very experienced with Google Tag Manager, you're going to struggle.
Fortunately, though, there is a simple solution.
You can simply install this Webflow Forms Conversion Tracking Recipe in your Google Tag Manager account and you'll have everything you need to get basic conversion tracking set up.
What Is a Google Tag Manager Recipe and What's in It?
A recipe is a pre-built bundle of Google Tag Manager assets (a tag, a trigger and a variable) that you import in one go instead of building each piece yourself. You can see all our recipes and how they work in the GTM recipe library.
This recipe detects successful Webflow Forms submissions, sends a 'Form Submitted' event to Google Tag Manager, and gives you a Trigger you can use to send conversions to Google Analytics, Google Ads, etc. There are three parts to it, and nothing inside is hidden. Here's exactly what each piece contains, so you can see what you're importing before you import it.
Custom HTML Tag
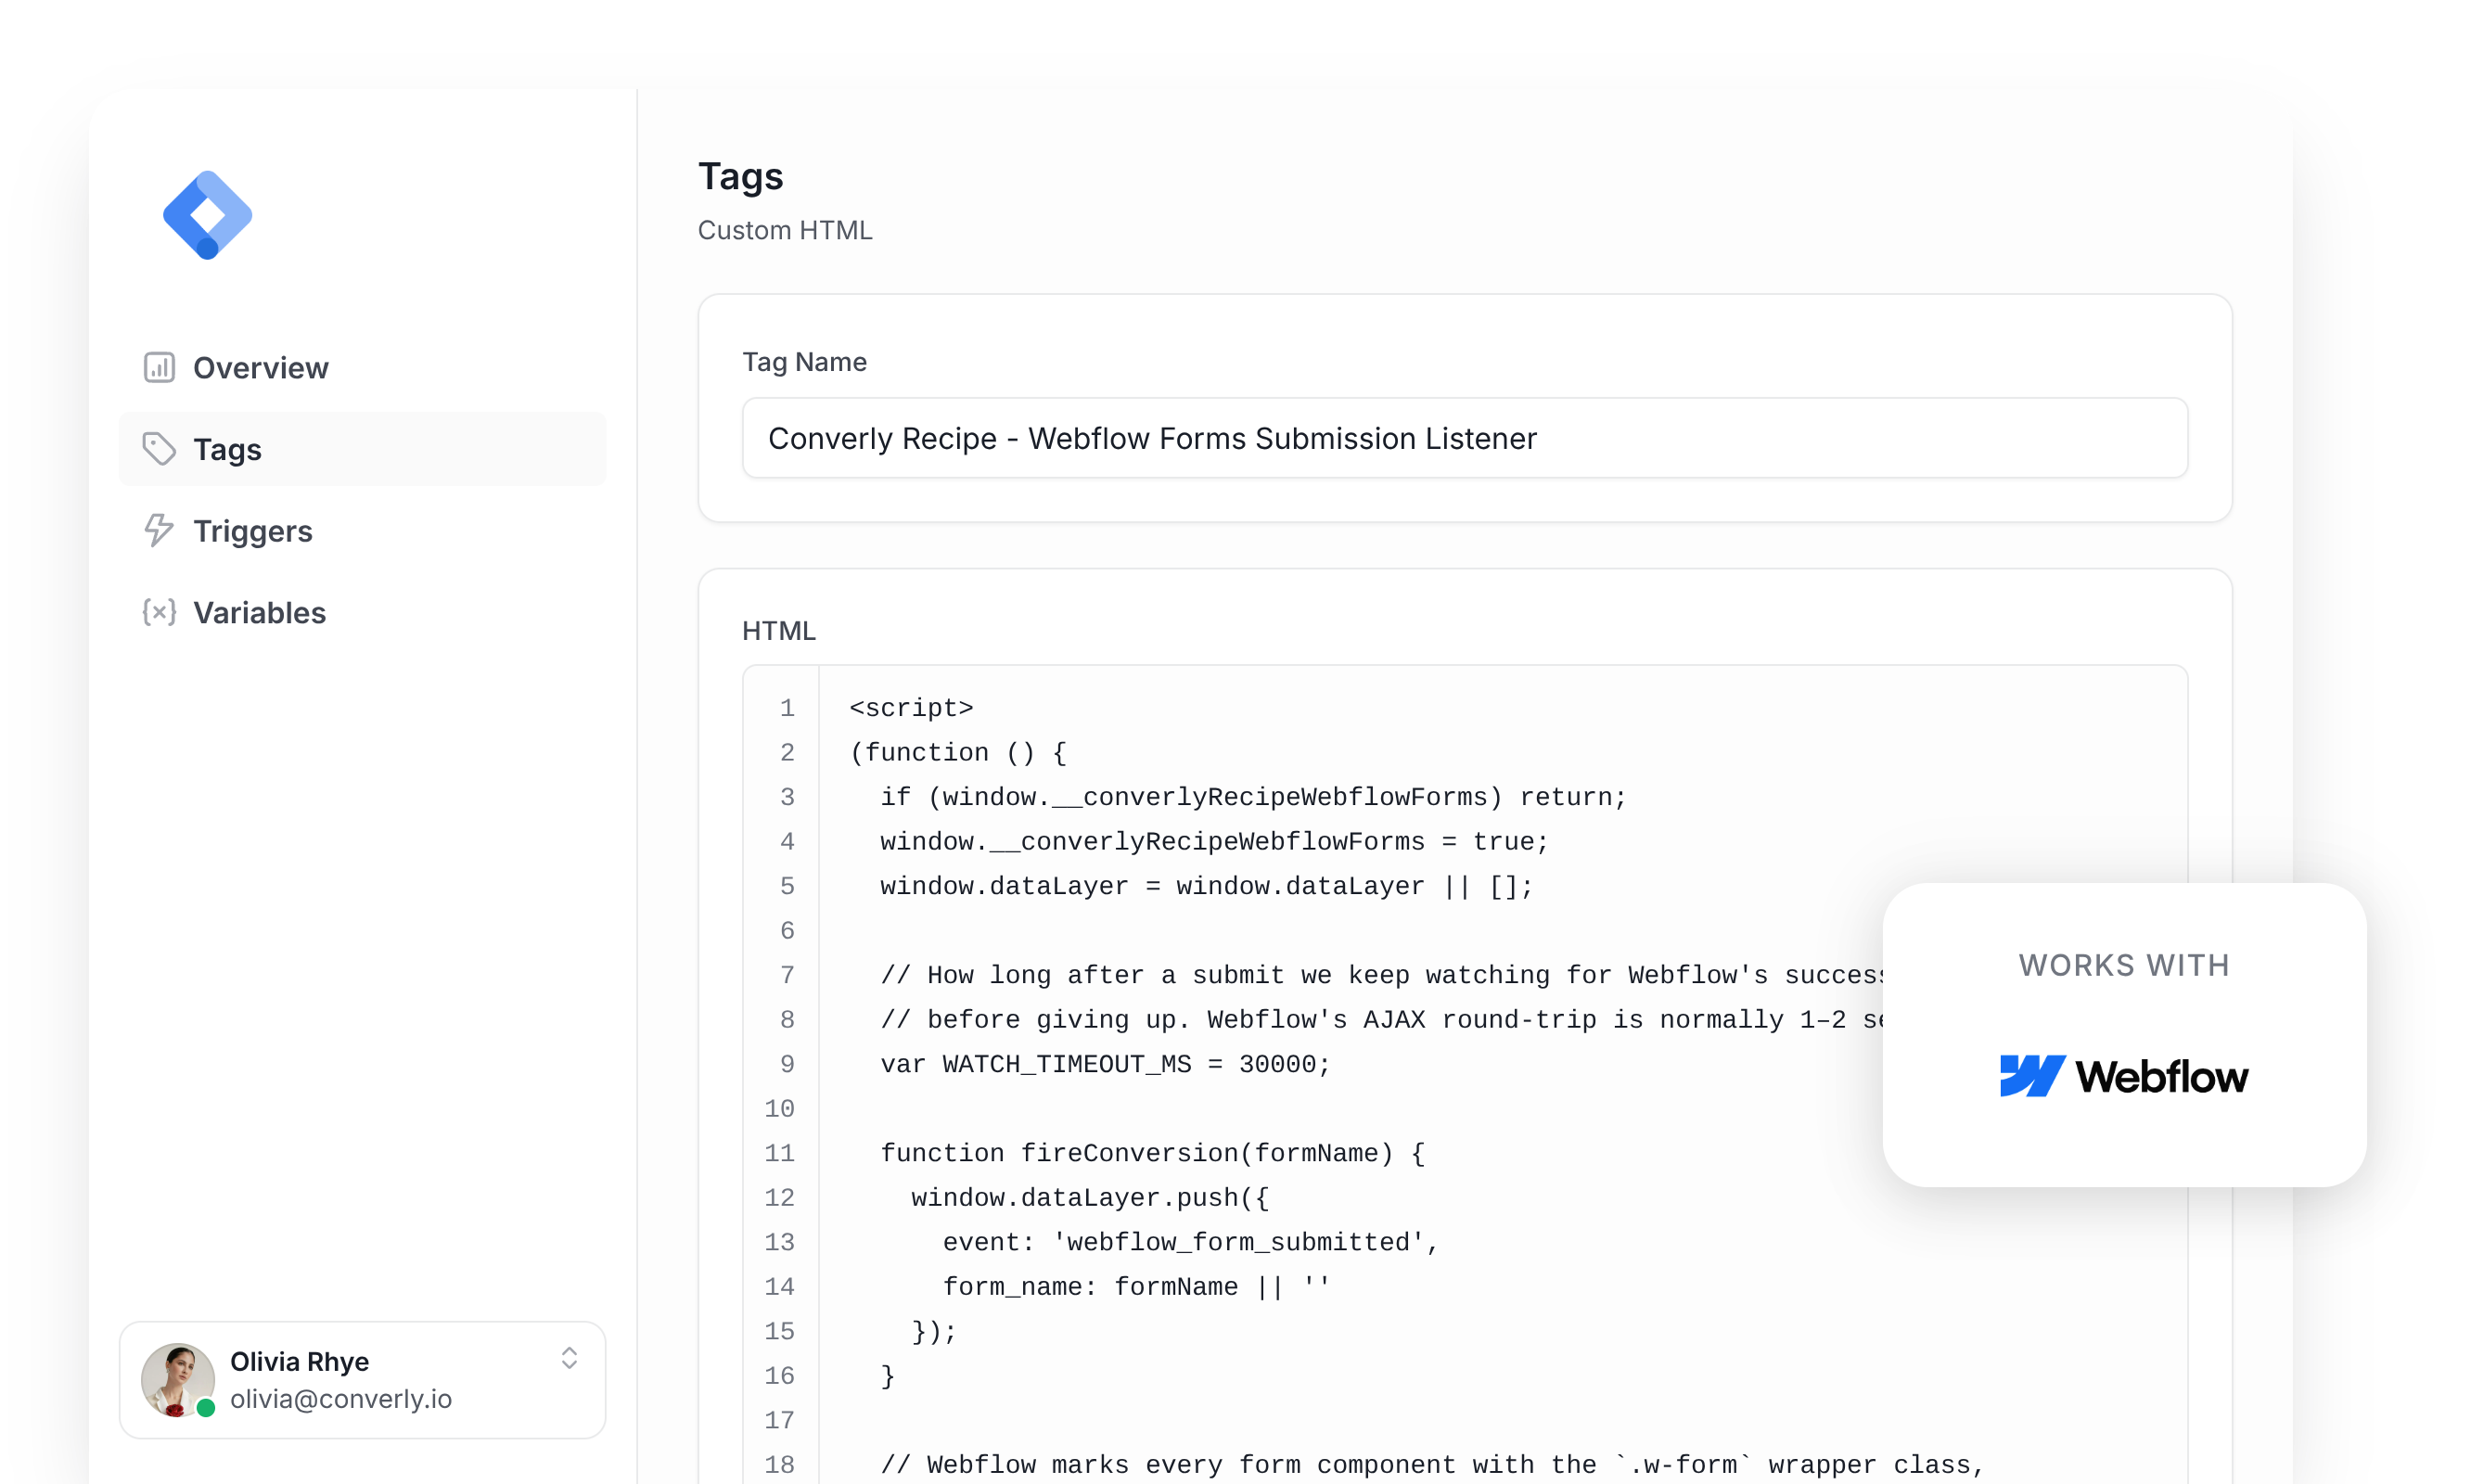
Listens for successful Webflow Forms submissions and pushes a 'webflow_form_submitted' event to the dataLayer. It fires on All Pages, once per event, and this is the code inside it.
(function () {
  if (window.__converlyRecipeWebflowForms) return;
  window.__converlyRecipeWebflowForms = true;
  window.dataLayer = window.dataLayer || [];

  // How long after a submit we keep watching for Webflow's success box
  // before giving up. Webflow's AJAX round-trip is normally 1–2 seconds.
  var WATCH_TIMEOUT_MS = 30000;

  function fireConversion(formName) {
    window.dataLayer.push({
      event: 'webflow_form_submitted',
      form_name: formName || ''
    });
  }

  // Webflow marks every form component with the `.w-form` wrapper class,
  // regardless of theme or custom classes added on top. This is the same
  // check the production module uses to scope its listener to real Webflow
  // forms (and not e.g. a hand-coded <form> elsewhere on the page).
  function isWebflowForm(formEl) {
    if (!formEl || !formEl.closest) return false;
    return formEl.closest('.w-form') !== null;
  }

  function isVisible(el) {
    if (!el) return false;
    try {
      return window.getComputedStyle(el).display !== 'none';
    } catch (e) {
      return false;
    }
  }

  // Arm a success watcher for one form. Fires only when Webflow's own
  // success box (`.w-form-done`, a sibling of the form inside the `.w-form`
  // wrapper) becomes visible — Webflow sets inline `display: block` on it
  // after its AJAX call succeeds (live-verified). A visible `.w-form-fail`
  // (Webflow's failure box), or the timeout elapsing with neither box shown
  // (Webflow's JS can also reject a submission silently, with no UI change
  // at all), tears the watcher down WITHOUT firing. One watcher per form:
  // a re-submit while armed (e.g. a retry after a failure) resets it.
  function armWatcher(formEl, formName) {
    var wrap = formEl.closest('.w-form');
    if (!wrap) return;
    var doneEl = wrap.querySelector('.w-form-done');
    var failEl = wrap.querySelector('.w-form-fail');
    if (!doneEl) return; // nothing to confirm success against — never fire unconfirmed

    var prev = formEl.__converlyRecipeWatch;
    if (prev) prev.teardown();

    var state = { fired: false };
    var observer = null;
    var pollTimer = null;
    var killTimer = null;

    function teardown() {
      if (state.fired) return;
      state.fired = true;
      if (observer) { try { observer.disconnect(); } catch (e) {} }
      if (pollTimer) clearInterval(pollTimer);
      if (killTimer) clearTimeout(killTimer);
      formEl.__converlyRecipeWatch = null;
    }
    state.teardown = teardown;

    function check() {
      if (state.fired) return;
      if (isVisible(doneEl)) {
        teardown();
        fireConversion(formName); // confirmed Webflow success
      } else if (isVisible(failEl)) {
        teardown(); // confirmed Webflow failure — no conversion
      }
    }

    if (typeof MutationObserver === 'function') {
      observer = new MutationObserver(check);
      observer.observe(wrap, {
        attributes: true,
        attributeFilter: ['style', 'class'],
        subtree: true,
        childList: true
      });
    }
    pollTimer = setInterval(check, 300); // belt-and-braces alongside the observer
    killTimer = setTimeout(teardown, WATCH_TIMEOUT_MS);

    formEl.__converlyRecipeWatch = state;
  }

  // Attached at the document level in CAPTURE phase so it runs before the
  // handler Webflow attaches in bubble phase — the same technique the
  // production module uses to see the submit reliably. The submit itself
  // never fires the conversion; it only snapshots the form name and arms
  // the success watcher above.
  function handleSubmit(event) {
    try {
      var formEl = event.target;
      if (!formEl || (formEl.tagName || '').toLowerCase() !== 'form') return;
      if (!isWebflowForm(formEl)) return;

      // The form's own name/id — set by the site builder in the Webflow
      // Designer, not user-submitted data. Snapshotted at submit time.
      var formName = formEl.getAttribute('data-name') || formEl.id || '';

      armWatcher(formEl, formName);
    } catch (e) {
      // Never throw back into Webflow's own form handling.
    }
  }

  if (typeof document !== 'undefined' && document.addEventListener) {
    document.addEventListener('submit', handleSubmit, true);
  }
})();Variable
Captures the name of the form that was submitted, ready to reference in any tag. These are its exact settings.
Name
DLV - Webflow Form Name
Variable Type
Data Layer Variable
Data Layer Variable Name
form_name
Trigger
Fires when the 'webflow_form_submitted' event is received. Use it as the trigger for any conversion tag. These are its exact settings.
Name
CE - Webflow Form Submitted
Trigger Type
Custom Event
Event Name
webflow_form_submitted
Download This Recipe
Get the ready-to-import file and upload it into Google Tag Manager. Everything shown above (the tag, the variable and the trigger) comes pre-built inside.
Built from Converly's own Webflow Forms detection code
Why It's the Best Recipe Out There
It is built from the same detection code we use in our own conversion tracking product, Converly, just adapted to run inside Google Tag Manager.
How to Use the Webflow Forms GTM Recipe
Install the Recipe
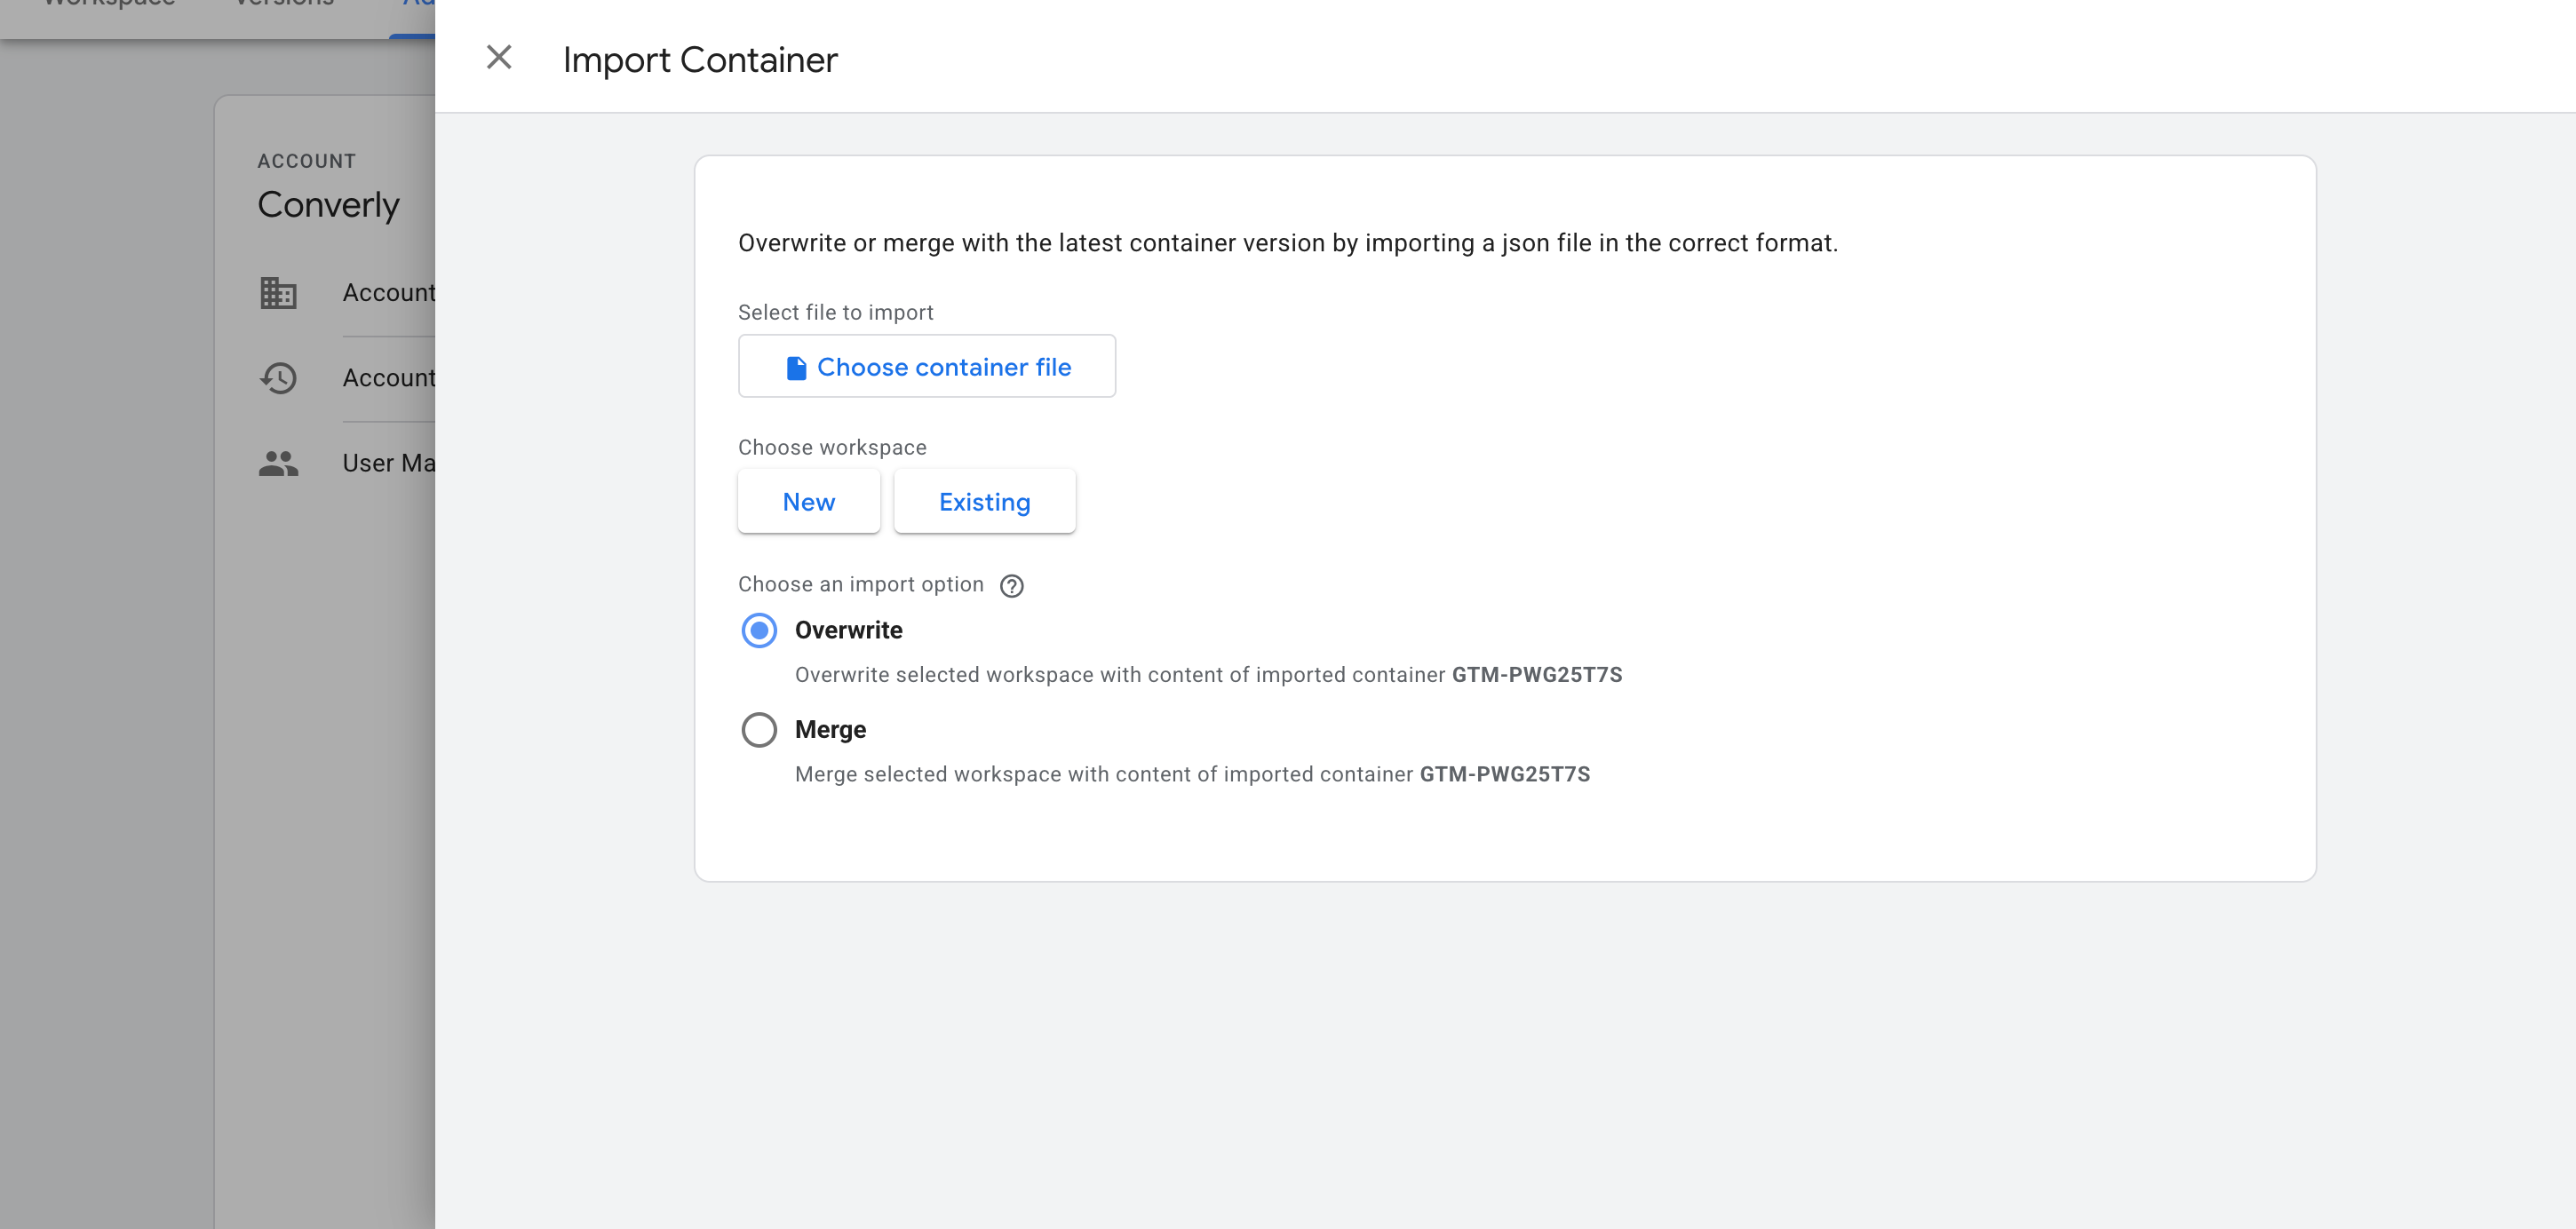
Download the recipe using the form above, then import it into your Google Tag Manager container. In GTM, head to Admin, choose Import Container, select the downloaded file, and pick the Merge option so it doesn't overwrite anything already in your container. The listener, variable and trigger are added for you automatically.
Configure Your Tags
Now that the recipe is installed, you can use it as a Trigger for your conversion tags. Here are two common examples.
Example 1: Google Analytics
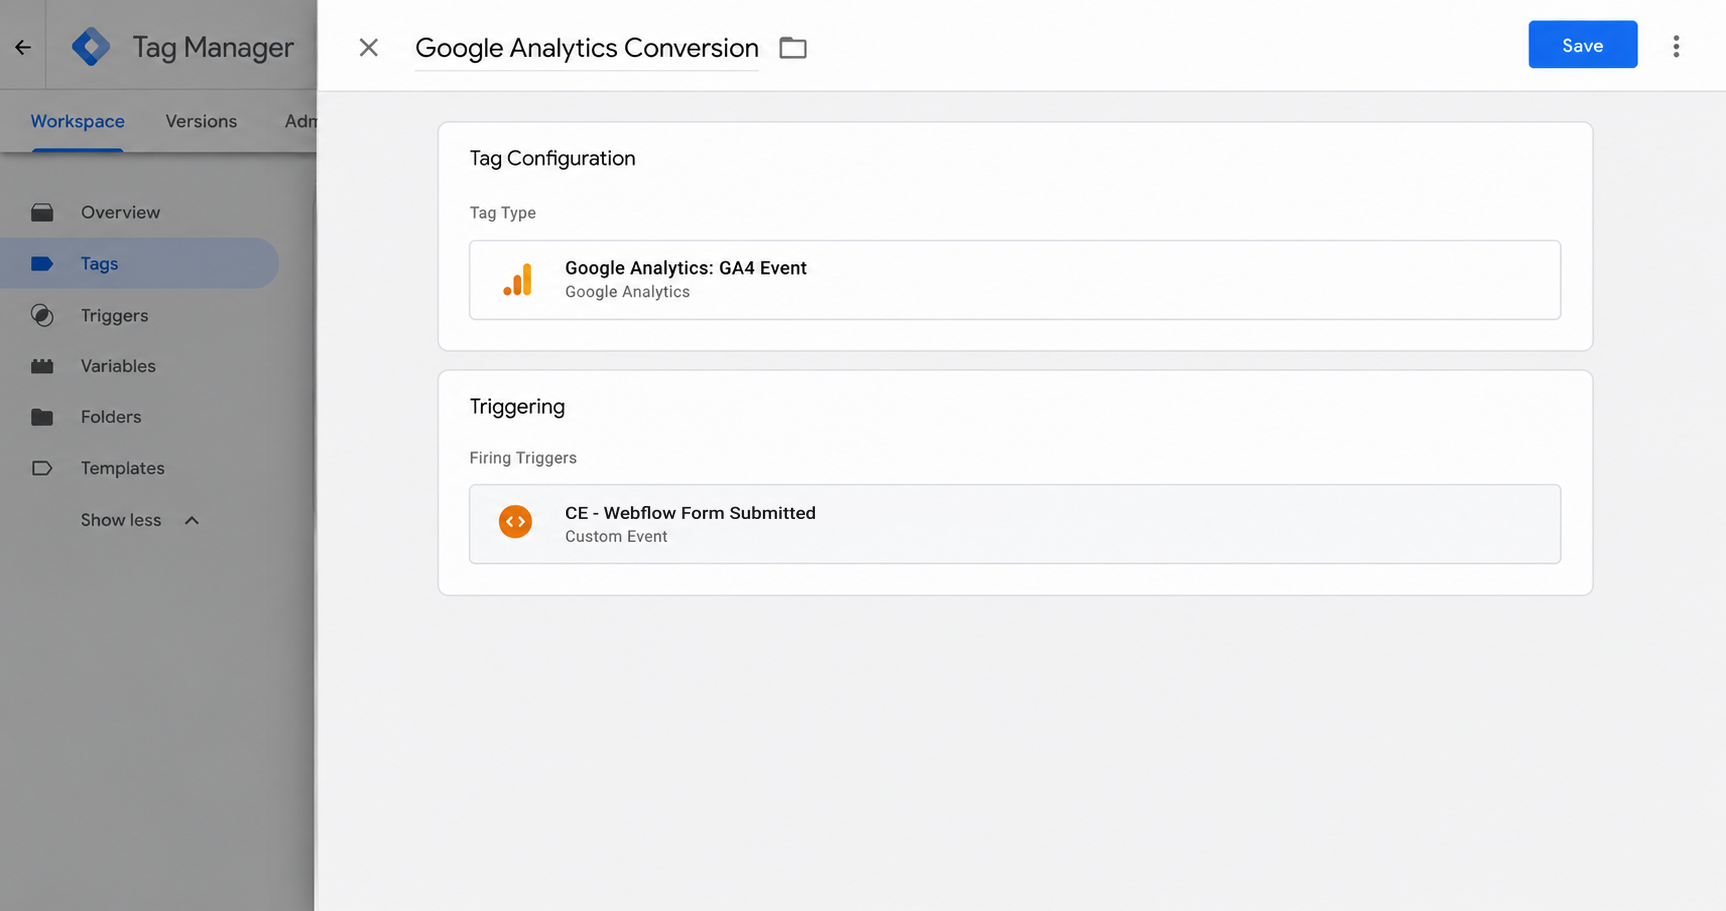
Create a GA4 event tag and set it to fire on this recipe's trigger (called CE - Webflow Form Submitted). Every Webflow form submission now sends an event to Google Analytics.
Example 2: Google Ads
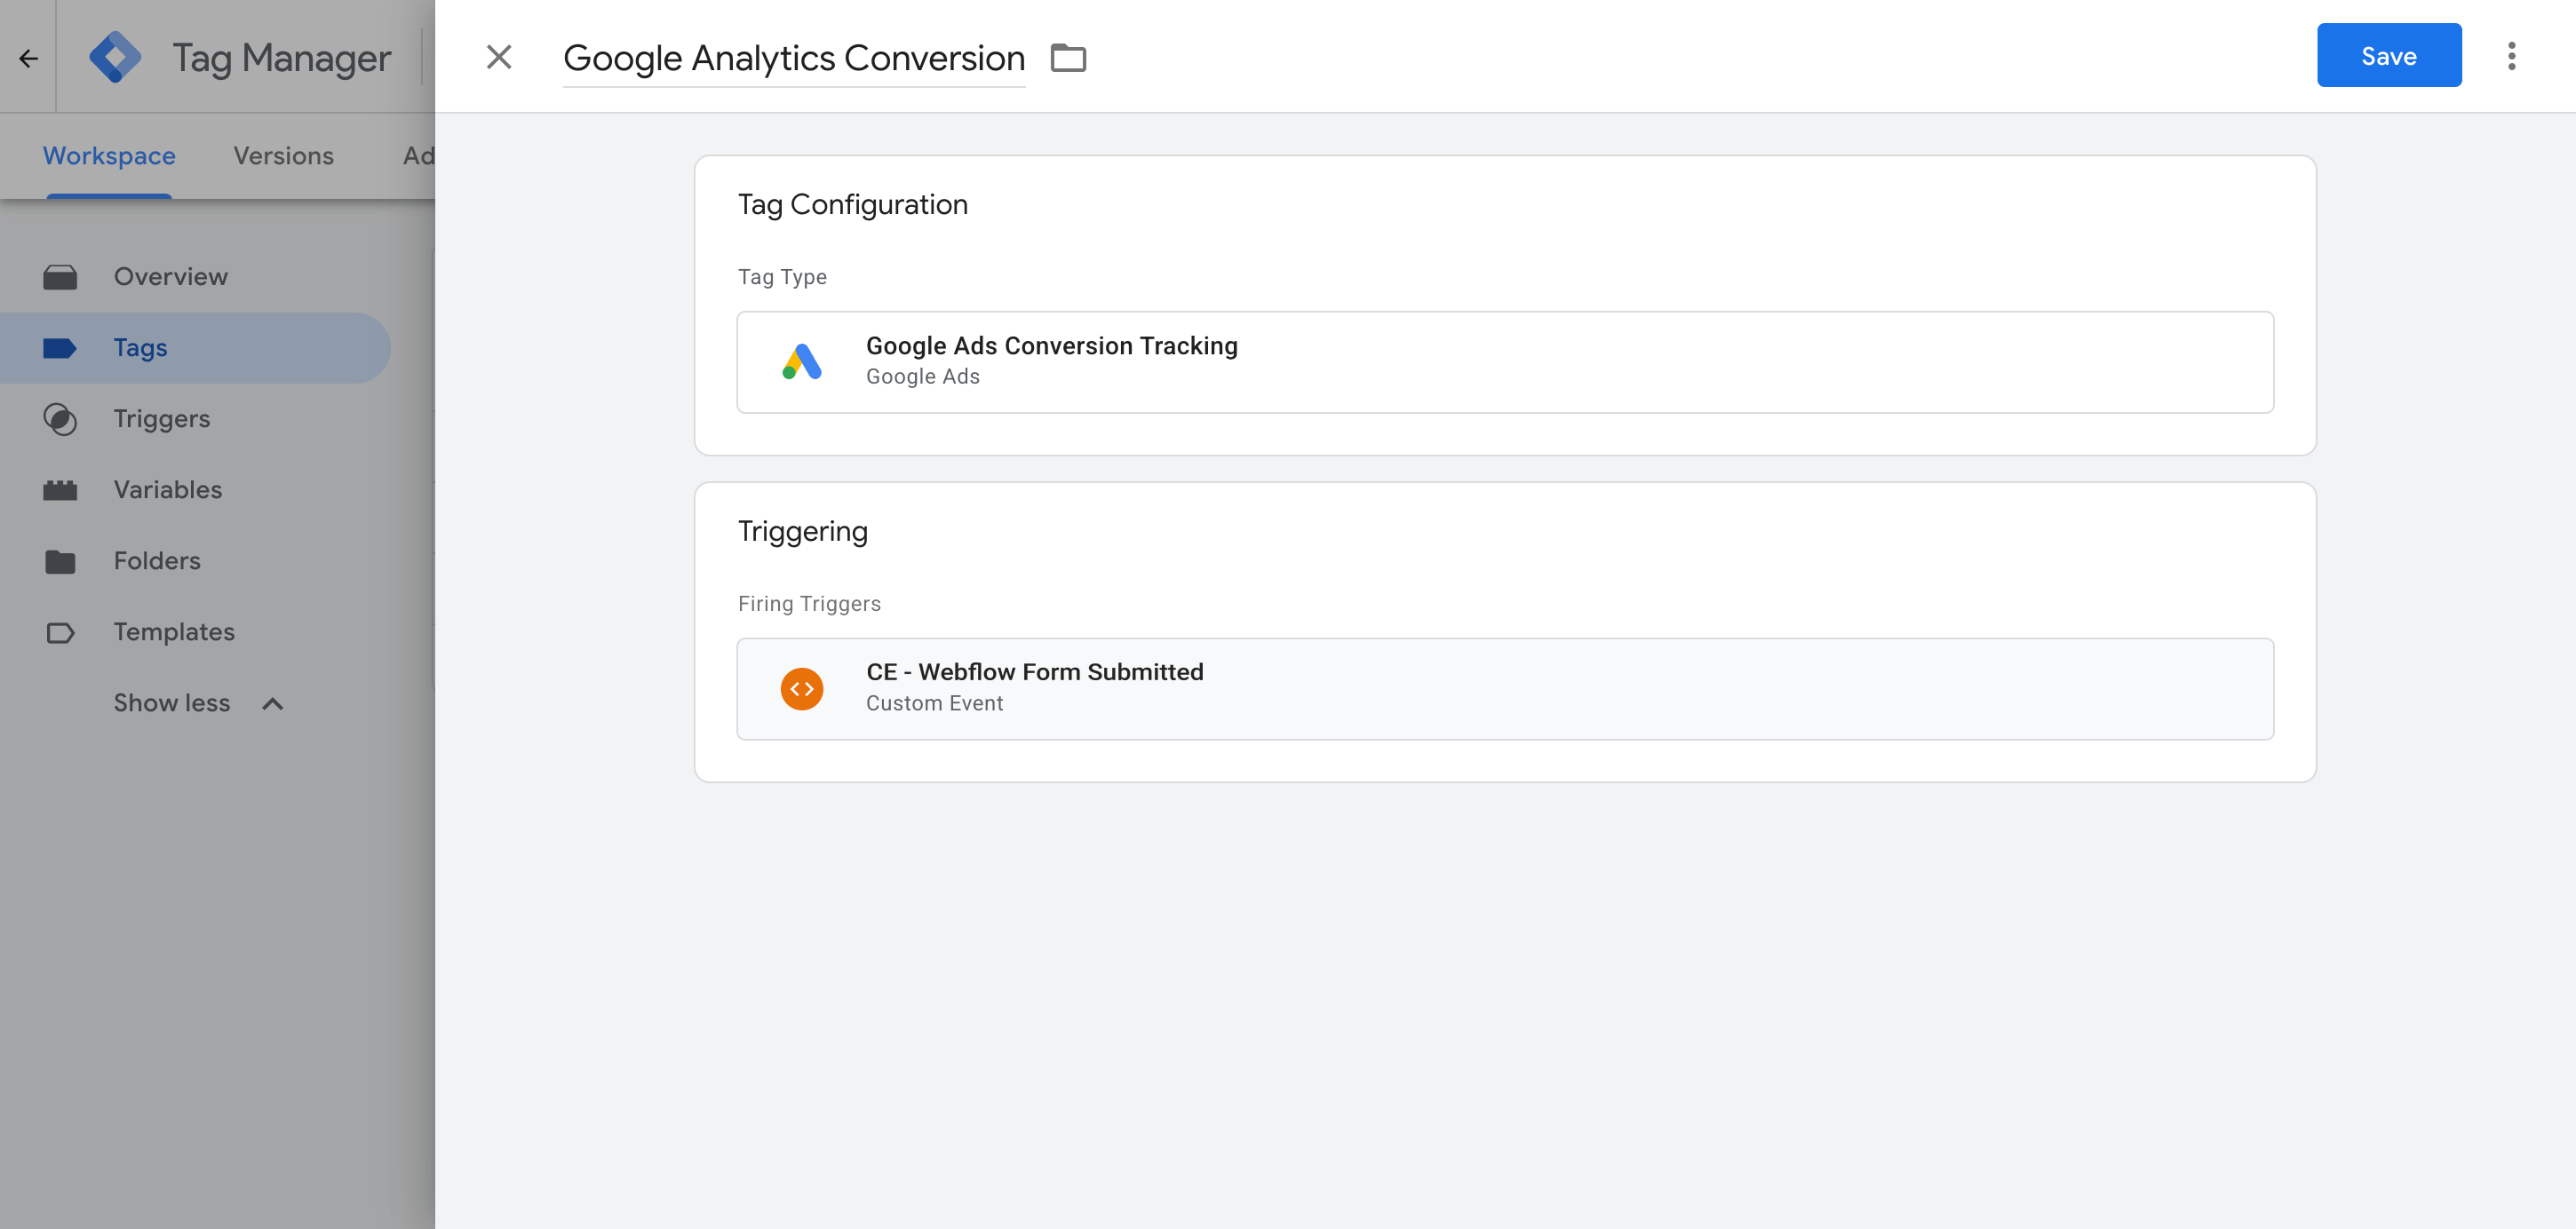
Add your Google Ads conversion tag and set the Firing Trigger to be the trigger included with this recipe (called CE - Webflow Form Submitted). Webflow form submissions will now be sent to Google Ads as conversions.
What This Enables You to Do (and What It Doesn't)
This recipe fires an event in Google Tag Manager whenever a successful Webflow Forms submission is detected. You can use that as a trigger to send conversions to Google Ads, Google Analytics and other tags.
What it does
Sends an Event to GTM
Detects successful Webflow Forms submissions and pushes an event called 'webflow_form_submitted' into your dataLayer automatically.
Tells You Which Form Fired
Captures the name of the form that was submitted, so a site with several forms can fire different tags for different forms.
Creates a Trigger in GTM
Gives you a 'Trigger' in Google Tag Manager which you can use as the trigger for any of your conversion tags.
What it doesn't do
Doesn't send the conversion server-side
Google Tag Manager sends conversions to ad platforms through the visitor's browser, so ad blockers and privacy restrictions in iOS and Safari can stop it working
Doesn't send Click IDs or Identifiers
It does not capture the Google click ID, Facebook click ID, Meta pixel cookies, IP address or user agent, which ad platforms need for Enhanced Conversions (Google) or a proper Event Match Quality score (Meta).
Doesn't send lead details
The script only fires a generic 'Form Submitted' event and does not capture the lead's name, email or phone number. Fine for tools like Google Analytics, but ad paltforms like Google and Meta want you to send the lead's details for Enhanced Conversions (Google) or a high EMQ score (Meta).
No Logging or Notifications
You can test it with Tag Assistant on install, but unless you check every week you have no way of knowing if it breaks (until you see 0 conversions in your account)
The Proper Way to Send Conversions to Google Ads, Meta Ads & More
This recipe is fine if all you want to do is send events to Google Analytics, which does not accept personal information or IP addresses. But to get a good Event Match Quality (EMQ) score in Meta, or use Enhanced Conversions in Google, you need to send the data server-side, together with the lead's name and email. That is what Converly does.
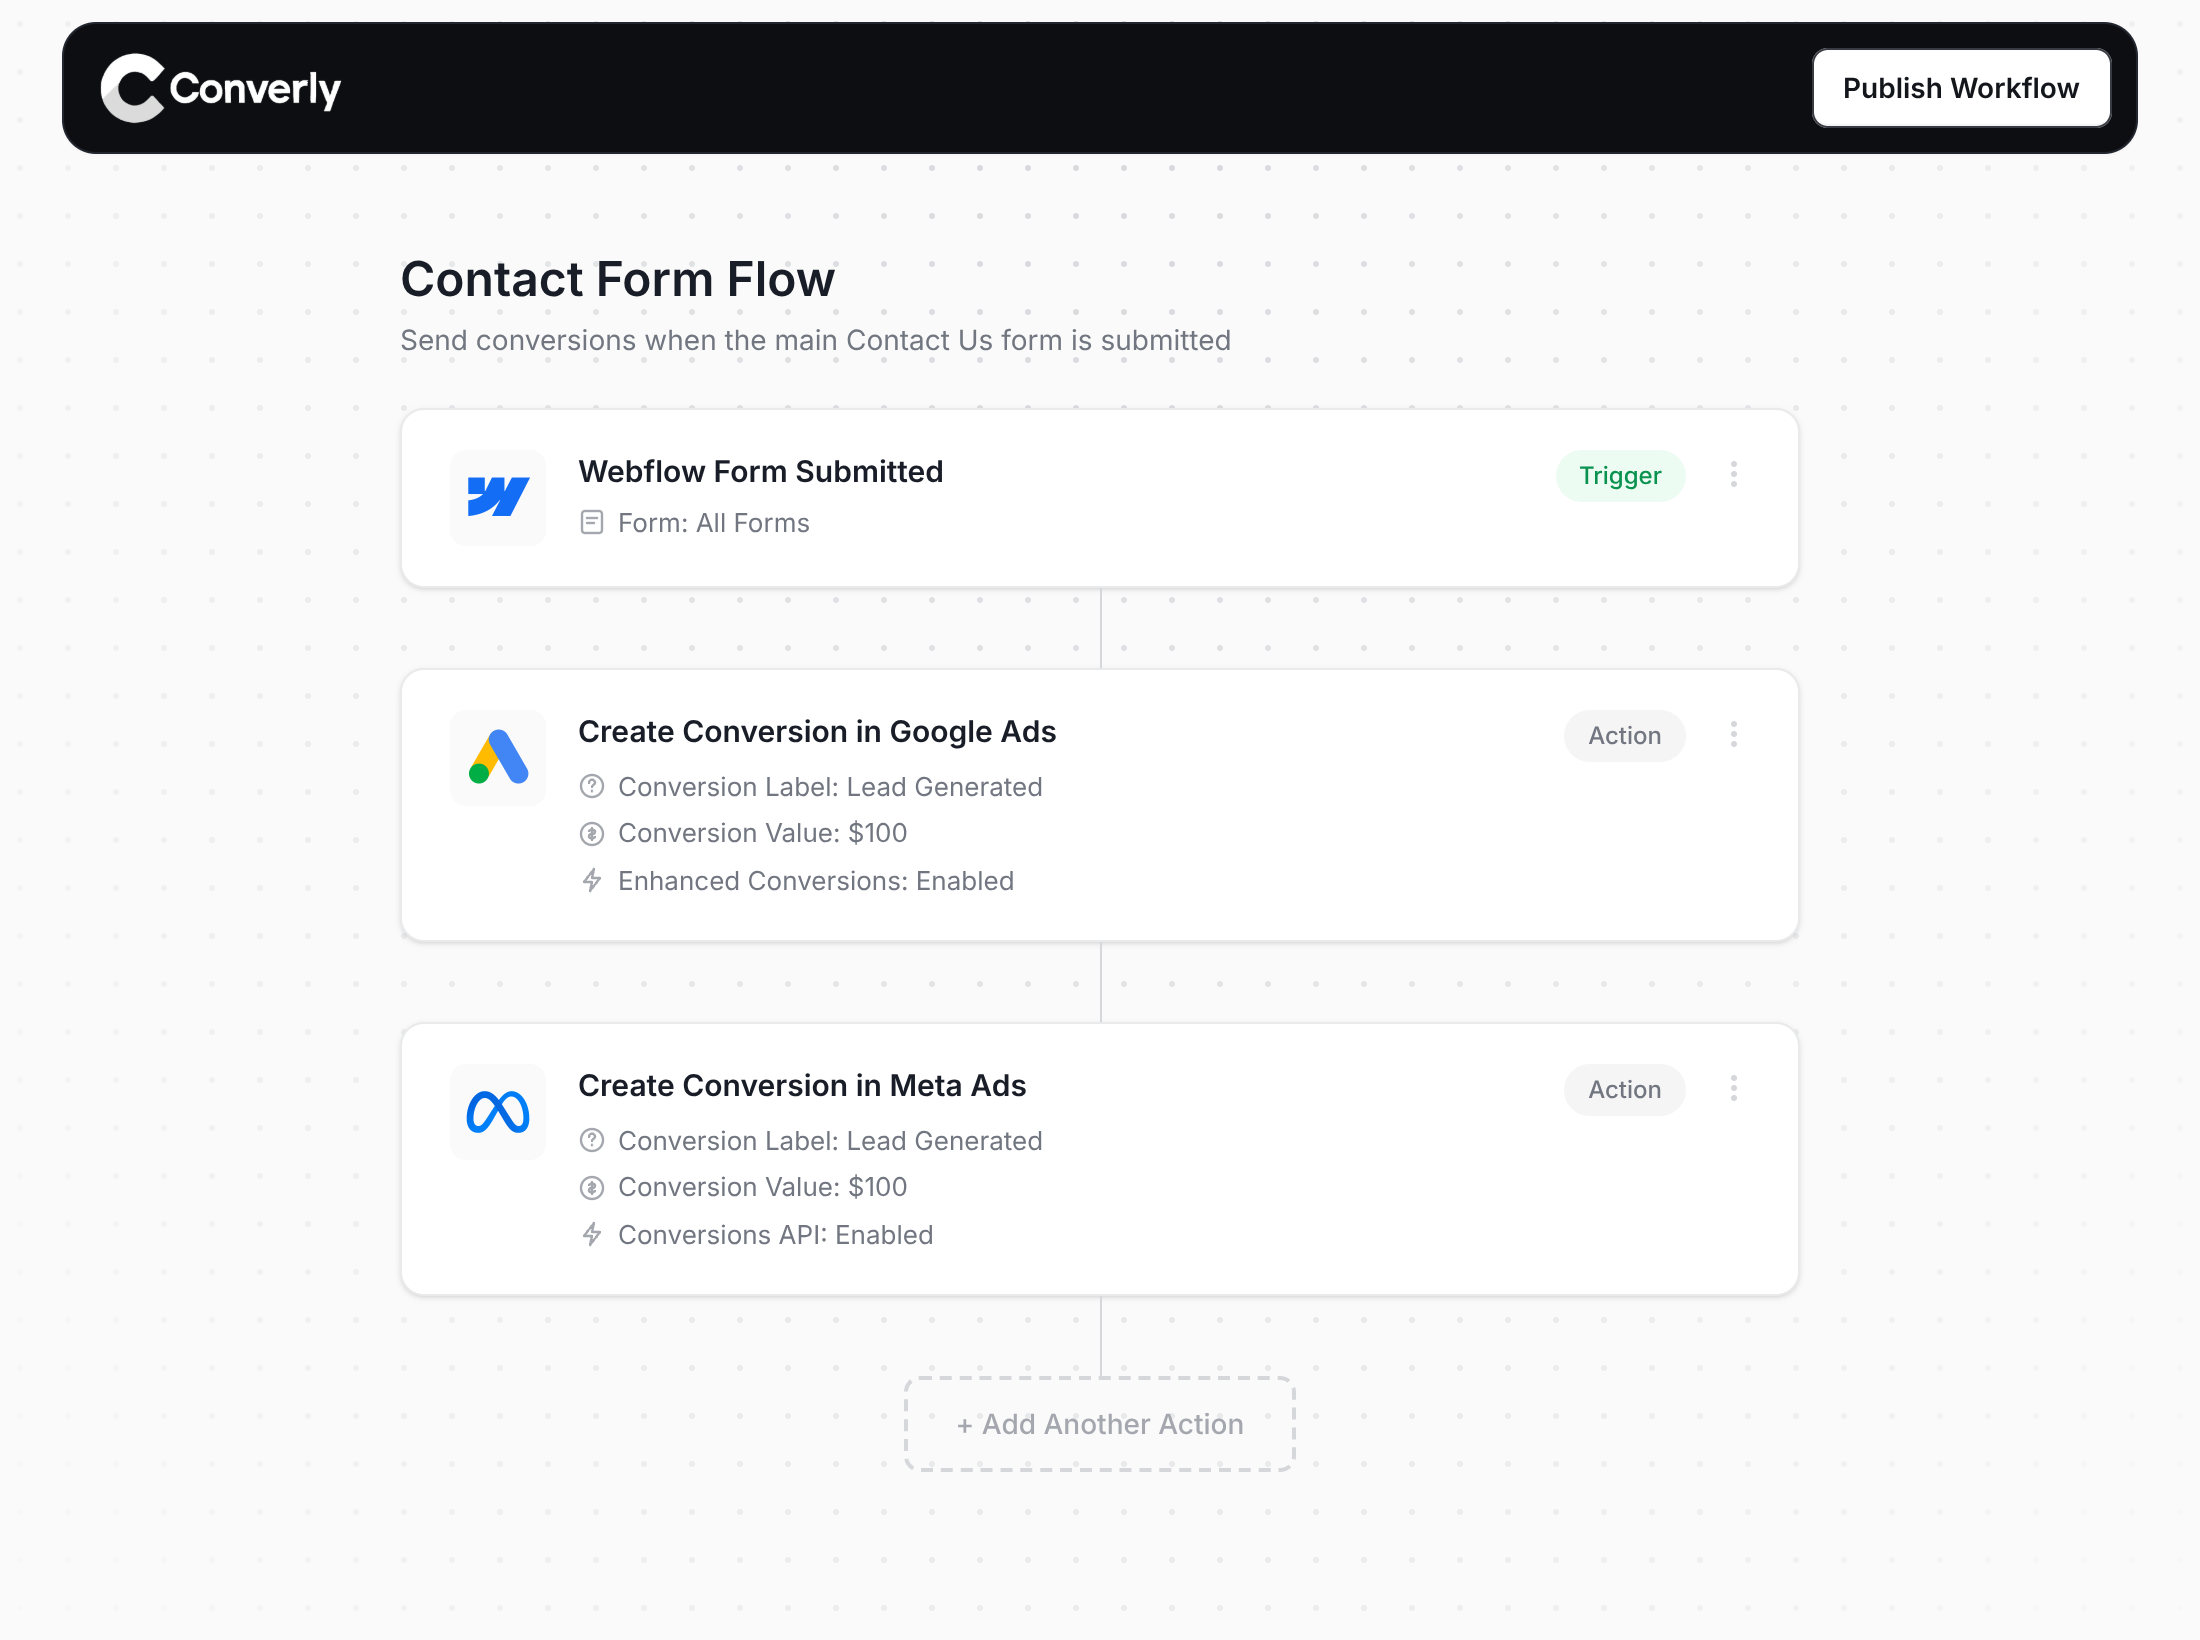
Here's why Converly is the best way to send conversions to Google Ads, Meta Ads, Microsoft Ads, LinkedIn Ads, etc.
Easy to set up
Converly gives you a simple drag-and-drop builder you can use to build a Conversion Flow. Simply select a trigger (like a Webflow form being submitted), then choose the actions you want to happen (like sending a conversion to Google Ads). No custom code, no complex configuration.
Sends Data Server-Side
Converly sends conversions directly from its servers to Google, Meta, etc. This means ad blockers and privacy restrictions can't get in the way because the data isn't being sent through the visitor's browser.
Sends More Data
It captures the lead's name, email and phone plus the Google and Facebook click IDs, IP address and user agent, and sends to the ad platforms with every conversion. That enables Enhanced Conversions in Google Ads, or gives you an Event Match Quality (EMQ) score of 9 or 10 in Meta (EMQ is essentially Meta's score of how good your conversion tracking setup is).
Full Conversion Log & Email Notifications
See every conversion, what was captured, what was sent to each platform and whether it was successfully received or not. Setup email alerts so tracking can't break without you knowing.
Supports Multiple Tools & Destinations
Detects submissions across 80+ form, scheduling, and chat tools and sends them to 20+ destinations, including Google Ads, Meta Ads, ChatGPT Ads, LinkedIn Ads, and more. So if you ever add a new tool or start advertising on a new platform, it's just a few clicks to get it set up.
Provides Free Support
Our team has 20 years of experience in conversion tracking and analytics and is here to help whenever you need it. With Google Tag Manager, you're on your own.
Start Your Free Trial
Start a 14-day free trial and track your conversions the proper way. No code, no complicated configuration.
About the author
Aaron is the founder of Converly. With over 15 years of experience in digital marketing and SaaS, he's passionate about helping businesses track and optimise their ad conversions.