


Track Netlify form submissions as conversions in Google Ads
Learn how to send server-side conversions to Google Ads whenever a visitor completes a Netlify form on your website. No code required!
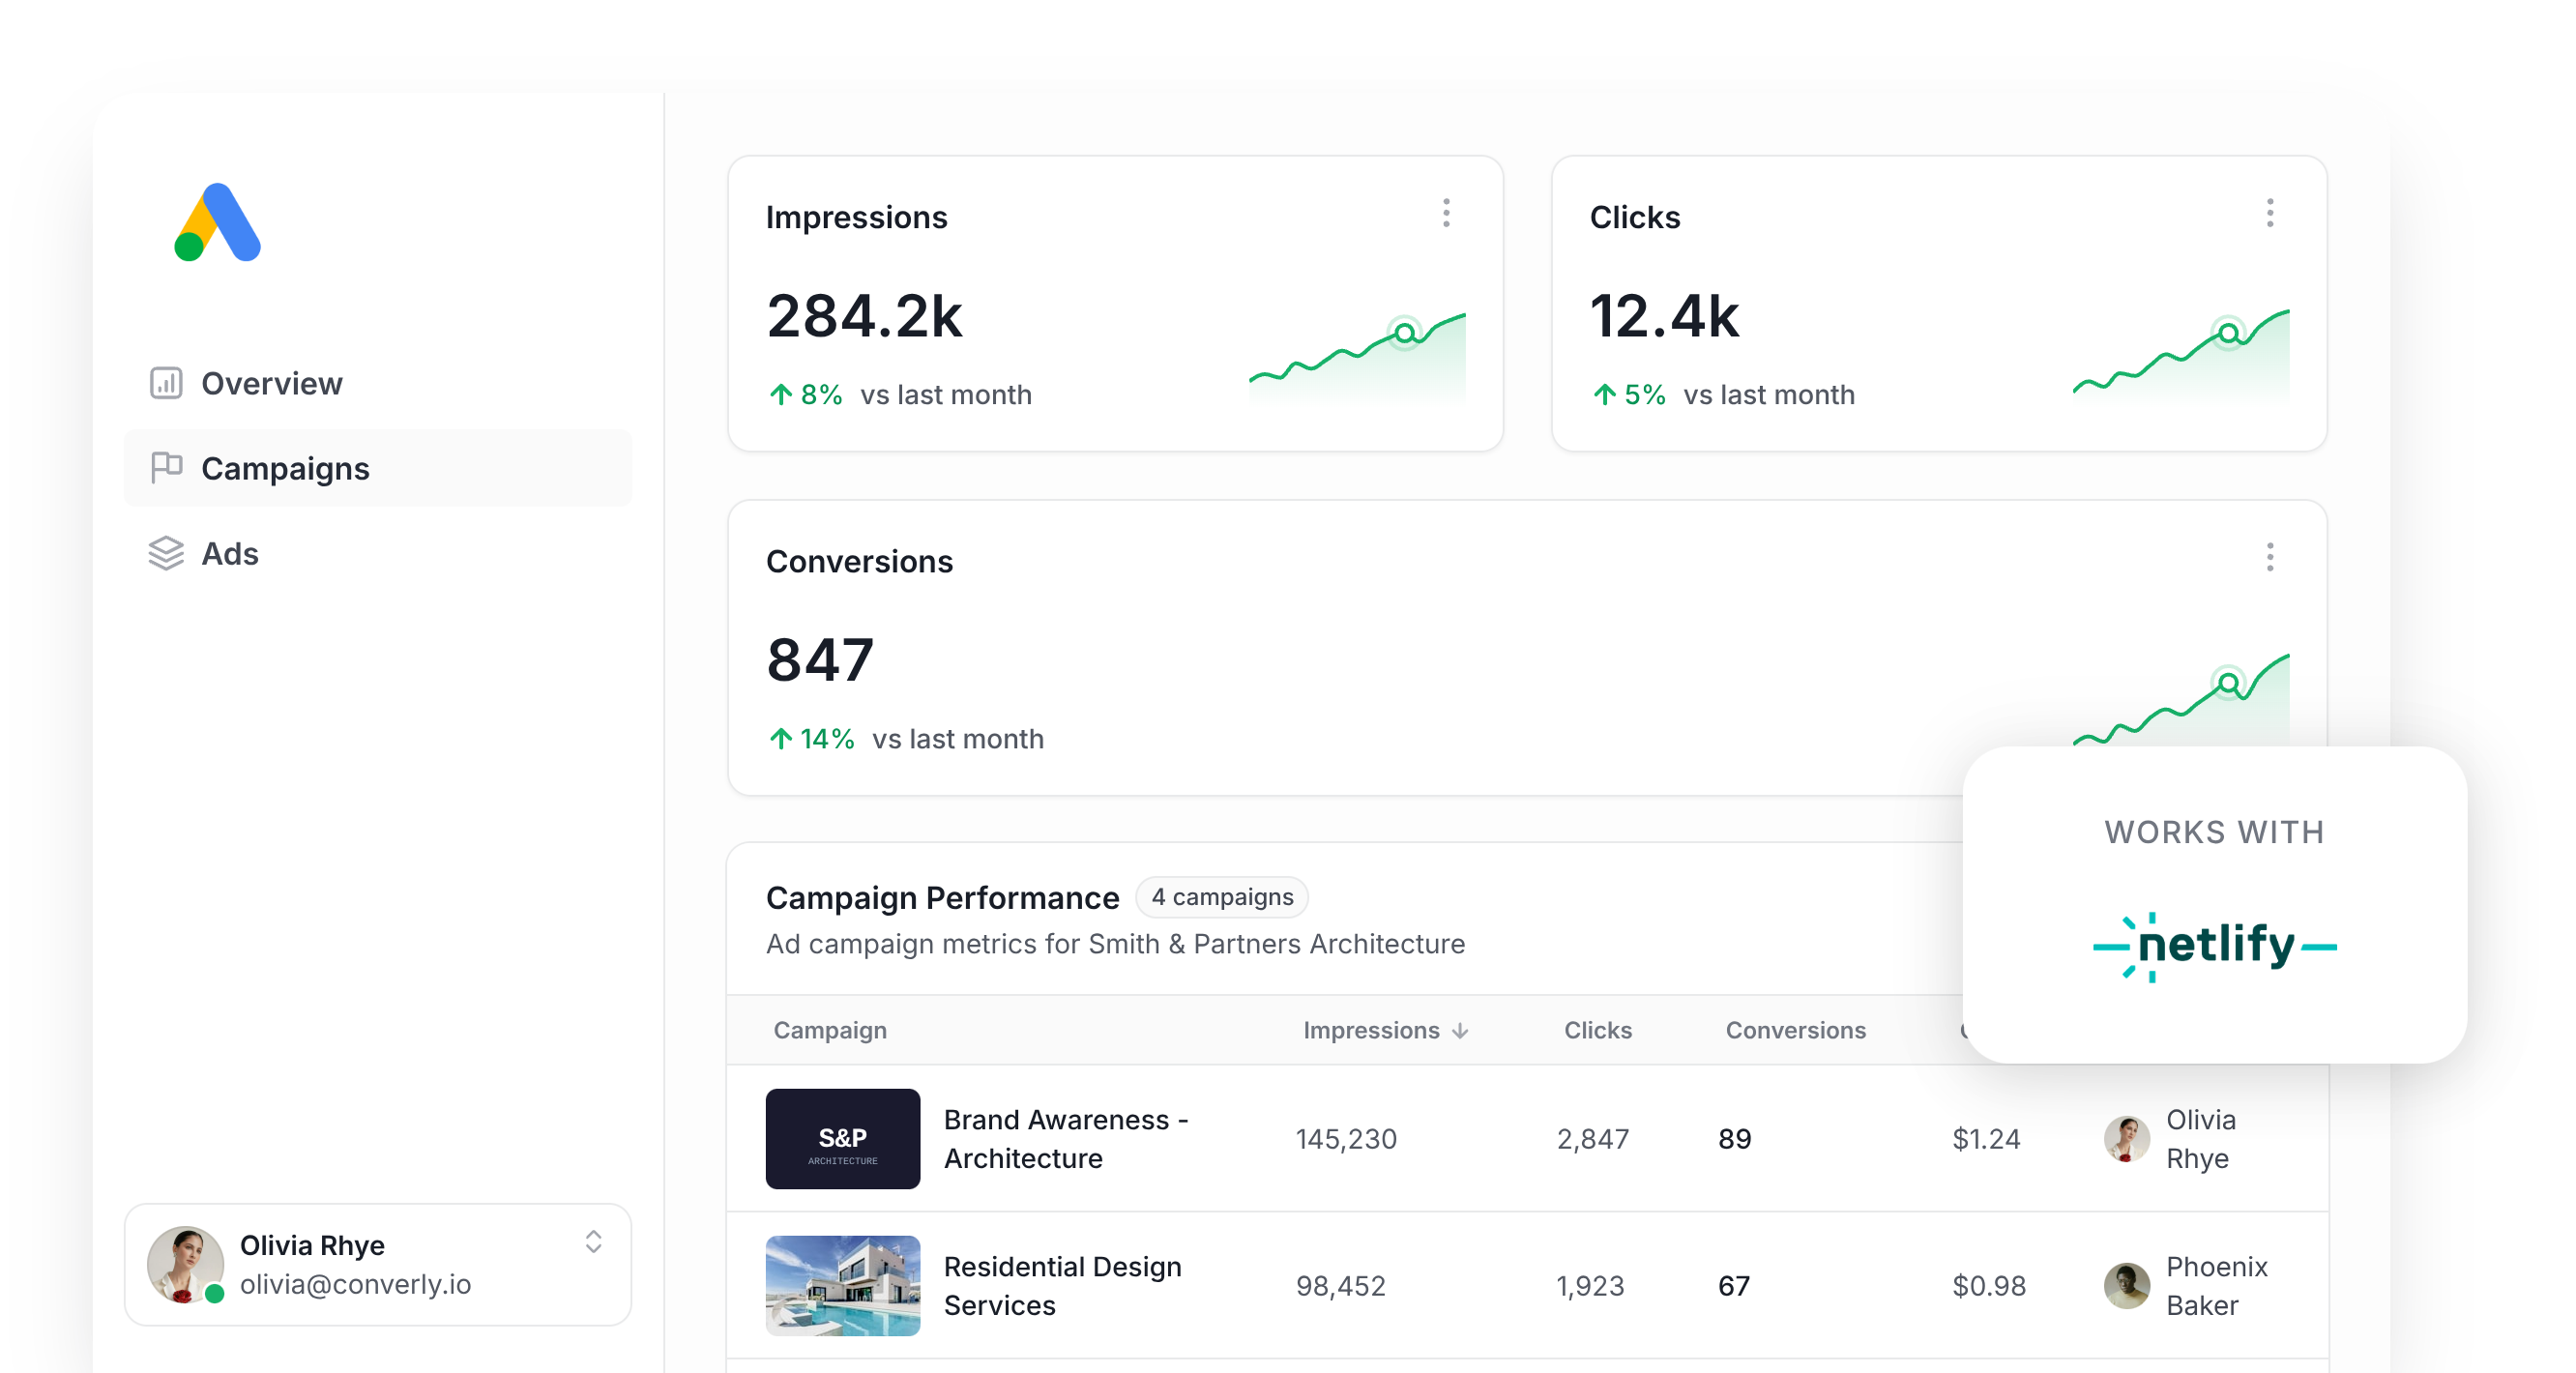
Google Ads is a great way to bring in new leads for your business.
But if you can't tell which campaigns are working (i.e. generating leads) and which ones aren't, then you are likely just burning through budget.
The best way to do that is to set up proper conversion tracking in your Google Ads account, but it's weirdly hard to do.
Tools like Google Tag Manager are quite well known, but they require you to write code to listen for a form submission, push an event into the dataLayer, then wire up Tags, Triggers, and Variables to pass it all through.
Some people skip that entirely and just watch for a thank you page visit or a button click instead, but that approach is notoriously leaky. Between ad blockers, Safari's tracking limits, and leads who click on their phone but convert later on a laptop, you can lose close to 30% of your real conversions without ever knowing it.
Thankfully, there's a much simpler path.
In this article, we'll walk through setting up reliable server-side conversion tracking for Google Ads every time someone submits a form on your Netlify website.
Why server-side tracking matters for Google Ads
Conversion tracking used to be a nice-to-have. Now it's the foundation everything else in your account relies on.
For instance, smart bidding strategies in Google Ads (Maximize Conversions, Target CPA, and similar) use signals like device, location, time of day, and past purchase behavior to estimate how likely a given searcher is to become a lead. They then adjust your bids up or down (and therefore display your ads more or less prominently) based on whether it thinks the searcher is a good fit for your business.
It's a genuinely powerful way to pull in more leads without increasing your budget, but it only works if the conversion data you're feeding it is trustworthy. And unfortunately older tracking methods (like watching for a thank you page visit) aren't reliable.
That's because they rely on the visitor's own browser to report the conversion back to Google, and that has a number of issues:
- Ad blockers - Plenty of visitors have extensions installed that block tracking scripts by default, so the Google Tag simply never runs when that visitor lands on your site (and therefore the conversion goes unrecorded).
- Browser privacy limits - Safari and other privacy-first browsers cap how long the Google Tag can follow a visitor, sometimes to just one day, so if someone clicks your ad and converts a few days later then the conversion won't be able to be matched back to the original ad click.
- Multiple devices - Someone might tap your ad on their phone while waiting in line, then fill out your Netlify form later that day from their laptop at the office. Browser-based tracking has no way to connect those two sessions since they happen on separate devices, so your campaign never gets credit for the lead.
Server-side tracking solves these problems because it doesn't rely on the visitor's browser to send the conversion to Google. Instead, the lead's details get sent directly to Google's servers through an API call, so ad blockers and privacy settings have nothing to interfere with.
It might sound like a technical distinction, but it has a real impact on your numbers. In fact, Google reports that switching to server-side tracking typically produces a 23% lift in recorded conversions and a 10% drop in cost per conversion, since the bidding algorithm finally gets the data it needs to figure out what your ideal customer looks like and can show your ads to more people who look like them.
3 simple steps to send server-side conversions to Google Ads from Netlify
Getting server-side tracking running between your Netlify forms and Google Ads only takes a few minutes with Converly. Here's the process:
Step 1: Build your Conversion Flow in Converly
Converly makes it simple to send a server-side conversion to Google Ads when someone submits a Netlify form on your site.
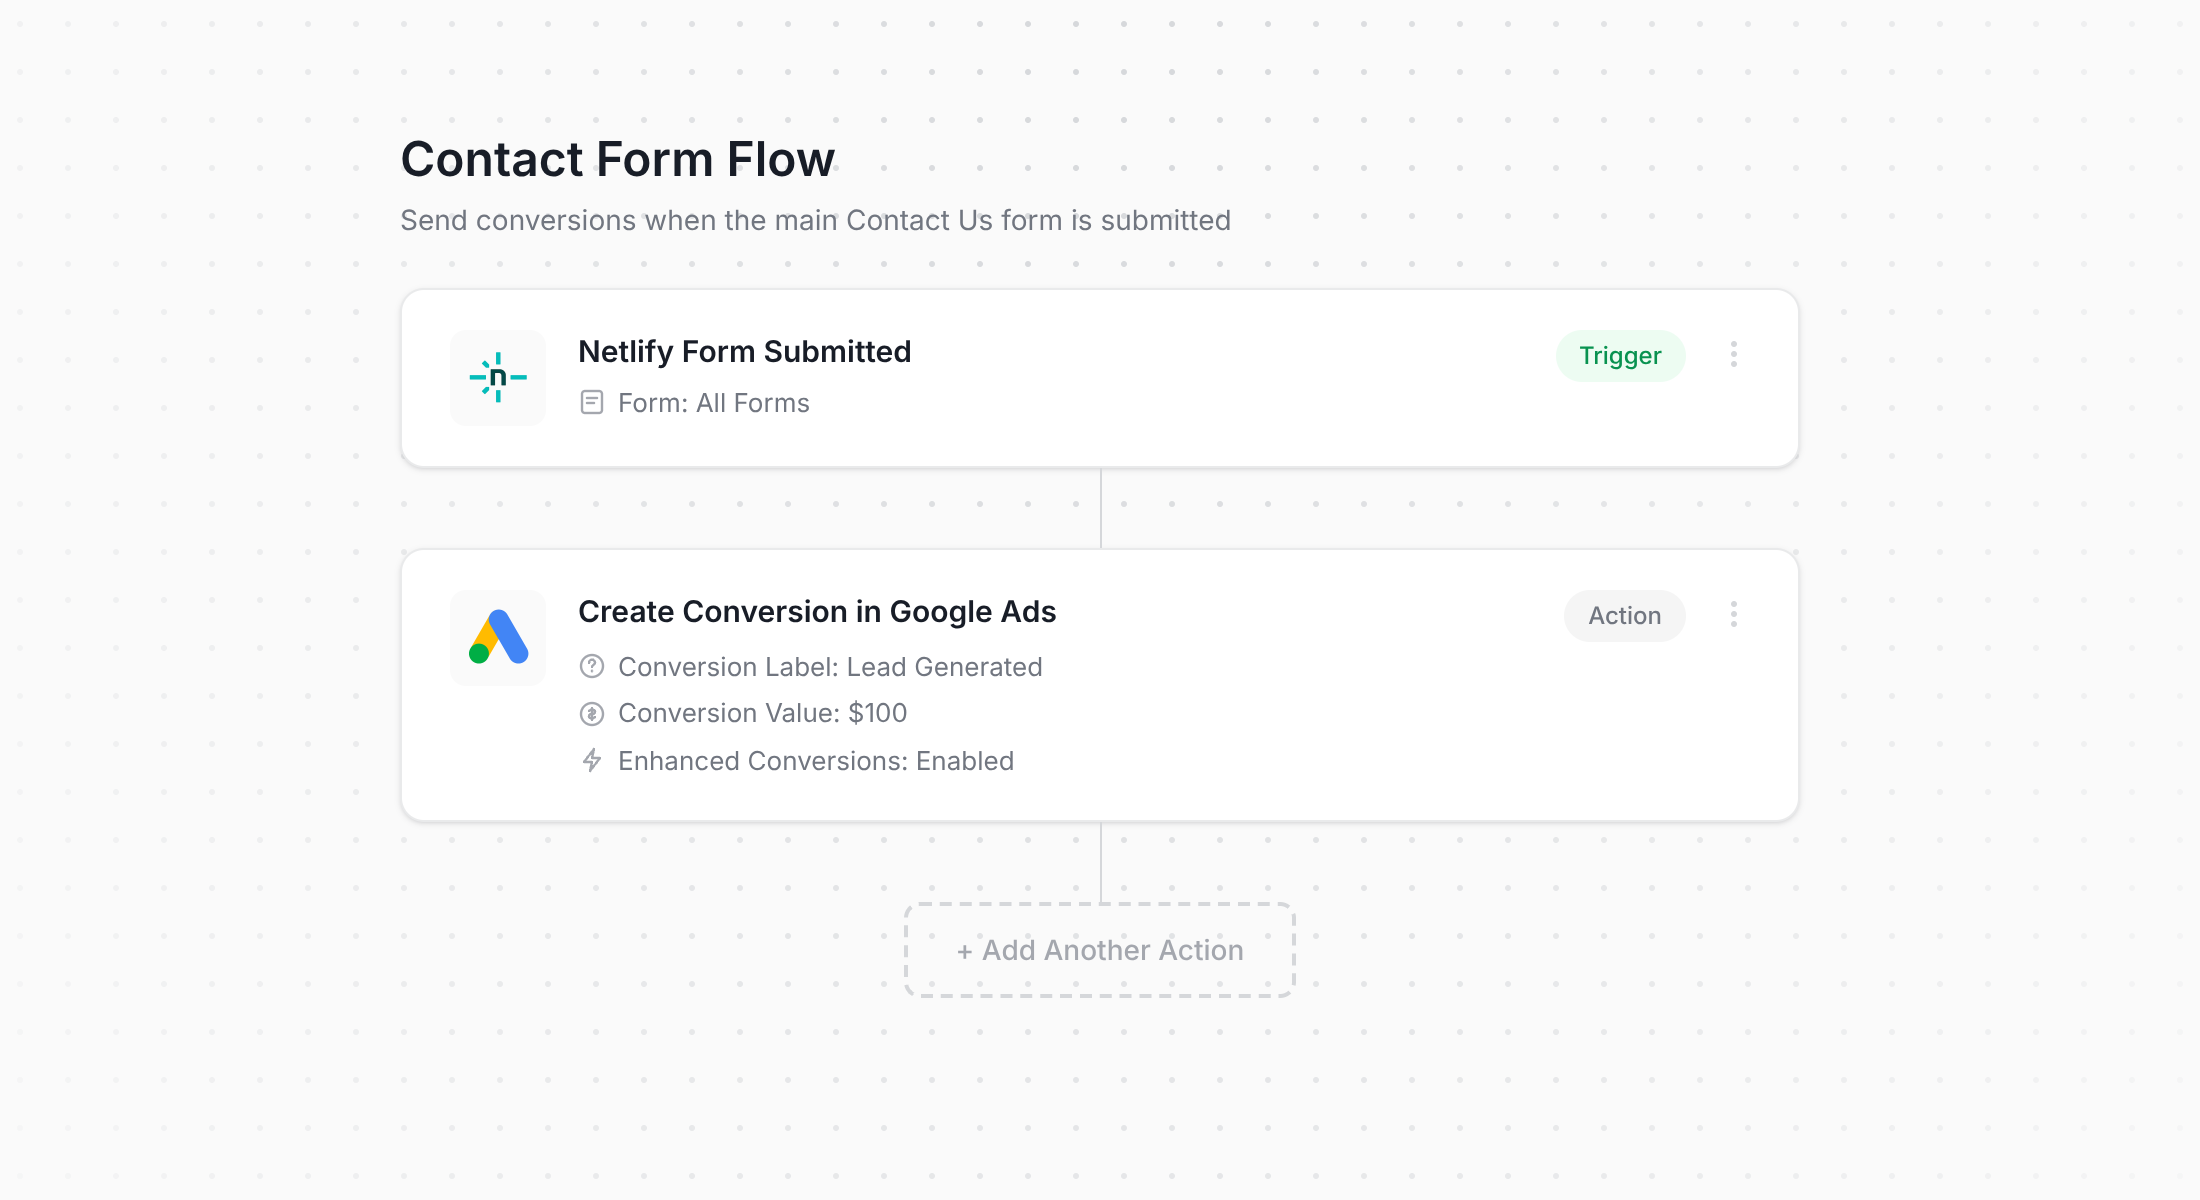
The screenshot above shows Converly's flow builder. Anyone who has used Zapier before, or built automations in another no-code tool, will be pretty familiar with how it works.
You simply pick a trigger (in this case, a Netlify form being submitted), then choose what should happen in response (sending a conversion through to Google Ads).
That's genuinely the whole process. A handful of clicks and you have server-side conversion tracking up and running, with no developers or custom code needed.
Step 2: Add the Converly code to your website
After you publish your Conversion Flow, Converly gives you a small snippet of code to drop into your site.
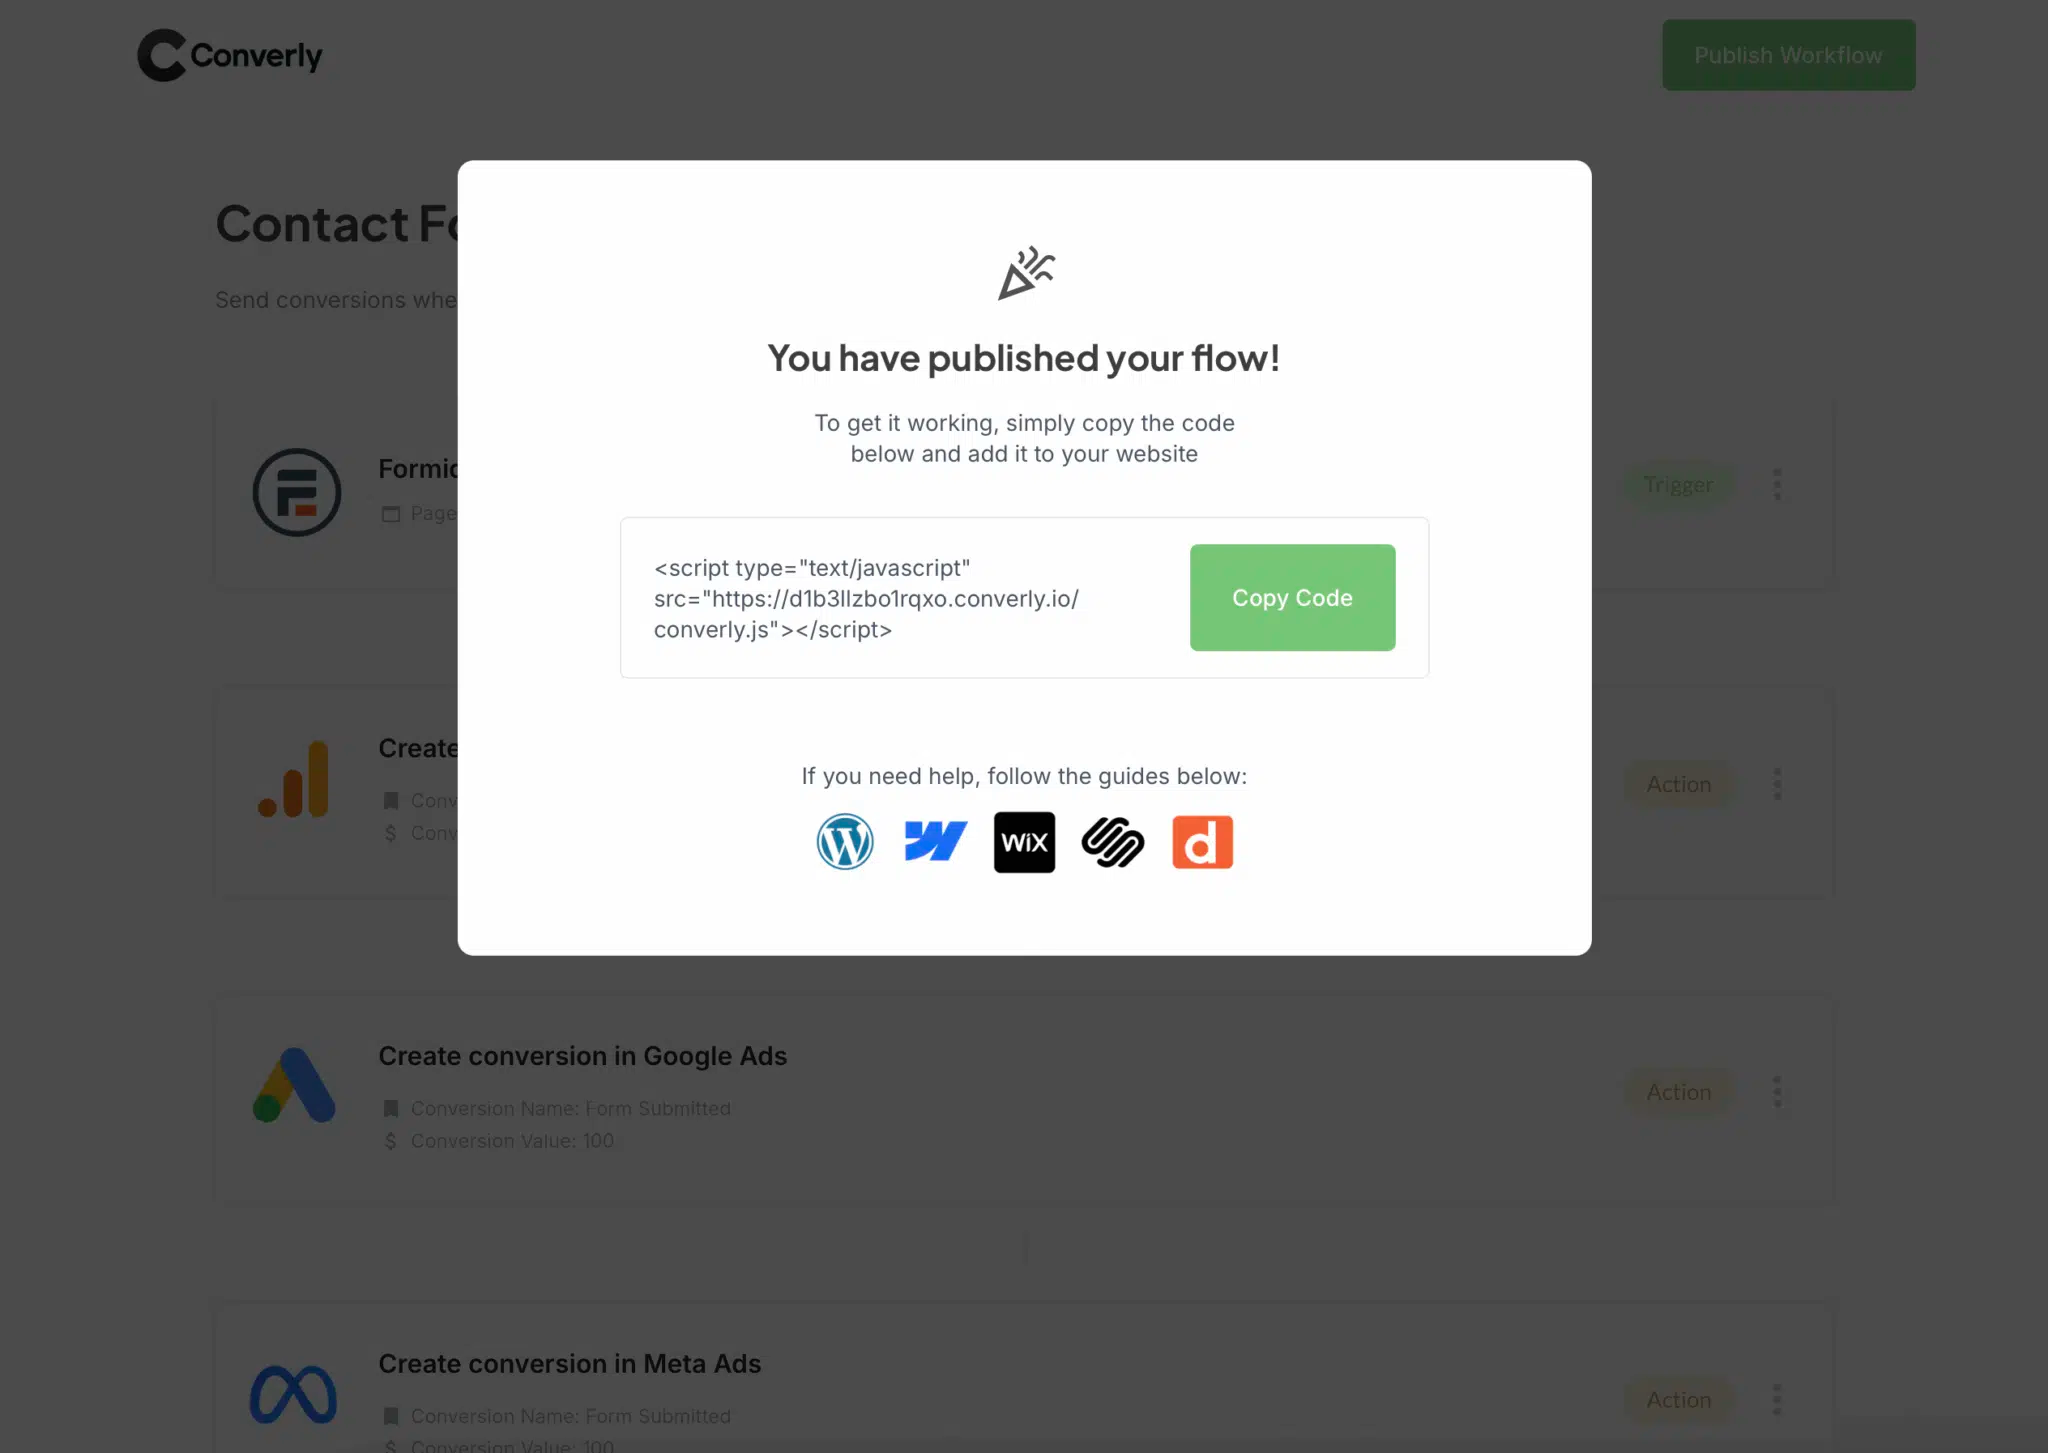
Since you're hosting on Netlify, you can add it through your site's HTML (in your layout template or a custom code injection, depending on how your site is built) so it loads on every page. If you'd rather manage it through Google Tag Manager, that works just as well.
Step 3: Test it works
With everything set up, go to your live site and submit one of your Netlify forms as a test.
Then jump back into Converly, open the Conversion Flow you built, click the 3-dot menu in the top right corner, and choose View Logs.
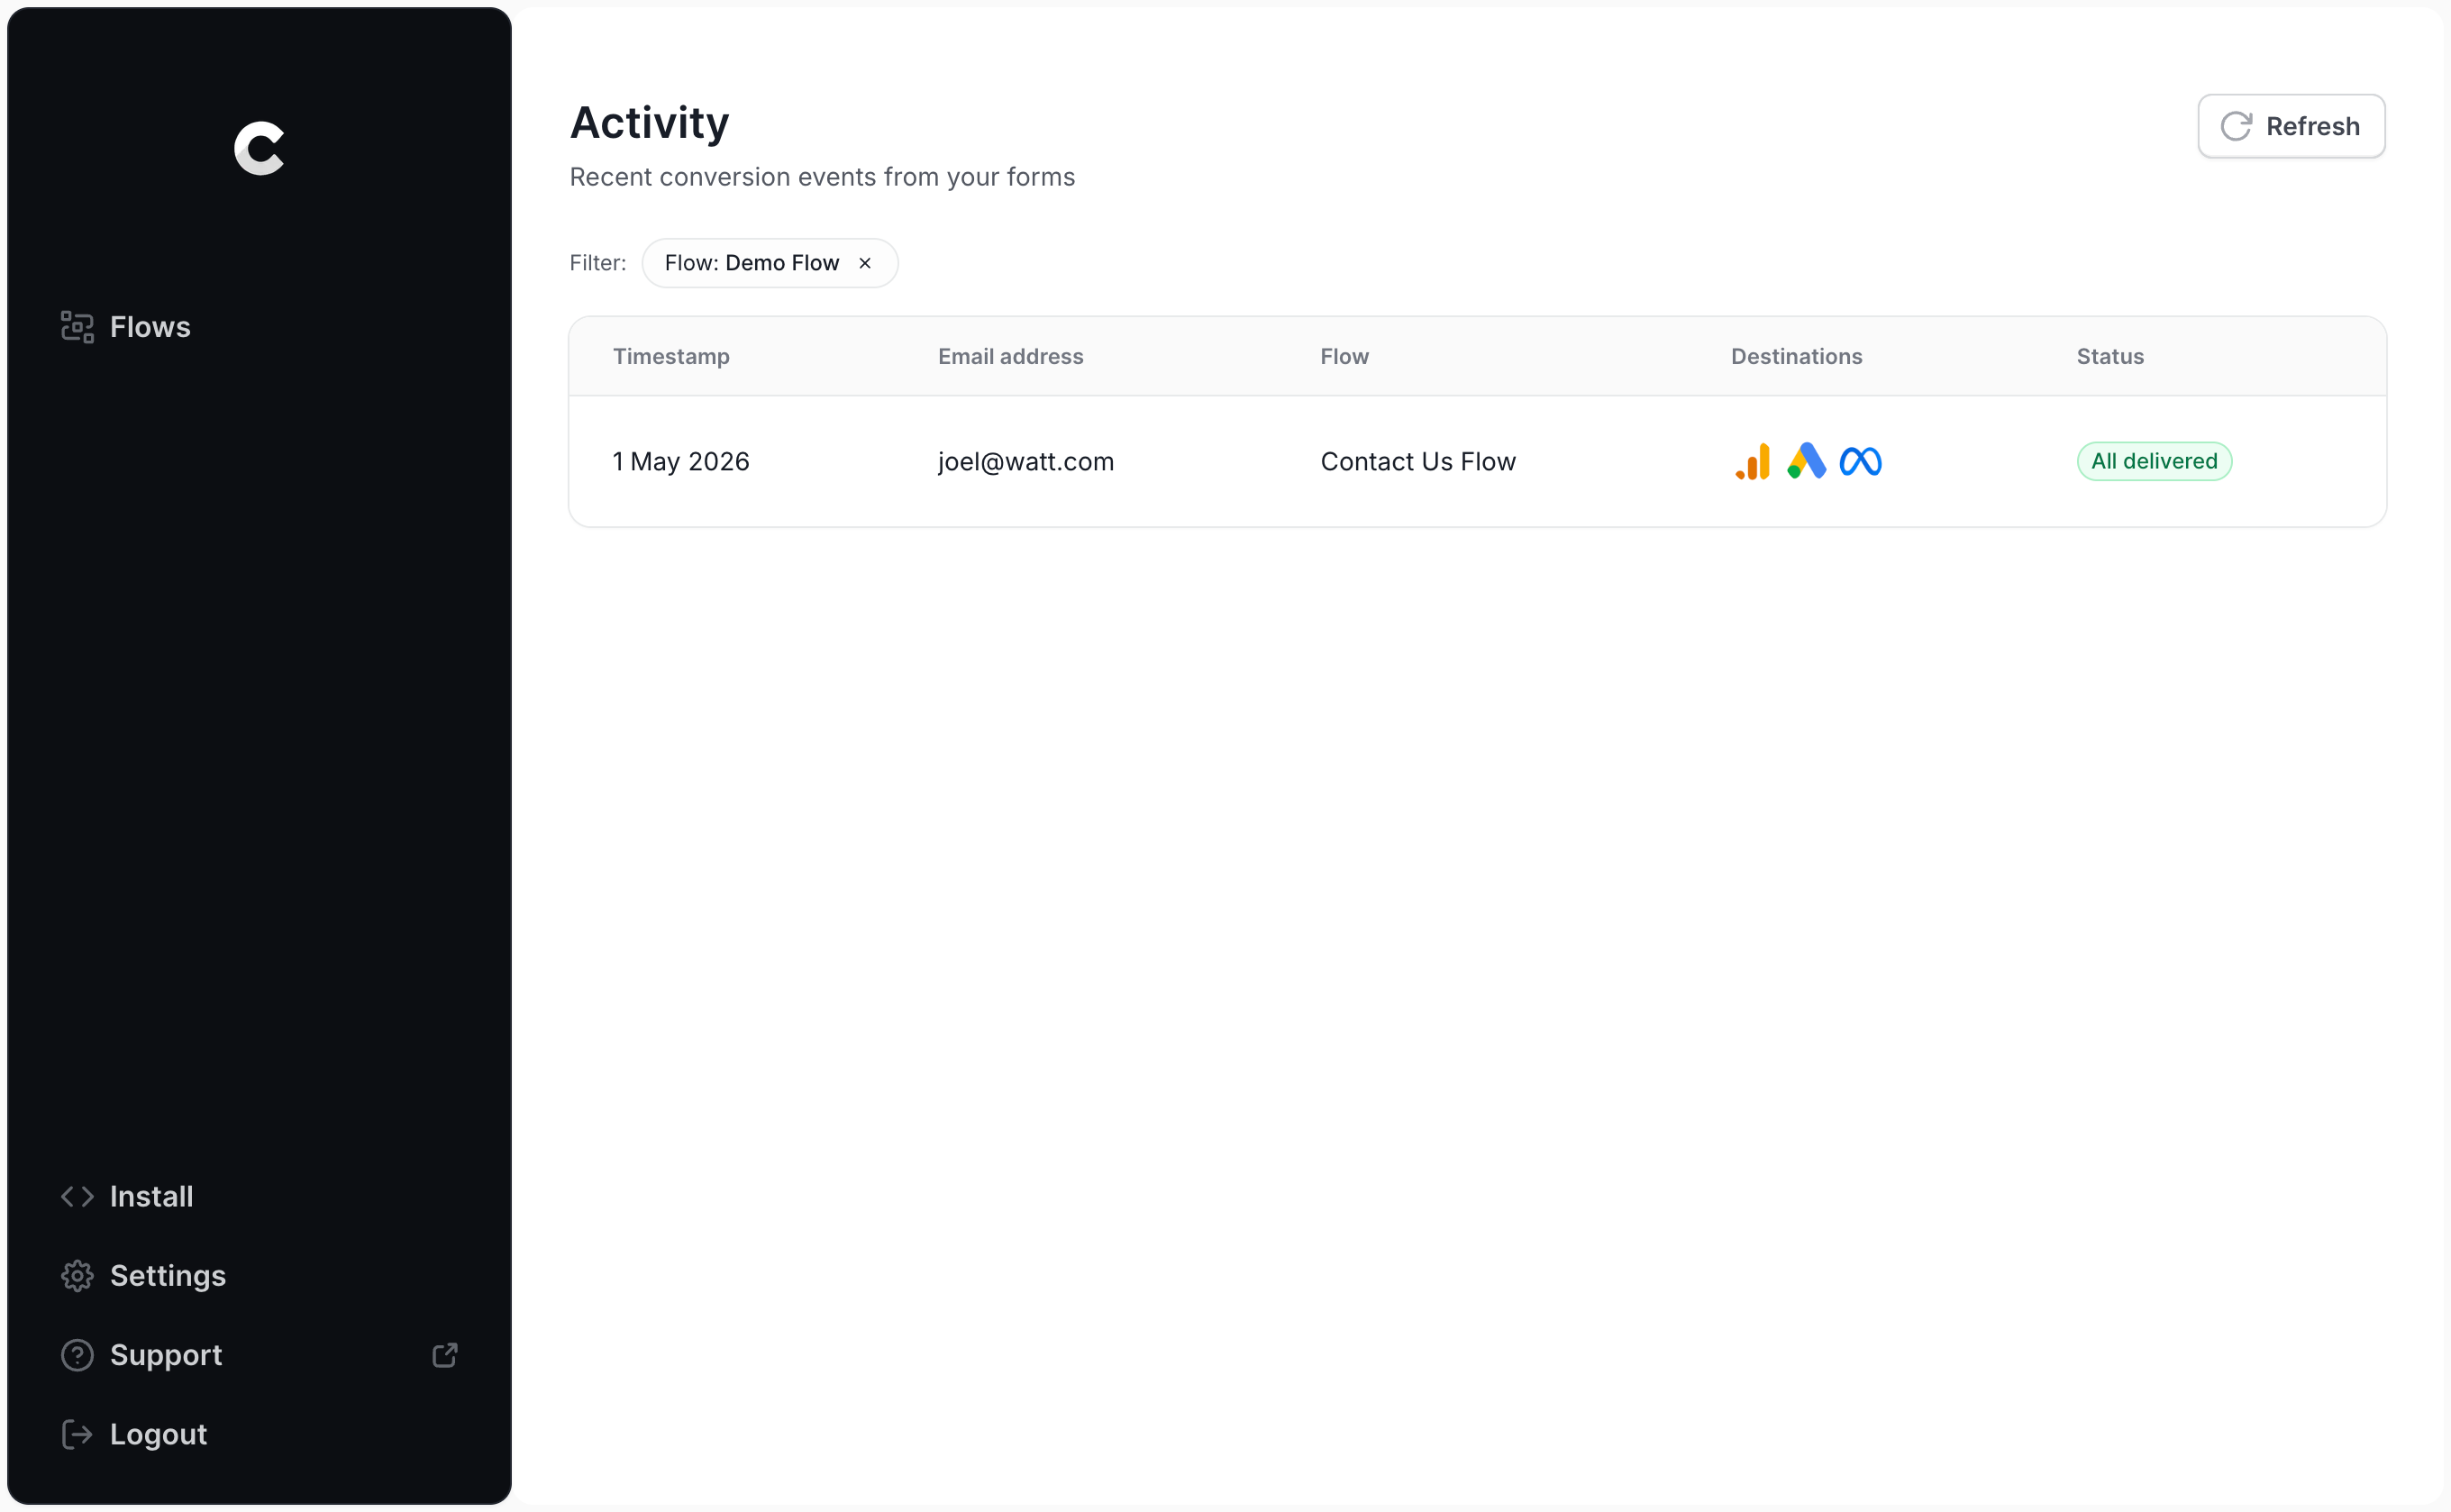
Find your test submission in the logs and open it up. You'll be able to see exactly what data came through and where Converly sent it.
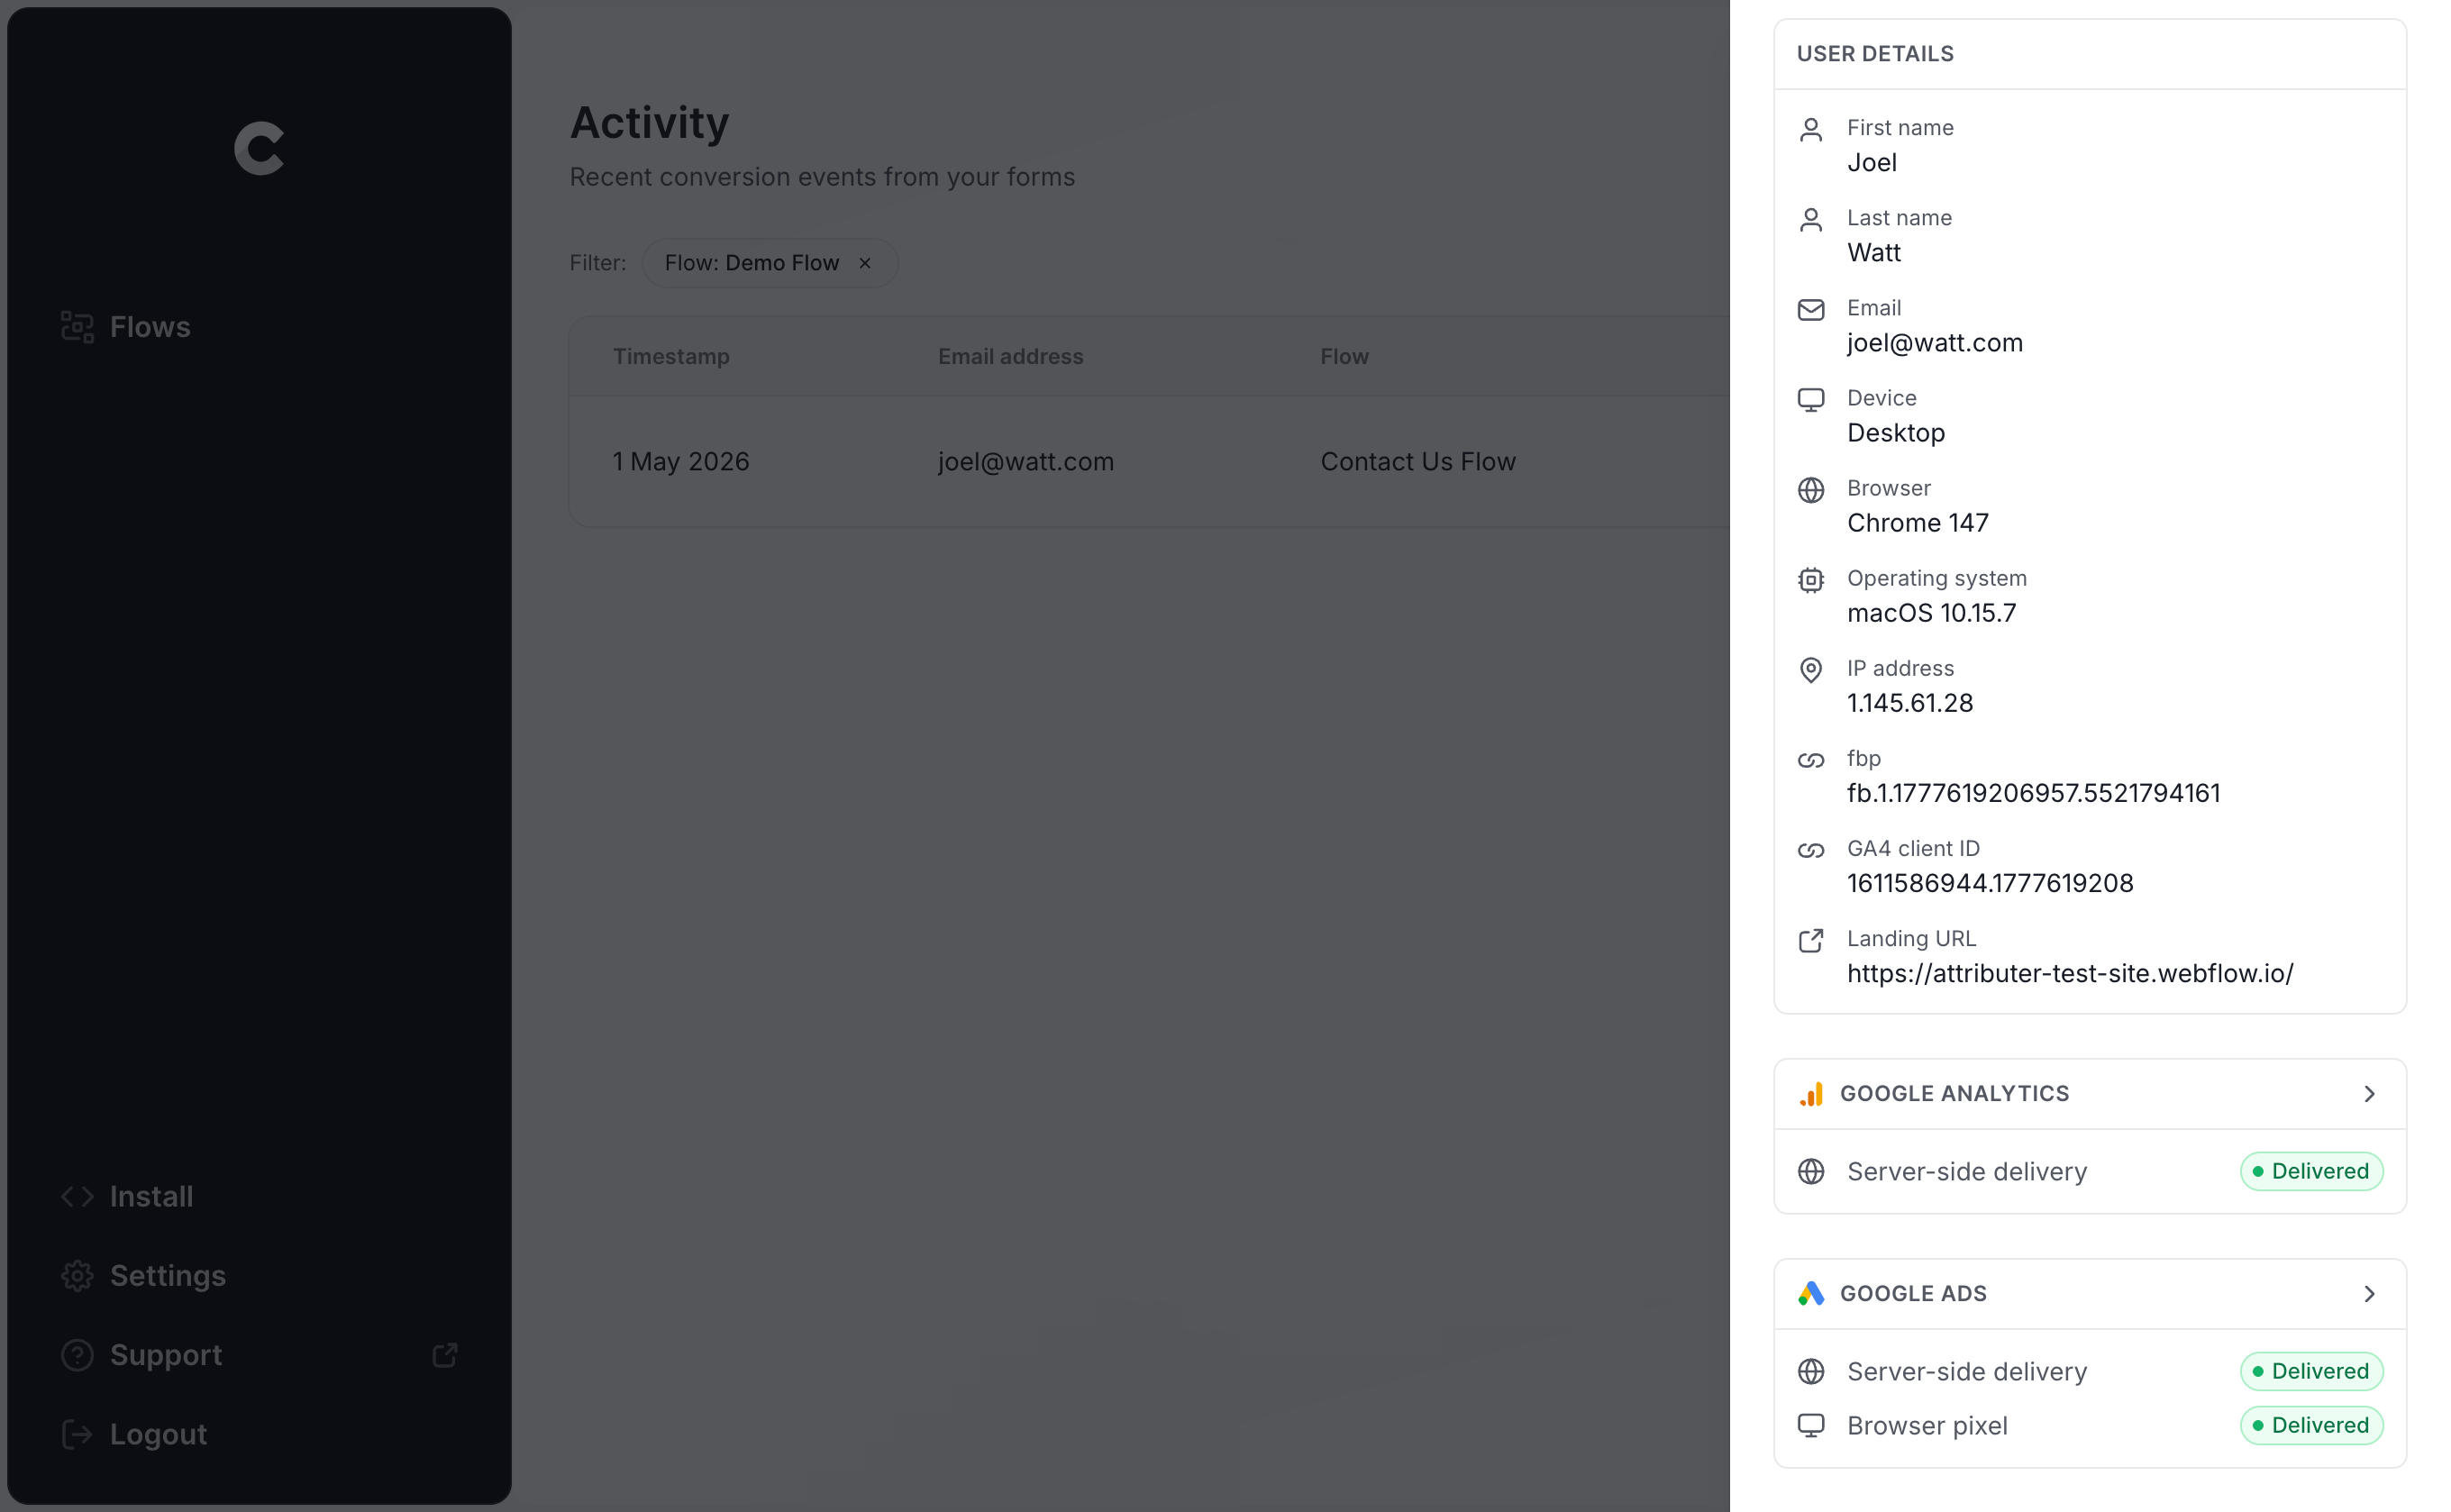
Dig one level deeper and you can even see the raw data that was passed along to Google Ads, plus how their server responded to it.
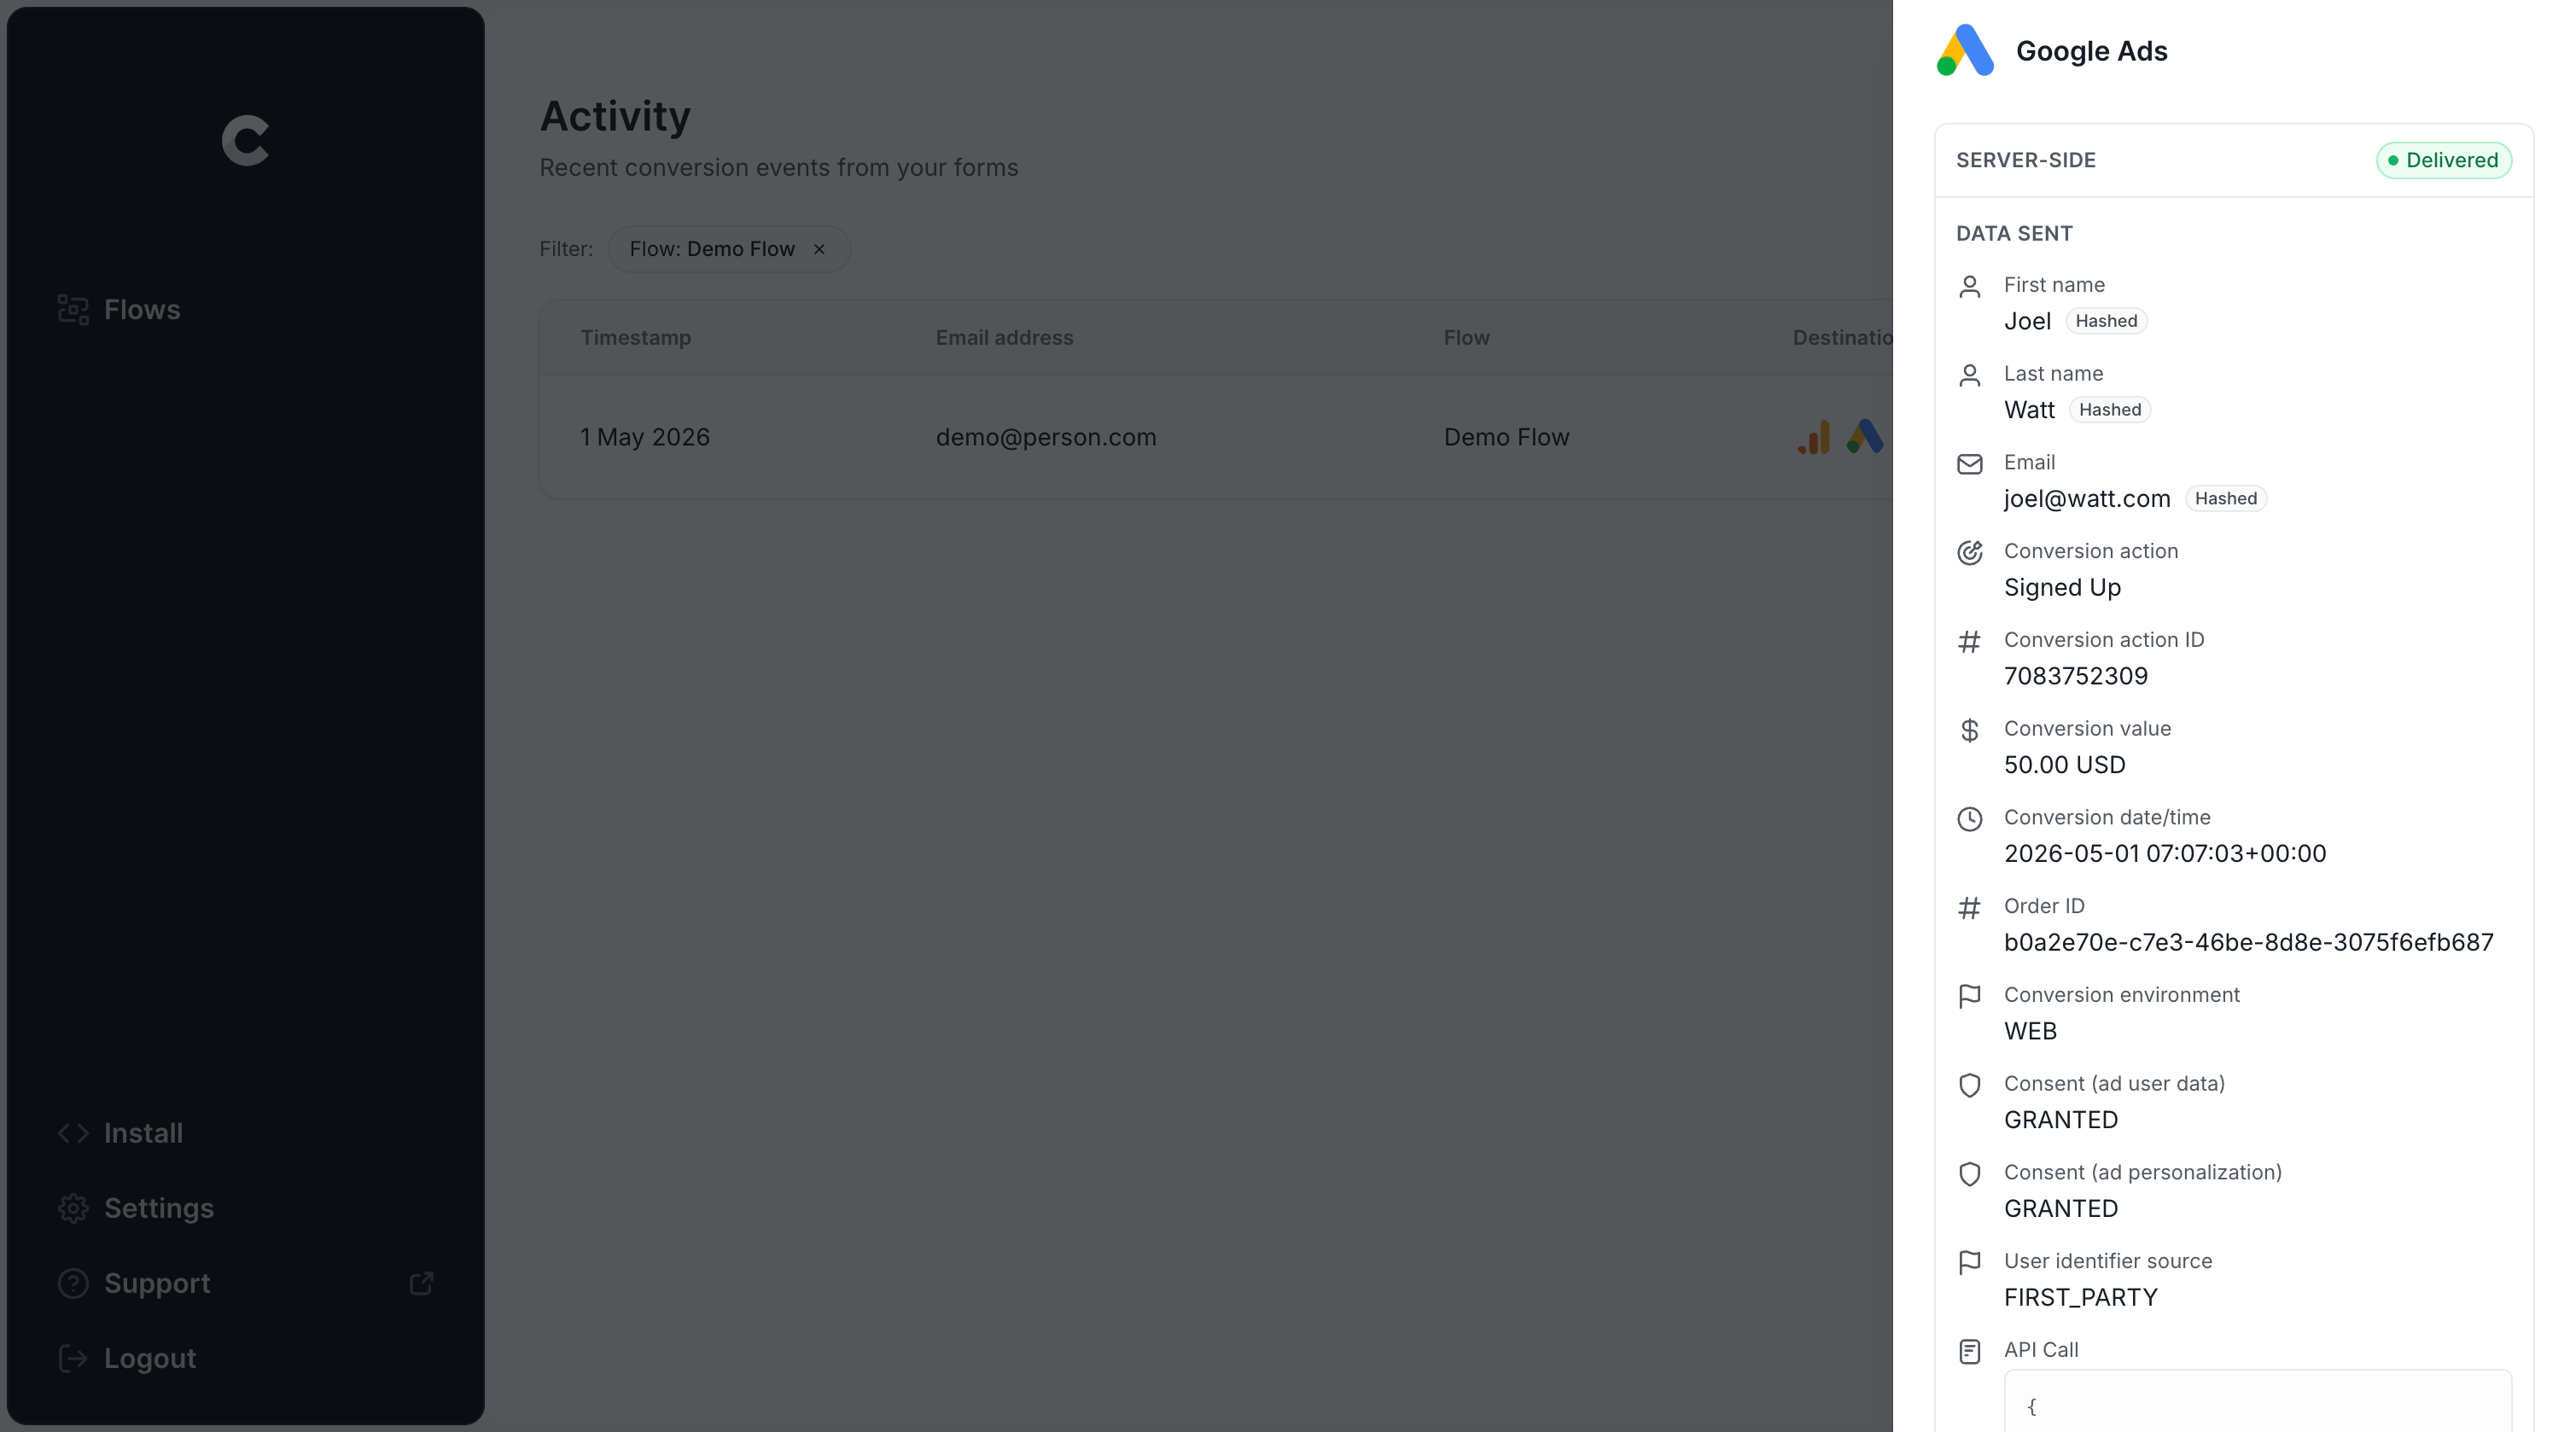
Once your test submission shows up in the log with a successful send to Google Ads, you're done. Most people wrap up the entire setup in under 5 minutes.
Why Converly is the best way to send conversions to Google Ads from Netlify
There are other methods for sending conversions to Google Ads when someone submits a form on your Netlify site, so what makes Converly worth choosing?
1. Easy to set up
Most people use Google Tag Manager to set up this kind of tracking, but that means writing custom JavaScript to detect the Netlify form submission, pushing the visitor's name and email into the dataLayer, pulling those values out with dataLayer Variables, hashing them with SHA-256 (Google requires this), and then piecing together the Tags and Triggers that tie it all together.
It's possible to pull off, but unless you already know your way around Google Tag Manager, you'll burn a lot of hours getting there.
With Converly, you just pick your trigger (a Netlify form submission) and your action (a Google Ads conversion), and that's it. No custom code, no complex configuration.
And if you already use an AI assistant like Claude or ChatGPT, you can connect it to Converly's MCP and ask it to "set up conversion tracking between Google Ads and Netlify," and it will do everything for you (build a flow, add the code to your site, test it works, etc).
2. Not affected by ad blockers and privacy restrictions
With browser-based tracking (like using Google Tag Manager to track thank you page visits or button clicks), a real chunk of your conversions never make it to Google. That's because ad blockers and privacy-first browsers prevent the Google Tag from loading in the first place, which means nothing on that visitor does ever gets tracked (includign completing a form).
Research covering more than 7 million conversions found that browser-based tracking only got about 70% of conversions through to Google Ads, meaning roughly 30% would simply vanish if you went that route.
Converly doesn't have this problem. It sends conversions straight to Google's servers, so there's no browser-level script an ad blocker or privacy setting can block.
3. Works across devices
It's common for someone to first discover your business on their phone, then not actually fill out a form until they're back at a desk on a different device entirely.
Tools like Google Tag Manager can't bridge that gap, since the two visits happen in separate browsers on separate devices (which means Google has no way to tie the eventual conversion back to the original ad click).
Converly solves this by sending the lead's details (name, email, and more) directly to Google's servers, giving Google the data it needs to match the conversion to a real person and the original ad they clicked (even when the two events happen on completely different devices).
4. Sends more data
Beyond the lead's name, email, and phone number, Converly also captures technical signals like the Google Click ID (GCLID), IP address, and user agent, and passes them to Google Ads with every conversion.
That matters because many people share the same name, and most people juggle multiple email addresses (which means the one they type into your form might not be the one they are logged in to Google with), so relying on those alone to match a conversion to a real person doesn't always work.
But by capturing and sending additional data, like the Google Click ID and the visitor's IP address, you give Google much more data to connect the dots between the original ad click and the eventual conversion.
The result is more accurate reporting and more reliable data sitting inside your Google Ads account.
5. Supports multiple tools and platforms
Converly connects with more than 100 form builders, CRMs, scheduling tools, and other website platforms, and it can also send conversion events to Google Analytics, Google Ads, Meta Ads, ChatGPT Ads, LinkedIn Ads, Microsoft Ads, and a handful of other destinations.
So if you bring on a new tool later (say a live chat widget for inbound leads), or start running ads on a platform you haven't used before, you don't need to rebuild your tracking from the ground up. Just connect it inside Converly and you're set.
6. Gives you a full conversion log and email alerts
If yuo build your tracking in Google Tag Manager, there's no easy way to check if it's still working once it's live. It might pass every test on day one, but a change to your Netlify form, a tweak inside GTM, or an edit somewhere in Google Ads can easily break it, and you might not notice until your conversion count drops to 0 (while Google keeps burning through your budget trying to find more conversions).
Converly closes that blind spot. Every conversion gets logged, showing what data came in, what got sent to Google Ads, and how Google Ads responded. You can also switch on email alerts, either for every conversion or just for failures, so you find out about issues as soon as they happen.
3 things you can do when you properly send conversions to Google Ads from Netlify
Once accurate conversion data starts flowing into Google Ads, you unlock a lot more in the way of reporting and optimization. Here are 3 things that become possible:
1. Report on conversions by campaign, ad group, keyword, etc.
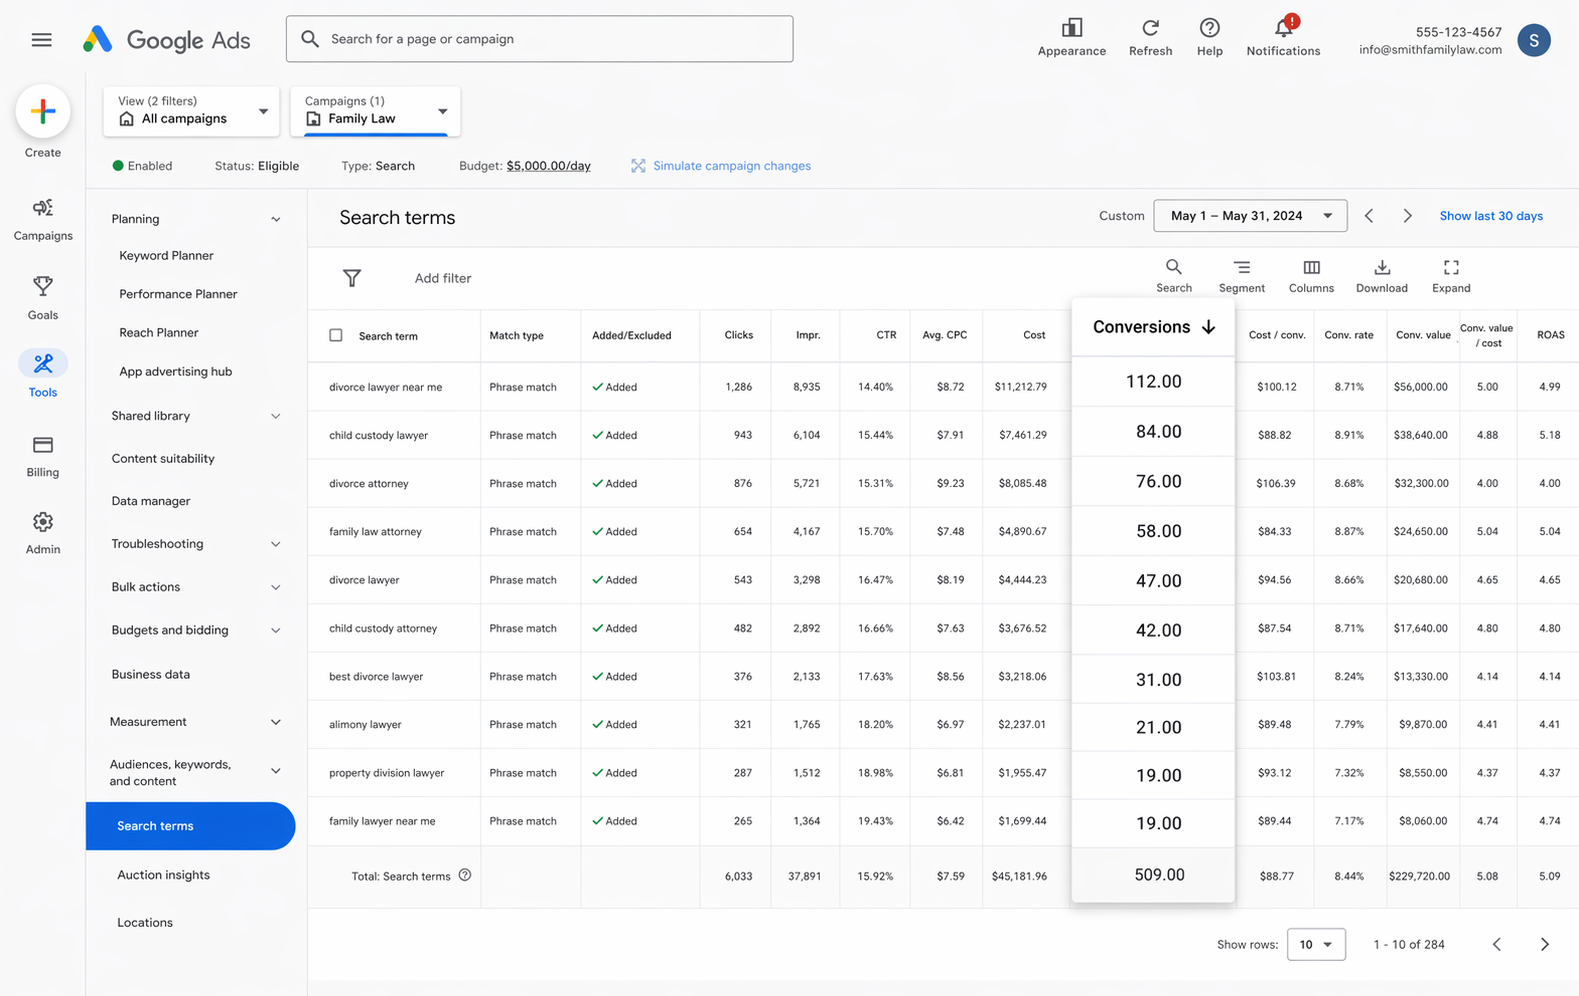
With real conversions being tracked, your Google Ads account stops being limited to impressions and clicks. You get conversion counts, conversion rate, cost per conversion, return on ad spend, and more, and you can slice any of it by campaign, ad group, keyword, ad, or country to see exactly where your conversions are coming from.
That kind of visibility makes it far easier to spot what's working, what's underperforming, and where the biggest opportunities are to grow.
2. Use Google's Smart Bidding technology
Manual bidding is a fairly basic way to run a Google Ads account. You're essentially telling Google 'bid up to $3 per click' regardless of who's actually searching or how likely they are to convert.
Smart Bidding is a much better approach. You give Google a target, like $45 per lead, and it takes over the bidding for you. It weighs things like the searcher's device, location, age, interests, and past behavior, then bids higher for people who look likely to convert and pulls back on the ones who don't.
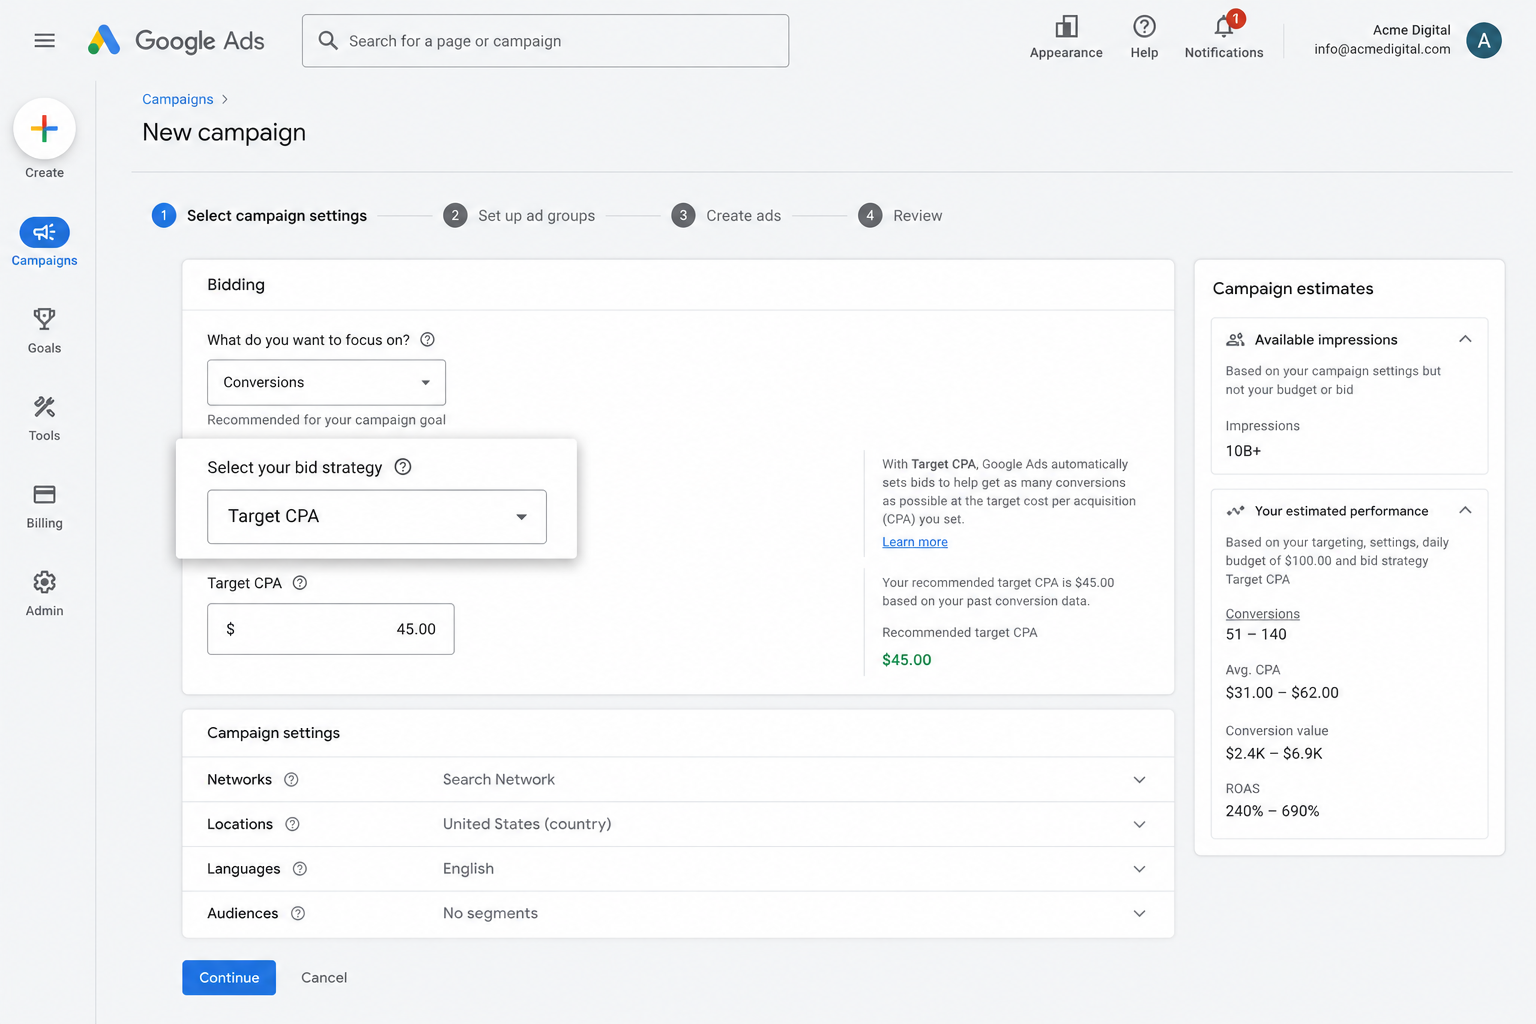
It's a genuinely effective way to bring in more leads at a lower cost, but it only works if the conversion data driving it is accurate. Without accurate data on which clicks actually turned into leads, Google can't learn what a good searcher looks like for your business, and you'll end up spending budget on people who were never going to convert.
Getting accurate, server-side tracking in place through Converly puts you in a position to actually benefit from Google's smart bidding capabilities, and ultimately bring in more leads at a lower cost per lead.
3. Retarget people who visited your site but didn't convert
Having reliable conversion data also allows you to build remarketing lists of visitors who made it to your site but never completed a Netlify form.
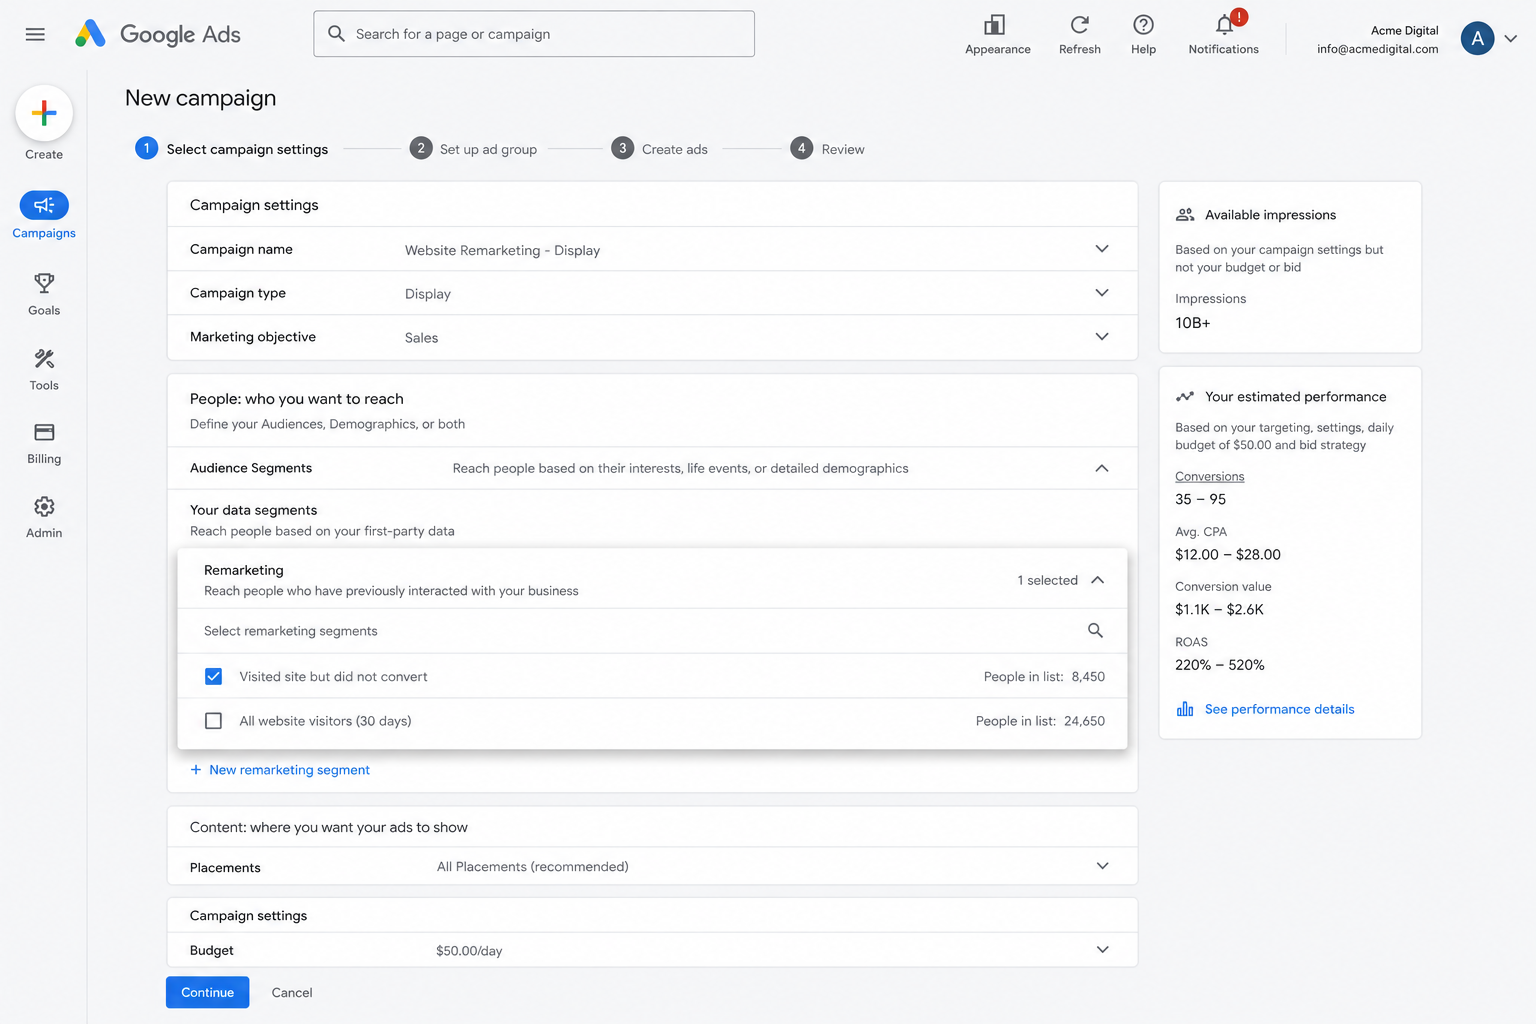
From there, you've got a few options for bringing them back:
- Search Ads - Raise or lower your bids for these visitors the next time they search your target keywords.
- Display Ads - Run banner ads across the Google Display Network so your brand stays visible while they browse other sites.
- YouTube Ads - Serve them YouTube ads to stay top of mind while they're watching video content.
Wrap Up
If you're after a reliable, easy way to send conversions to Google Ads whenever someone completes a Netlify form on your site, Converly is your best bet.
Conversions go straight to Google's servers, so ad blockers and browser privacy settings can't get in the way, and Converly sends along a full set of lead data (name, email, phone, IP address, user agent, and more), which gives Google what it needs to accurately connect the conversion back to the original ad click (even if it happened weeks earlier on a completely different device).
Setup takes just a few minutes, and it comes with a 14-day free trial with no credit card required, so give it a try today!
About the author

Aaron is the founder of Converly. With over 15 years of experience in digital marketing and SaaS, he's passionate about helping businesses track and optimise their ad conversions.