


How to send conversions to Meta CAPI the right way (with code)
A practical, code-level walkthrough of setting up Meta's Conversions API so your events actually match to real people, not just arrive. It's the same approach we use inside Converly.
If you run ads on Meta (so Facebook and Instagram), someone has probably asked you to set up the Conversions API.
It usually gets described like a checkbox you tick once and forget about. It really isn't. The gap between a CAPI setup that technically works and one that genuinely improves your results comes down to a handful of small details, and almost nobody gets all of them right on the first go.
This guide goes through the whole thing from start to finish. What data Meta accepts, why some of those fields matter way more than others, and exactly how to capture, store, hash and send your conversions so Meta can match them to real people. There's example code at every step.
By the time you reach the end, you'll understand how it all fits together and you'll have most of the code you'd need to build it yourself.
Why bother with CAPI at all?
It used to be that you could just fire an event to Meta's Pixel whenever a conversion event happened on your site (like a form being submitted) and call it done.
These days though, ad blockers, iOS tracking restrictions, Safari's cookie limits and a pile of browser privacy features mean a big chunk of the events you fire through the browser never actually make it to Meta. And when events go missing, a few things happen at once. Meta's algorithm gets worse at finding people who'll convert, the numbers in your reports come in lower than reality, and your cost per result slowly creeps up.
The Conversions API (or CAPI for short) is how you fix that. Instead of firing from the browser, it sends conversions straight to Meta's servers (and ad blockers and browser privacy settings can't get in the way).
But reliably sending the conversion to Meta's servers is only half of what makes CAPI worth doing. The other half is improving match quality.
Every time Meta receives a conversion, it tries to match it to a real Facebook or Instagram user. The more identifying signals you can send (email, phone, click ID and so on), the more confident Meta can be that it's found the right person.
It's so important that Meta actually gives you a score on this. The score is called Event Match Quality (EMQ). It ranges from 0 to 10, and you can see it in Events Manager.
A low score, say around 3, means Meta mostly ignores the event because it can't determine who it belongs to. A high score, around 8 or 9, means Meta can match the person, attribute the conversion, and feed it into its optimisation algorithms. You've sent the same conversion the same way (server-side), but the value you get from sending it is completely different.
So the goal of using Meta CAPI isn't just to send the event server-side to improve deliverability. It's to send the event server-side to improve deliverability, and to send as much relevant data as you can to improve match rate.
What data Meta CAPI accepts
A conversion event you send to CAPI is built from a handful of fields. A few of them describe the event itself, like what happened and when, and the rest sit inside user_data, which is the bundle of identifiers Meta uses to tie the event back to a real person. Here's the full list, what each one is, whether it needs to be hashed, and how much each one matters.
| Data point | Meta field | Hashed? | What it is | Importance |
|---|---|---|---|---|
| Event name | event_name | No | What happened, ideally a Meta standard event like Lead or Purchase | Required |
| Event time | event_time | No | When it happened, as a Unix timestamp in seconds | Required |
| Action source | action_source | No | Where the event came from ("website" for a web form) | Required |
| Source URL | event_source_url | No | The page the conversion happened on | Required |
| Event ID | event_id | No | Your unique ID for the event, used for deduplication (see Step 2) | Very high |
| Custom data | custom_data | No | Extras like value and currency for reporting on revenue and ROAS | Optional |
em | Yes | The visitor's email address | Very high | |
| Phone | ph | Yes | Phone number, country code included, digits only | Very high |
| Click ID | fbc | No | Derived from the fbclid in the ad click URL | Very high |
| External ID | external_id | Yes (recommended) | Your own stable ID for the user or lead | Very high |
| Browser ID | fbp | No | The Pixel's first-party browser cookie | High |
| IP address | client_ip_address | No | The visitor's IP, read on your server | High |
| User agent | client_user_agent | No | The browser's user agent string | Required |
| First name | fn | Yes | First name | Medium |
| Last name | ln | Yes | Last name | Medium |
| City | ct | Yes | City | Low to medium |
| State | st | Yes | State or region, 2-letter code | Low to medium |
| Zip / postcode | zp | Yes | Postal code | Low to medium |
| Country | country | Yes | 2-letter ISO country code | Low to medium |
| Date of birth | db | Yes | Format YYYYMMDD | Low to medium |
| Gender | ge | Yes | f or m | Low |
A few things from that table are worth committing to memory.
- Some fields have to be hashed, and some must never be - Email, phone, names and the address fields all get hashed with SHA-256 before they leave your server. But
fbc,fbp,client_ip_addressandclient_user_agenthave to be sent in plain text. This is where almost everyone slips up. They hash everything "just to be safe" and quietly break matching on the 4 fields that were doing a load of the work for free. - Certain fields hold more weight than others - For website events, Meta insists on
action_source,event_source_urlandclient_user_agenton every single event, plus at least one customer identifier it can actually match against. So in practice, you need to be sending an email or phone (whichever your form collects), plusfbc,fbp, the IP address and the user agent for it to be worthwhile. Those last 4 aren't hard to get because they are provided by the browser for free, but it's why pure server-to-server tools (like using Zapier to send a lead from your CRM) don't really work, because they never saw the visitor's browser in the first place. - Send everything you've got though - Every extra field that matches nudges your EMQ up a little. If your form collects a name and a postcode, send those along too. There's no real downside beyond the effort of capturing and normalising them.
8 steps to send conversions to Meta CAPI the correct way
Step 0: Things to do before you start (the bits that aren't code)
Before any of the code will do anything, a few things need to exist in your Meta account. None of them involve writing code, but they block everything that comes after, so knock them out first.
- Create a Pixel (Meta now calls it a "Dataset"). Head into Events Manager and create a data source if you haven't got one already. Make a note of its ID, because you'll need it in the endpoint URL later.
- Install the base Pixel code on your site. Even though we're going to send events from the server, the Pixel in the browser is what creates the
_fbcand_fbpcookies, and it's the browser half of the redundant setup we're building. Without it, Step 1 and Step 3 have nothing to work with. - Generate a Conversions API access token. In Events Manager, open your dataset, go to Settings and generate a token under the Conversions API section. Treat this token like a password (much more on that in the security section). It's the thing that lets your server send events at all.
- Accept the Conversions API terms. Meta won't accept a single event until you've agreed to them. It's a one-off click in Events Manager.
- Decide on your event name and whether it carries a value. For a lead form, that's usually
Lead. If a lead is worth a known dollar amount to your business, work out what that is so you can send it through incustom_data.
Step 1: Capture and store the click data the moment someone lands
The single most valuable signal you can hand Meta is the click ID, fbc. It links a conversion straight back to the ad click that caused it. The catch is that it's only around for a brief moment. It shows up as a fbclid parameter in the URL when someone clicks your ad and lands on your site, and then it's gone the second they move to another page. So you've got to grab it as soon as they land and store it somewhere.
Generating the correct identifier
There seems to be a bit of confusion on forums and different places around the web about what you actually send back to Meta. This is because there are actually a few different identifiers:
fbclidis the raw parameter that gets passed in the URL when the visitor lands on your site (yoursite.com/?fbclid=ABC123)._fbcis the value Meta actually wants you to send, and it has to be in a specific format. That format isfb.1.{timestamp}.{fbclid}._fbpis a separate cookie the Pixel creates to identify the browser. Its format isfb.1.{timestamp}.{randomnumber}. It does not need to be sent back to Meta.
So you don't actually send the raw fbclid. You build _fbc out of it. Sending the raw click ID instead is one of the most common reasons matching quietly underperforms for people.
Capturing it
When the Meta Pixel loads on a page that has a fbclid in the URL, it'll actually create the _fbc and _fbp cookies for you. So a lot of the time you can just read them straight off. But to be safe (in case the Pixel is blocked or slow to load), it's worth being able to build _fbc yourself. Here's a small function that does exactly that:
It runs as early as you can manage on every page load, checks the URL for a fbclid, and the moment it finds one it builds the value in Meta's required fb.1.{timestamp}.{fbclid} format and passes it to persistClickId to be saved. That saving part is where it gets surprisingly tricky.
Storing it so it survives Safari
This is the bit most guides skip over. If you store _fbc with JavaScript (document.cookie), Safari's Intelligent Tracking Prevention (ITP) caps how long that cookie lives to 7 days, and in some cross-site situations as little as a single day. Your visitor might click an ad today and not convert until next week, by which point the cookie is long gone.
The way around it is to get the site's own server to set the cookie using an HTTP response header. A cookie set that way, by the site's own origin, doesn't get capped in the same way, so it can stick around for the full window you choose. There's an important catch to this though, which I'll get to in a second.
It works as a 2-part handoff. First, the browser sends the _fbc value it built over to your own server:
Then your server takes that value and sets it as a long-lived, first-party cookie in the response, which is what gets it past that 7-day cap:
Here's the catch that makes or breaks the whole thing. That long lifetime only kicks in if the cookie is genuinely set by the site's own origin, and Safari lays 2 traps for you here. The first one is straightforward. If your tracking script and its backend live on a totally different domain, the cookie counts as third-party and Safari blocks it outright, ITP or no ITP. The second is sneakier. Safari also caps a cookie to 7 days when it spots CNAME cloaking, which is when a subdomain like track.yoursite.com is really just an alias pointing at some third-party tracking host. So spinning up a subdomain isn't a magic bypass on its own. The only setup that's genuinely durable is the site's own origin server setting the cookie itself. This is one of the genuinely hard infrastructure problems you run into when you build tracking yourself, and it's a big part of why hosted tools put so much effort into getting the cookie story right.
One last thing here. If a visitor turns up from a fresh ad click, the new fbclid should generally overwrite the old one, because the click you care about is the one that led to this conversion (last touch). So store the most recent one, not the first.
Step 2: Generate a unique event ID for each conversion
This is the piece that makes deduplication work, so it's worth getting your head around properly.
Meta actually wants you to send the same conversion twice. Once from the browser through the Pixel (that's Step 3), and once from your server through CAPI (Step 7). And you're doing that deliberately, because the redundancy is exactly what makes the whole setup reliable. If the browser event gets blocked, the server event still lands. And if they both arrive, then Meta deduplicates them.
But in order for this deduplication to occur, you need to generate and send an event ID. When the browser Pixel event and the server CAPI event carry the same event_id (and the same event_name), Meta recognises them as one conversion and dedupes them down to a single count.
So the rule is simple. Generate one ID at the moment of conversion and use it in both places. It's a single line:
crypto.randomUUID() is built into modern browsers and Node, so you don't need to pull in anything extra. Honestly, any unique string will do, as long as it's the same across the browser and server halves of a single conversion. Hang onto this ID. You'll hand it to the Pixel next, then send it off to your server right after.
Step 3: Fire the event to the Meta Pixel in the browser
Step 3 is to fire the conversion to the Pixel (in the browser) when the form is submitted. This is the browser half of that redundant setup.
The detail that matters here is passing your eventId through as the eventID property in the 4th argument. That's the thing that lets Meta line it up against the server event later on. Here's the call, with the value of the conversion and that shared ID passed in:
A quick word on timing, because this is where browser tracking goes wrong more than anywhere else. Fire on a confirmed success, not on a click of the submit button. This is because there are many things that can prevent the form from actually being submitted when the button is clicked (e.g. the user entered an invalid email address, their payment method gets rejected, etc). In that case, you'll have fired a conversion that never actually happened. And then when they resubmit the form successfully, you'll have fired a second conversion.
So you need to wait for the real success signal instead. Depending on the form builder and how you have it configured, that's usually the success message showing up, the redirect to a thank-you page, or the form tool firing its own "submitted" event.
Step 4: Extract the visitor's personal data
To get a decent EMQ, you need the visitor's real details (like their email, phone, name, and whatever else the form collects). While that sounds like it should be trivial, different form tools expose their data in completely different ways, so the approach you take is very much going to depend on what form tool you use.
That being said, Converly integrates with 80+ form builders, scheduling tools and chatbots, and in our experience, there are usually three ways to do it:
Method 1: Walk the DOM
If the form is plain HTML sitting directly in the page (therefore it's part of the page's own code), you can read the field values straight out of the page when someone submits it. This is actually the way we do it for standard HTML forms, Webflow forms, Gravity Forms, Contact Form 7 and most WordPress form plugins.
Reading the values out is just a matter of grabbing the form element and pulling each field off it:
The code snippet above reads the email, phone and name straight off the submitted form by their input selectors. The fiddly part is the guesswork. Real forms label their fields all over the place (fname, first_name, your-name and so on), so anything robust needs a stack of fallback matching to cope.
Method 2: Receive it in a postMessage
If the form is embedded in an iframe, your page's JavaScript isn't allowed to access it for security reasons. So instead, these tools shout their data out to the parent page using postMessage (which is a browser mechanism that lets one frame talk to another). Some of the more popular embedded form builders, like Paperform and HubSpot Forms, work this way.
So on your side, you need to listen for those messages and pick out the ones that mean a submission happened. Here's some example code for HubSpot Forms:
That event.origin check isn't optional. Leave it out and any other site or script can fire a fake message at your page and inject a fake conversion (There's more on this in the security section.)
Method 3: Pull it from an API
Sometimes the postMessage only tells you that a submission occurred and provides an ID, but it doesn't include the lead's actual details. To get the email and name, you then need to call the tool's API from your server and use that ID to look the record up.
This is how you need to do it with embedded form tools like Typeform and Jotform, as well as embedded scheduling widgets like Calendly and Acuity Scheduling.
With the ID you got from listening to the postMessage, you call the API to fetch the details. Here's a Calendly example that turns a booking into an email and name:
It takes the booking's unique ID and your access token, asks Calendly for the invitee on that booking, and hands back the email and name you'll later send to Meta.
The reality
The reality of step 4 is that it's going to be different depending on what form tool you use, so you just need to research how the tool you use behaves and adapt accordingly.
Step 5: Send the data to your server (and join it if it arrives in pieces)
At this point you've got 2 separate bundles of data. There are the browser-side signals (the event ID, _fbc, _fbp, the page URL and the user agent), and there are the visitor's details (email, phone, name). Both of them need to end up on your server, together, in a single record.
Sending the browser bundle
Fire the browser bundle off to your own endpoint the moment the form is submitted. Use sendBeacon, or fetch with keepalive, because submitting a form often navigates the page away straight away, and a normal fetch would just get cancelled mid-flight. Both of those methods are built to survive exactly that. Here's what sending that bundle looks like:
It bundles up the event ID, the 2 cookies, the page URL and whatever user details you extracted, then posts the lot to your endpoint with keepalive set so the request survives the page navigating away. The getCookie helper underneath is just a small utility for reading a cookie value by name.
There are 2 things you can only really get on the server, not in the browser:
- IP address. The browser can't reliably tell you its own public IP. Read it on the server from the request instead. If you're behind a proxy or load balancer (which is almost always the case), pull it from the
X-Forwarded-Forheader, and make sure your framework is set up to trust the proxy. - User agent. You can read
navigator.userAgentin the browser, but the cleaner source is theUser-Agentrequest header on the server. Either one works fine.
So on the receiving end, your endpoint reads both of those off the request and stores them alongside the rest of the event:
Joining data that arrives separately
If you're dealing with a hybrid tool where you can't get the lead's details through the browser (either by walking the DOM or capturing them from the postMessage), the personal details will show up later, from an API call, on a totally different code path. So now you have to merge the browser record and the API record into a single complete event before you can send anything.
That's trickier than it sounds, and it nearly always comes down to one thing, which is timing. The browser signal often arrives before the API data is ready. A scheduling tool might fire its browser message the second someone books, but the booking record isn't queryable through the API for another couple of seconds.
This is why you need to join them. If you just send the event to Meta when the browser signal arrives, then you fire off a half-empty event that barely matches. If you then send a second one when the lead's details turn up from the API call, then you've got a duplicate.
The pattern that actually works looks like this:
- When the browser signal arrives, save it and flag the record as waiting for enrichment.
- Try to fetch the API data. If it isn't ready yet, don't give up. Wait and retry with a backoff (try again in 30 seconds, then 2 minutes, then 10 minutes).
- Only once the record is genuinely complete do you send it to Meta, and you send it once.
- Use a stable key (the submission ID, or the booking ID) to match the 2 halves up, so a retry can never create a duplicate.
Getting this race condition right is one of the genuinely hard parts of building conversion tracking yourself. It's really easy to build the happy path, ship it, and never notice that a slice of your events are quietly going out either half-empty or doubled up.
Step 6: Normalise and hash the data
This is the step that separates an EMQ of 3 from an EMQ of 9, and it almost always happens on the server, right before you build the payload.
The way Meta matches hashed values is by comparing them against its own hashed copies of the same user data. For that comparison to land, you and Meta have to hash the data in exactly the same way. Meta normalises the data before it hashes it, so you have to normalise it identically. If you don't, the hashes will never line up and that field is just wasted. Here are the normalisation rules Meta uses:
- Email. Trim the whitespace and lowercase the whole thing.
- Phone. Strip out everything that isn't a digit, keep the country code, and drop the leading
+along with any leading zeros. A New Zealand mobile ends up as64211234567. A US number ends up as14155551234. - First and last name. Trim and lowercase. Keep Unicode characters like accents (Meta matches them as they are). Meta doesn't ask you to strip internal punctuation out of names, so the sample code below just trims and lowercases.
- City. Trim, lowercase, and pull out the spaces and punctuation.
- State. The 2-letter code, lowercased (for example
ca). - Country. The 2-letter ISO code, lowercased (for example
nz). - Zip or postcode. Lowercase, trim, no spaces.
- Date of birth. The digits only, as
YYYYMMDD.
Once that's done, hash each normalised value with SHA-256 and send the result through as a lowercase hex string. In code, that's one small sha256 helper plus a wrapper per field that normalises first, then hashes:
Notice each wrapper bails out and returns undefined when the value is empty, which keeps you from sending Meta a hash of an empty string (more on why that matters in a moment).
The rules you must not break
fbc, fbp, client_ip_address and client_user_agent are never hashed. They go to Meta in plain text. If you run them through your hashing function to keep things consistent, then you've just destroyed the 4 signals that were quietly doing a big share of the matching for free. This is the single most common self-inflicted wound in CAPI setups, so it's worth saying twice.
Similarly, you should skip empty fields completely. Never send a hash of an empty string. If you don't have a phone number for someone, leave ph out of the payload altogether rather than sending a hash of "".
Step 7: Build the payload and send it to the Conversions API
Now you put the event together and POST it to Meta. The endpoint looks like this:
That v25.0 is the API version. Make a mental note of it, because it comes back to bite people later (there's a whole section on versioning further down).
Here's the whole call, pulling together everything from the steps so far:
There are a couple of deliberate choices baked into that:
- The access token goes in the body, not the URL - Meta will take it either way, but the moment you put a secret in a URL it ends up in server logs, proxy logs and error trackers. Keeping it in the body keeps it out of all of those.
event_timeis in seconds -Date.now()hands you milliseconds, so you divide by 1000 and floor it. Sending milliseconds is a classic bug, and it makes Meta reject every event you send.
Reading the response (and what it doesn't tell you)
A success comes back looking like this:
The important bit to understand here is that events_received: 1 only means Meta received the event. It doesn't mean the event got matched to a user, attributed, or counted.
The only real way to know your matching is working is to keep an eye on your Event Match Quality and the diagnostics in Events Manager over time. And hang onto that fbtrace_id. It's the reference Meta support will ask you for if something's gone wrong.
Handling retries
Network blips and Meta's own 5xx errors are temporary, so those are worth retrying with a growing delay. Most 4xx errors, on the other hand, mean you sent something wrong (a bad token, a malformed payload), and retrying will just fail in exactly the same way forever, so don't bother retrying those.
There's one exception worth knowing about, though. Meta returns some of its throttling and rate-limit errors as an HTTP 400 with a body error code of 4, 17, 32 or 613. Those ones are actually temporary, so you do want to retry them, even though the status code makes them look permanent. The takeaway is to check the code in the body, not just the HTTP status.
Here's that wrapped around the send, so it only retries when it should:
Step 8: Test that it works
Before you point this at real campaigns, you want proof that Meta is receiving your events and reading every field correctly. Do not use your live traffic to find that out. Meta gives you a dedicated testing tool that shows your events arriving in real time, so you can catch problems before they cost you anything.
The tool lives in Events Manager. Open your dataset and click the Test Events tab. Think of this tab as a live window into events as they land. It works for both the browser Pixel events and your server-side CAPI events. The browser and server are tested slightly differently, and since what we have been building is the server side, that is the part to focus on.
Here is how the testing actually works, because this is the piece people get wrong. On the Test Events tab you will see a test event code, a short string that looks like TEST12345. That code is how Meta tells a real event apart from a test. When you include it in your CAPI request, Meta recognises the event as a test, routes it to the Test Events tab instead of into your live reporting, and displays it there within a few seconds. The code goes at the top level of the request body, as a test_event_code field sitting next to your data array, not inside the individual event object. It is the one line that was commented out in the Step 7 code, so testing is really just a matter of switching it on.
Here's where that line goes in the payload:
So the process is straightforward. Copy the code from the tab, drop it into your payload, then trigger a genuine conversion by submitting your form the way a real visitor would. The event should appear in the Test Events tab almost immediately. Click into it and Meta shows you everything it received. You get the event name, the parameters, which user_data fields were present, and most importantly whether each field was formatted and hashed the way Meta expects. If your email hash is malformed, or your phone number is missing its country code, or you accidentally hashed something that should have been sent in the clear, this is where the warning shows up.
It is also a good place to confirm your deduplication is working, because when you fire both the browser Pixel and the server event with the same event ID, the tool will tell you whether Meta is treating them as one event or two.
Now the most important rule, and the one that quietly catches people out. An event sent with a test_event_code does not count. Meta deliberately excludes it from attribution, optimisation, and reporting, because it is a test. That means you have to remove the test_event_code line before you go to production. If you leave it in, your real conversions will keep sailing through and looking perfectly healthy in the Test Events tab while contributing absolutely nothing to your campaigns. So the rhythm is test with the code, confirm everything looks right, then strip the code out and deploy.
Once it's live, keep watching
Testing it once proves the plumbing works. It doesn't prove your matching is any good. So once real events are flowing, get into the habit of checking 2 things in Events Manager:
- Event Match Quality, the 0 to 10 score, for each event. If it's coming in low, you're either missing strong fields or hashing them wrong.
- The Diagnostics tab, which flags problems in plain English, things like "your events are missing the fbc parameter" or "server and browser events aren't being deduplicated." This tab is often how you find out that Step 1 or Step 2 has a bug you never noticed.
Things to think about
The 8 steps above will get a conversion to Meta. Turning that into something you can actually run in production, trust, and not get burned by is a whole separate set of concerns. So here they are.
Deduplication
You're sending every conversion twice, from the browser and from the server, on purpose. Meta dedupes them using event_name plus event_id, so both of those have to match exactly across the 2 events. The way we do it in Converly is to generate the ID once, the instant the form is submitted, and then fire that same ID with both the browser Pixel and the server call, so the two are guaranteed to line up. Get it wrong and every conversion gets counted twice, which inflates your numbers and misleads the algorithm at the same time.
A couple of details worth knowing:
- Meta's deduplication only works inside a window of roughly 48 hours. 2 events with the same ID sent days apart will both count. So this protects you against the browser-and-server pair, not against accidentally re-sending an old event much later on.
- If you can't send an
event_idfor some reason, Meta falls back to fuzzy matching onfbpand a few other fields, which is a lot less reliable. So always send the ID.
Idempotency
This one is your own protection, and it's separate from Meta's. It stops you from processing the same conversion twice on your own side, which happens more easily than you'd think. A client retries a dropped request, a beacon fires twice, a webhook gets delivered more than once. If you don't guard against it, you end up creating duplicate events with different IDs, and Meta can't dedupe those for you, because the IDs don't match.
The fix is to work out a stable key for each conversion (the submission ID, say, or a hash of the form data plus a time window) and then reject or ignore anything you've already seen. Store the keys you've processed and check against that list at your endpoint, before you do anything else with the request. In Converly that guard sits right at the events endpoint, so a retried beacon or a twice-delivered webhook just collapses back into the same conversion instead of a duplicate. The simplest version is a set you check first:
Auditability
When a conversion doesn't show up in Meta, or a client emails to ask whether their lead from Tuesday actually got tracked, you need to be able to give them a real answer. That means storing 3 things for every single event:
- What you received (the raw browser and API data).
- What you sent (the exact payload that went to Meta, with the PII already hashed, never in the clear).
- What came back (Meta's response, including the
fbtrace_idand any error).
Keep all 3 together, timestamped, and ideally show them in a readable log so that someone who isn't a developer can look at a single conversion and follow the whole story. This is exactly what the debug log does in Converly. Every conversion shows what arrived from the browser, the precise hashed payload we sent to Meta, and Meta's response with the fbtrace_id, so you can give a customer a straight answer in seconds. It's gold for debugging, and for keeping clients confident in you, and it's the very first thing you'll wish you'd built the first time something goes wrong.
Security
Conversion tracking deals with secrets and personal data, and it accepts data from the open internet, so it carries a genuine attack surface. A few things to lock down:
- The access token has to live on the server, and only the server. That's the whole reason CAPI is server-side in the first place. If that token ever leaks into browser code, anyone can fire events (and worse) into your dataset. It's also why you can't run CAPI purely client-side.
- Store the token in a secret manager. Not hardcoded, and not sitting casually in a plain file. Use your platform's vault or secrets feature (in Converly the token lives in a vault and is only ever read server-side).
- Validate the origin of incoming events. Your
/track/eventendpoint is public to the whole world. Without an origin check and a quick sanity check on the payload, anyone can POST fake conversions straight into your customers' Meta accounts and poison their optimisation. So check the request genuinely came from a site you allow (in Converly every incoming event is origin-checked before it's trusted). - Rate limit that endpoint, per site and per IP, so a flood of junk can't run up costs or pollute the data.
- Strip secrets and PII out of your logs. It's really easy to log a full request while debugging and accidentally write an access token or a raw email into your logs forever. Scrub them.
Privacy
You're handling people's personal data here, which comes with legal obligations, and those vary depending on where you and your visitors are.
- Hashing (Step 6) is part of this. You never send a raw email or phone number to Meta in the first place.
- Consent. In the EU and UK, and more and more places besides, you need a lawful basis to process this data, and often explicit consent. If you operate in those regions, you'll need to wire this into a consent banner and only fire when consent has actually been given. Meta's Consent Mode and the wider GDPR rules are what apply here.
- Global Privacy Control. Some browsers send a
navigator.globalPrivacyControlsignal that means "don't sell or share my data." Respect it. If it's set, don't fire (Converly checks for the signal and skips the conversion when it's there). - Data retention. Decide how long you're going to keep raw personal data before deleting it, and then actually delete it. At Converly, for instance, we keep it for 7 days, which is long enough for customers to see and search their conversions by name and email while they're still debugging the setup, and then we delete it to keep the blast radius small if anything ever goes wrong. Holding onto it forever is a liability, not an asset.
- Deletion requests. People have the right to ask you to delete their data. So you need a way to find and properly hard-delete a person's records when they ask (in Converly there's an endpoint for exactly that).
- Limited Data Use. For California, Meta supports a
data_processing_optionsflag that tells it to handle the event under restricted terms. If you've got US traffic, it's worth looking into.
Error handling
Things are going to fail. Meta will have a bad minute, a network call will time out, an API you're pulling from will be briefly down. The gap between a toy and a real production system is entirely about what happens when they do.
- Persist first, send second. Write the event to your database the instant it arrives, before you even try to forward it to Meta. That way a forwarding failure never loses the conversion. You just retry from the stored copy. This is how Converly's events endpoint works, writing and acknowledging the event first and only then forwarding it.
- Retry the temporary failures with a backoff (Step 7), and don't retry the permanent ones.
- Have a sweeper. Run a background job that regularly hunts for events that got stuck (received, but never successfully sent) and retries them. Without it, any event that burns through all its immediate retries is just lost, silently. In Converly a reaper job runs this sweep on a schedule.
- Decide what happens to the permanent failures. An event Meta keeps rejecting (a genuinely dead token, say) should land somewhere you'll actually notice, like a dead-letter list or an alert, instead of just vanishing.
event_time correctness
There are 3 ways this one field bites people:
- It's in seconds, not milliseconds. Divide
Date.now()by 1000. - It has to be within the last 7 days and not in the future. Anything older than 7 days and Meta rejects it.
- In the join case (Step 5), where the personal data turns up via an API minutes or even hours later, the
event_timestill has to be the original submission time, not the time you finally managed to send it. Send the time the conversion actually happened, not the time your code eventually got around to it. In Converly the timestamp is locked to the moment of submission and carried through enrichment, so a late API pull never shifts it.
API versioning
That v25.0 in the endpoint is a version number, and Meta retires each version roughly 2 years after it's released. Once your version is retired, your calls just start failing. So keep the version in one single place in your code so you can bump it easily (in Converly it's a single constant we update as routine maintenance), and stick a reminder somewhere to review it once a year. A silent breakage that was scheduled years ago is a genuinely miserable thing to debug after the fact.
Bot and spam filtering
If your forms get spam (and most do), every fake submission turns into a fake conversion. And that's worse than just inflating your numbers, because fake conversions actively mislead Meta's optimisation and teach it to go chasing the wrong people. So filter the obvious junk out before you send anything. Honeypot fields, suspicious patterns, known-bad email domains and submission-rate checks all help here.
action_source and event_source_url
These 2 are both easy to set wrong and easy to forget entirely. For a website conversion, action_source has to be "website". There are other values for other channels (a phone call, an in-store sale), and using the wrong one will get your events rejected or attributed to the wrong thing. event_source_url should be the actual page the conversion happened on. Meta leans on both of these for matching and for its own sanity checks (in Converly both are set automatically, action_source to "website" and event_source_url to the page the form was on).
Alternatively, you can use Converly
Everything above is buildable, but it takes serious time and effort.
Converly is a SaaS tool that makes it all easy. You simply select a trigger (e.g., a form being submitted on your site) and then select the actions you want to take (e.g., send a conversion to Meta, send a conversion to Google Ads, etc).
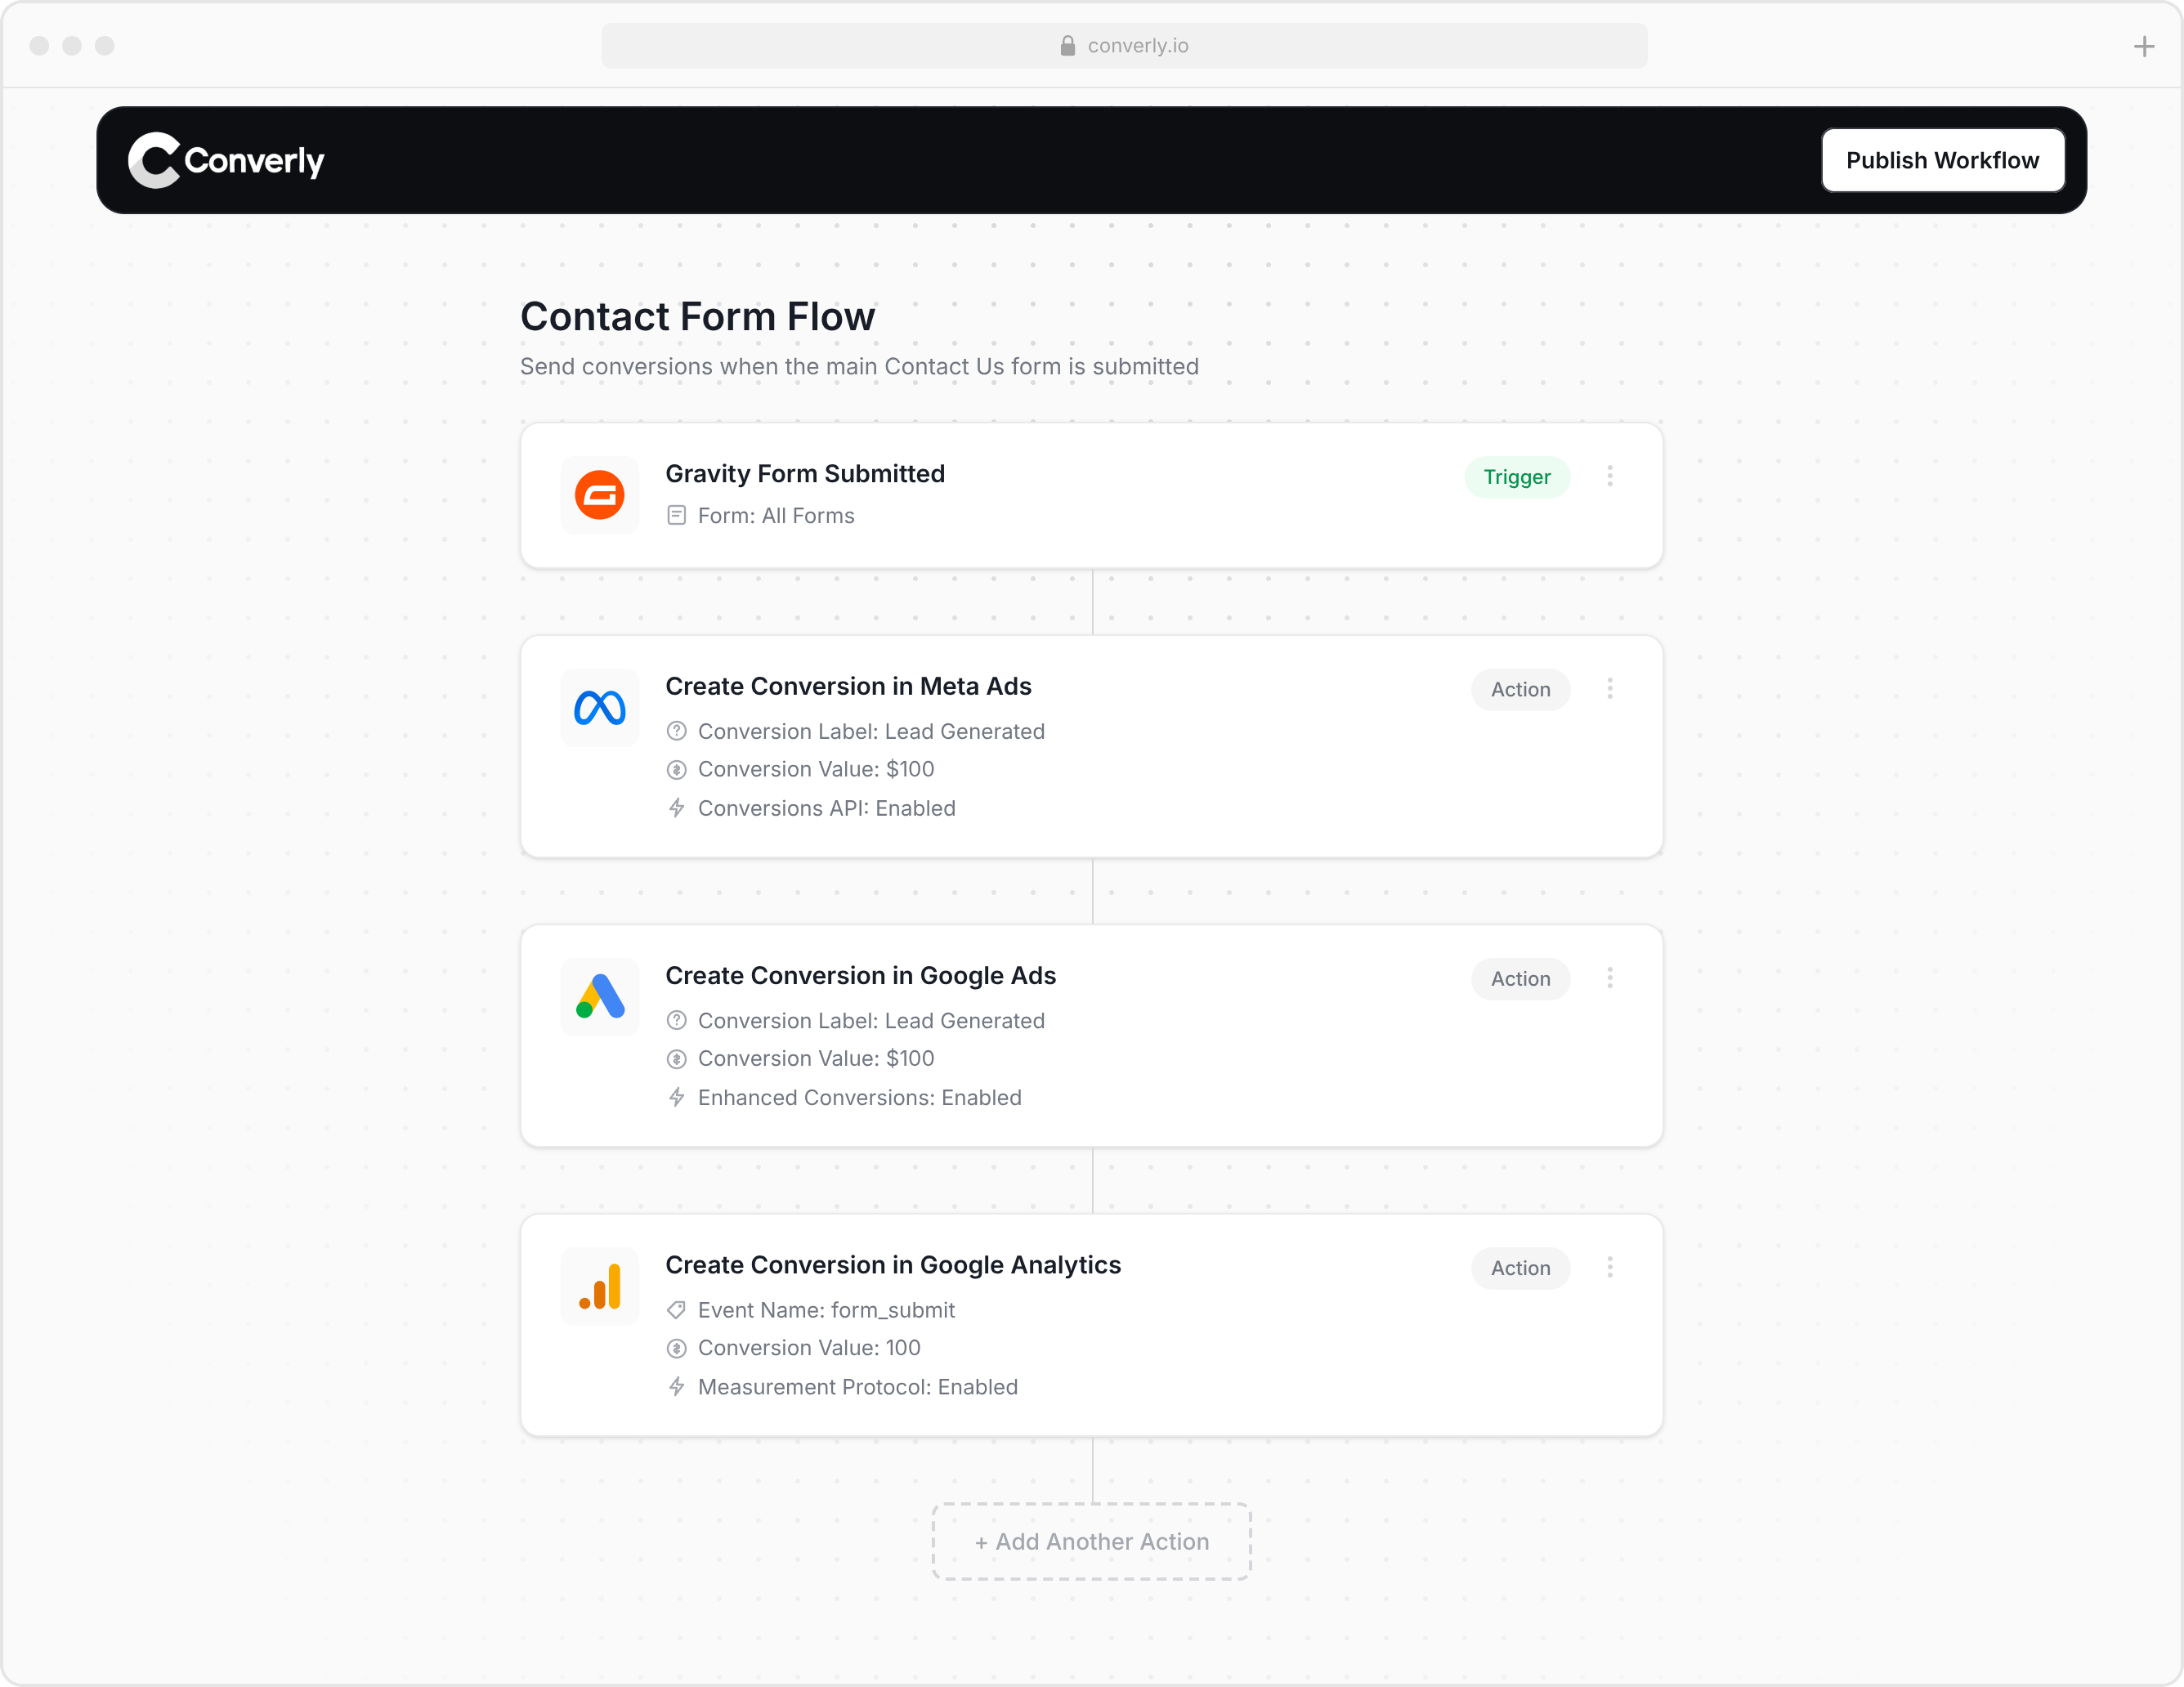
Converly then gives you a snippet of code you place on your website, and it takes care of everything else for you, including:
- Captures
fbc,fbp, IP and user agent automatically. This is the browser-side advantage that pure server-to-server tools just can't match, because they never saw the visitor's browser. It's the difference between a match quality of 3 and a match quality of 9. - Captures and persists the click data in first-party cookies automatically, and keeps it readable across your subdomains, so a click on your marketing site is still attached when the same visitor converts over on your app subdomain.
- Detects form submissions across loads of different form builders, whether they hand their data over through the page, through postMessage, or only through an API. You're not writing and maintaining a separate detector for every tool.
- Joins data that arrives in pieces, including that timing race where the browser signal lands before the details are ready, so your events come out neither half-empty nor duplicated.
- Normalises and hashes everything correctly, every field, every time.
- Handles deduplication, idempotency, persist-first storage and automatic retries for you, so nothing gets double-counted and nothing gets lost.
- Keeps your access token server-side and validates incoming events, so nothing leaks and nobody can spoof conversions into your account.
- Gives you a readable log of what was received, what was sent and what Meta sent back, for every single conversion.
- Fires the same conversion to Meta as well as Google Ads, GA4 and other platforms from one setup, so the work you'd do for Meta on its own ends up covering everything.
It works with 80+ form tools, scheduling widgets and chatbots out of the box, as well as custom HTML forms. If you're a SaaS business or similar, then there's also an API integration method which captures the browser-side information and then waits for you to send it the user's name and email via an API call (which is good for SaaS signup flows which offer both a form and SSO options like Google, Microsoft, GitHub, etc).
Wrap Up
As you can see from this post, sending conversions to Meta's Conversions API (CAPI) isn't as easy as it initially looks. There are a lot of steps to collect the data you need and send it over, and then of course, you need to think about idempotency, auditability, security, privacy, etc.
Or you can use tools like Converly, which basically handle all of this for you. You can set it up in just a few minutes, and it runs on proven infrastructure with full conversion logging and support.
Best of all? It comes with a 14-day free trial, so you can try it for free, and if, for some reason, it doesn't work for you, then you can fall back to building it all manually yourself. So save yourself some time and headache and give Converly a try today.
About the author

Aaron is the founder of Converly. With over 15 years of experience in digital marketing and SaaS, he's passionate about helping businesses track and optimise their ad conversions.