


How to send conversions to ChatGPT Ads the right way (with code)
A developer's guide to using OpenAI's Conversions API to send conversions back to ChatGPT Ads when someone converts on your website.
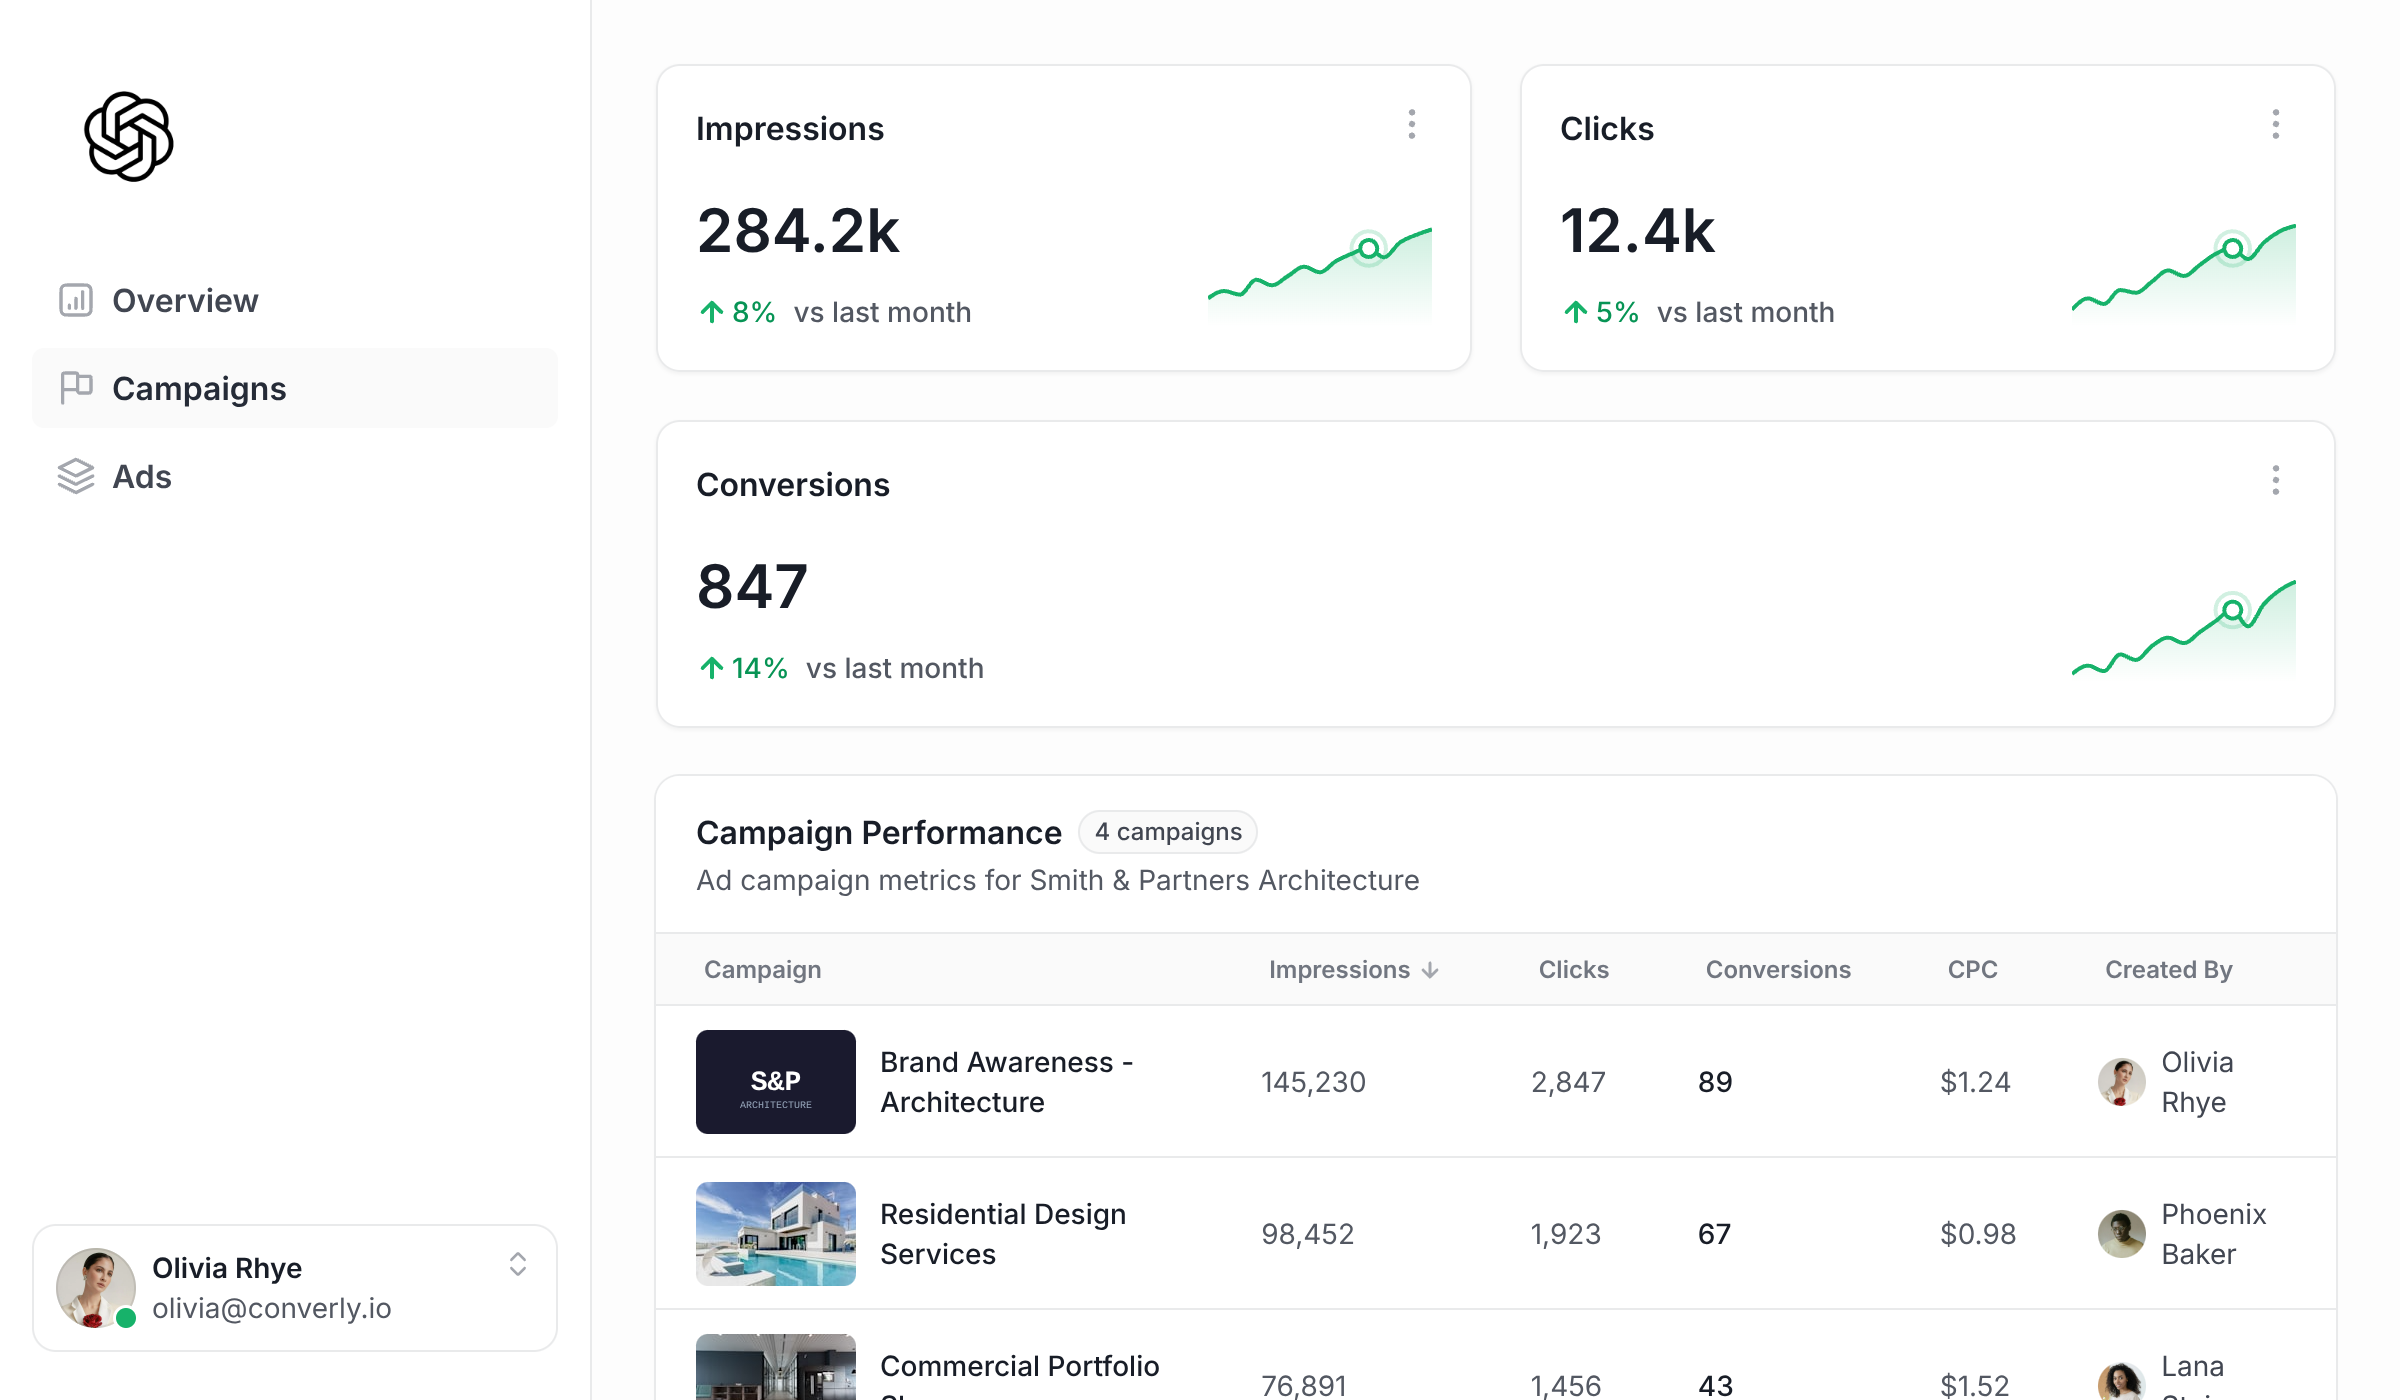
So your marketing team recently decided to start doing ChatGPT Ads, and now you have to set up conversion tracking. Good for you.
If you've set up Meta's Conversions API or Google's Enhanced Conversions before, the general shape of this will feel pretty familiar. You send an event to an endpoint, you include a few hashed identifiers, and you get a 200 back. But OpenAI's version has a handful of traps that are genuinely its own, and a few of them will happily let you ship a completely broken integration without ever once telling you about it.
We built this integration into Converly, and while we were doing it we probed the live API fairly thoroughly, because the documentation and the actual behaviour don't always agree with each other.
In this article, we'll show you how the whole thing works from start to finish. What data ChatGPT Ads accepts, why 2 of those fields matter more than all of the others put together, and exactly how to capture, hash and send a conversion so that OpenAI can tie it back to a real person. There's example code at every step.
Why bother with the Conversions API at all?
ChatGPT Ads offers a browser-pixel that you could just place on the website, so why not just use that?
The first reason is deliverability. When you use the browser pixel you're essentially sending the conversion to ChatGPT via the visitor's browser, which means that it has to survive ad blockers, iOS tracking restrictions, Safari's cookie limits and a whole pile of other browser privacy features.
This ultimately means that a significant chunk of conversions (studies put it at 30 to 40%) will never make it back to ChatGPT, and that's a big deal. When you're missing that much data, the platform's algorithm gets worse at finding people who'll convert, the numbers in your reports come in lower than reality, and your cost per result slowly creeps up. Fortunately, sending the conversion from your own server solves all of those issues, because there's no browser sitting in the middle to block it.
The second reason is matching, and on ChatGPT Ads this one matters even more than it does on other ad platforms. Every conversion you send has to be tied back to a real person who clicked one of your ads, and OpenAI will only do that based on two things: the lead's email address and the click ID (which is in the URL when the visitor first lands on your site). That's the entire list. Everything else you send is supporting signal that helps confidence, but on its own it will never connect a conversion to an ad click.
That's a problem for a browser-only setup. The click ID is sitting right there in the URL when somebody lands on your site, but their email address usually isn't available until they submit a form several pages later, and hashing it properly is work you shouldn't be doing in a browser anyway. So browser-only tracking tends to send events carrying one weak half of what OpenAI needs, whereas a server-side setup can send both halves together on the same event.
This means ChatGPT is able to match far more conversions back to real people and the original ad they clicked, and ultimately their algorithms get better at serving ads to people who are likely to convert (which means your marketing team gets more conversions at a lower cost).
What data ChatGPT Ads accepts
A conversion event is built out of 3 parts. The event fields at the top describe what happened, the data object describes the shape of the conversion, and the user object carries the identifiers OpenAI uses to tie the conversion back to a real person. Here's the full list, where each field lives, whether it needs to be hashed, and how much it actually matters.
| Data point | Field | Where | Hashed? | What it is | Importance |
|---|---|---|---|---|---|
| Event ID | id | Event | No | Your unique ID, used for deduplication | Very high |
| Event type | type | Event | No | What happened, like lead_created | Required |
| Timestamp | timestamp_ms | Event | No | When it happened, in milliseconds | Required |
| Action source | action_source | Event | No | "web" for a website conversion | Recommended |
| Source URL | source_url | Event | No | The page it happened on. Required for web events | Required |
| Click ID | oppref | Event | No | From the oppref parameter on the ad click URL | Very high |
| Data shape | data.type | Data | No | Must match the event type, like customer_action | Required |
| Value | data.amount | Data | No | Integer, in the currency's minor unit (see Step 7) | Optional |
| Currency | data.currency | Data | No | 3-letter code. Required whenever amount is present | Conditional |
user.email_sha256 | User | Yes | The visitor's email address | Very high | |
| Browser ID | user.obref | User | No | OpenAI's first-party browser cookie | High |
| IP address | user.ip_address | User | No | The visitor's IP, read on your server | Medium |
| User agent | user.user_agent | User | No | The browser's user agent string | Medium |
| Country | user.country | User | No | 2-letter code | Low |
| City | user.city | User | No | City name | Low |
| Postcode | user.zip_code | User | No | Postal code | Low |
There are 4 things in that table that are worth committing to memory before you write any code, because each one of them is a way to build something that looks completely fine but doesn't work at all.
- The
userobject isn't validated, but the event level is - If you send an unknown field at the top of the event, you get a clean 400 telling you exactly what's wrong. Inside theuserobject, where all of your identifiers live, you can send absolute nonsense and OpenAI will cheerfully return a 200. We'll come back to what that means for you in Step 6, because it changes how you have to build and test everything. opprefgoes at the event level andobrefgoes insideuser- These 2 look like a matched pair and they really aren't. Putobrefat the event level and you'll get a clean 400 that tells you off. Putopprefinsideuserand you'll get a 200, and it will match nothing at all, because nothing insideusergets checked. The same mistake in one direction shouts at you and in the other direction says nothing, which is a fairly cruel way to lose a quarter's worth of attribution.- Only 2 identifiers will actually get you a match - Those are
oppref(the click ID) andemail_sha256. Everything else in that table is supporting signal. If an event has neither of those 2, there is genuinely no point sending it, because OpenAI will accept it and it will never be attributed to anything. - Only the email gets hashed - It's SHA-256 of the lowercased, trimmed address, and everything else in the table goes over in plain text. It's also worth deriving that hash yourself on your server rather than accepting a pre-hashed value from a client, because there's no way to look at a 64-character hex string and tell whether it was ever an email address in the first place.
One more thing on obref before we move on, because it trips people up. It isn't something OpenAI hands you from their servers. It's a UUID that their browser SDK generates in the visitor's browser and stores in a first-party cookie, which is structurally the same idea as Meta's _fbp. That means when you're sending server-side, you have to read the cookie that already exists rather than making one up, because a UUID you invented has never been seen by OpenAI and will match precisely nobody.
9 steps to send conversions to ChatGPT Ads the correct way
Step 0: Things to do before you start (the bits that aren't code)
Before any of the code below will do anything useful, a few things have to exist inside your ChatGPT Ads account. None of them involve writing code, but they block everything that comes after them, so it's worth knocking them out first. They all live under Conversions in ChatGPT Ads Manager.
- Create a data source. A "data source" is OpenAI's name for what every other platform calls a pixel. Create one if you haven't already, and make a note of its ID, because it goes into the endpoint URL later on.
- Install the ChatGPT Ads pixel on your site. Even though we're going to be sending events from your server, the pixel running in the browser is what creates the
obrefcookie, and it's the browser half of the redundant setup we're building. Without it, Step 2 and Step 4 have nothing to work with. - Create a conversion event on that data source. This is the one people skip, and it matters more than it looks like it should (there's more on this just below).
- Generate a Conversions API key. This is the credential that lets your server send events at all. Treat it like a password.
- Decide whether your conversion carries a value. If a lead is worth a known dollar amount to your business, work out what that number is now, because you'll need it in Step 7 and the format OpenAI wants it in is not the format you'd expect.
Picking your event type (and the trap that comes with it)
ChatGPT Ads has a fixed list of event types, and each one is locked to a "data shape" that you have to declare in data.type. The 3 that matter for lead generation all use the customer_action shape:
lead_created- somebody filled in a formregistration_completed- somebody signed upappointment_scheduled- somebody booked a time
Ecommerce events like order_created and checkout_started use the contents shape instead, and subscription events use plan_enrollment. If you pair an event type with the wrong data shape, you get a clean 400, which is genuinely the good outcome here.
But here's the part that catches people out. An event type only ever counts if a matching conversion event actually exists on the data source you're sending to. So if you send appointment_scheduled to a data source that only has a lead_created conversion event defined on it, OpenAI accepts the event, hands you back a 200, and then simply never reports it anywhere. Nothing errors, nothing warns you, and your booking conversions just quietly don't exist.
So before you send anything, go and check which conversion events are actually defined on your data source, and only ever send those types.
Other warnings before you start clicking
There are 2 different API keys and their names are confusingly similar. The Ads API key (which lives under Settings, in the General tab) is the one that manages your account. The Conversions API key (which lives in the Conversions section) is the one that sends conversions. Both of them start with sk-svcacct-, so you genuinely cannot tell them apart by looking at them. Label them the moment you create them and save yourself some headache.
It's also worth knowing that the Conversions API key is only ever shown to you when you first create it. There's no endpoint that will read it back to you (trying returns a 405), so if you don't save it somewhere safe right then, your only option is to go and create another one.
Nothing you create can ever be deleted. There's no delete, archive or update endpoint for data sources, conversion events or API keys, and the Ads Manager UI doesn't offer it either. Every test object you create while you're figuring this out will live in that account permanently. So name things carefully, and do all of your experimenting on a single throwaway data source rather than spinning up a fresh one every time you want to try something.
Step 1: Capture the click ID the moment someone lands
Now that the account side of things is sorted, we can start capturing data. And the single most valuable thing you'll ever send to ChatGPT Ads is the click ID, because it links a conversion straight back to the original ad click that sent the lead to your website.
When somebody clicks one of your ChatGPT ads, they arrive on your site with an oppref parameter sitting in the URL (so yoursite.com/?oppref=ABC123). The catch is that, like all URL parameters, it gets wiped from the URL as soon as the visitor clicks through to another page. So you need to grab it as they land and store it somewhere it'll survive until they eventually convert.
Here's a small function that reads it out of the URL and writes it into a first-party cookie:
The above code looks for the oppref value in the query string, checks it actually looks like a click ID rather than junk somebody appended to your URL, and writes it into a cookie that's readable across all of your subdomains. That subdomain part is worth doing, because it means a click that landed on your marketing site is still attached to the visitor when they convert over on your app subdomain a week later (I.e. if they land on converly.io but then convert by creating an account on app.converly.io).
Two details in there are easy to get wrong, and both of them cost you attribution quietly rather than loudly.
Use OpenAI's own cookie name, __oppref, rather than inventing your own. Since you've got their pixel on the page from Step 0, their SDK is reading and writing that same cookie. If you keep a parallel copy under your own name, the two will drift apart the moment their SDK updates one and not the other, and you'll end up sending a stale click ID that looks perfectly valid. Sharing the cookie means you always agree on the value.
Give it 30 days, not the 90 you'd normally reach for. 30 days is the lifetime OpenAI's own SDK uses, and it matches their click window. Stretching it to 90 means you'll eventually send click IDs from outside that window, and since nothing at their end will complain, the cookie will still be there and still look correct while quietly matching nothing.
I recommend running this on every single page load, not just on the pages you think people will land on from your ads. If you be selective about where this runs, it's likely your marketing team will set up an ad to a different page at some point and then everything is ruined.
Step 2: Read the browser cookie, don't generate one
Capturing and sending the click ID gets you an exact match on people who clicked your ad. The obref browser ID is the supporting signal that sits alongside it, and if you've got the ChatGPT Ads pixel on your pages (Step 0), it's already maintaining a first-party cookie holding that value for you. All you need to do is read it back out:
The code above looks for the __obref cookie and gives back its value, or null if the pixel hasn't set one yet. It also checks the value is a real UUID before handing it over, because a malformed one matches just as poorly as a missing one, and OpenAI will take it without a word either way.
When the cookie isn't there, the temptation is to generate a UUID yourself so that the field isn't sitting empty. Please don't. An obref that you invented has never been seen by OpenAI, so it can't possibly match anybody, and because nothing inside the user object gets validated, the API will return a perfectly happy 200 and let you believe it worked. Send the field only when you genuinely have a real value for it, and leave it out entirely when you don't.
Step 3: Generate a unique event ID for each conversion
If you've never set up conversion tracking before, this is going to sound a bit off to you, but you're actually going to end up sending each conversion twice, once from the browser through the pixel (that's Step 4) and once from your server through the Conversions API (that's Step 8). The redundancy is deliberate, and it's exactly what makes the whole setup reliable, because if the browser event gets blocked, then the server event still lands.
But for that to work without double-counting everything, OpenAI needs a way to recognise that the 2 events it just received are actually the same conversion. That's what the event ID is for. When the browser event and the server event carry the same id and the same event type, OpenAI collapses them down into a single conversion.
So generate one ID as soon as the conversion happens, and use it in both places:
crypto.randomUUID() is built into modern browsers and into Node, so there's nothing extra to install. Any unique string will do the job, as long as it's the same one across both halves of a single conversion. Hang onto it, because you're about to hand it to the pixel, then send it off to your server right after.
One case to watch out for. If your form redirects off to a thank-you page and you fire the browser event from there rather than in place, that variable is long gone by the time the new page loads. So park the ID in sessionStorage before the redirect and then read it back on the other side, which keeps both halves of the conversion carrying the same one.
Step 4: Fire the event to the ChatGPT Ads pixel in the browser
With the ID generated, the next thing to do is fire the browser half of the conversion. That's a single call to the pixel, and the important detail is passing your event ID through as event_id, because that's the thing that lets OpenAI line this event up against the server event that arrives later.
The event type has to match across both legs too, so if you fire lead_created here, that's what your server has to send as well. Same conversion, same name, same ID.
A quick word on timing, because this is where browser-side tracking goes wrong more than anywhere else. Fire this on a confirmed successful submission, not on a click of the submit button. There are all sorts of reasons a form doesn't actually go through when somebody clicks submit (they've typo'd their email address, a required field is empty, their payment method got declined), and if you fire on the click, you've just recorded a conversion that never happened. Worse, when they fix the problem and resubmit successfully, you fire a second one, so a single lead has now been counted twice.
So wait for the real success signal instead. Depending on your form tool and how you've got it configured, that's usually the success message appearing, the redirect over to a thank-you page, or the form tool firing its own "submitted" event.
Step 5: Send everything to your server
That's the browser side of the conversion done. Everything from here happens on your server, which means all of the pieces you've been gathering in the browser need to get there first.
Right now they're scattered about. There's the event ID you generated in Step 3, the oppref sitting in the cookie from Step 1, the obref from OpenAI's own cookie in Step 2, the URL of the page the conversion happened on, and whatever details the form itself collected. All of that has to arrive at your server together, as a single record.
So the moment the form is submitted, bundle it all up and post it to your own endpoint:
The code above reads the click ID back out of the cookie you set in Step 1, grabs the browser ID using the readObref helper from Step 2, adds the event ID and the page URL, and posts the lot off to your own tracking endpoint. The readCookie helper underneath is just a small utility for pulling a cookie value out by name.
That keepalive: true is the part to pay attention to, because leaving it off causes a bug that's genuinely horrible to track down. Submitting a form can sometimes navigate the page somewhere else (like off to a thank-you page or some other redirect), and when a page unloads the browser cancels any requests still in flight and your conversion gets thrown away before it ever leaves the browser. What makes it so unpleasant is that it doesn't fail consistently. On a fast connection the request often finishes before the navigation happens and everything looks perfectly healthy, and then on a slow phone connection it quietly disappears. Setting keepalive tells the browser to let the request finish either way.
If you'd rather use navigator.sendBeacon, that works too, but you have to wrap the payload in a Blob with an explicit type. A raw string gets sent as text/plain, which a JSON endpoint won't parse:
The 2 things only your server can see
Looking back at the data table, there are 2 fields we still haven't accounted for, and that's because you can't reliably get either of them in the browser.
The first is the IP address. A browser can't tell you its own public IP, so you read it off the incoming request instead. If you're sitting behind a proxy, a load balancer or a CDN, which you almost certainly are, it'll be in the X-Forwarded-For header rather than on the connection itself.
The second is the user agent. You can read navigator.userAgent in the browser and send it along with everything else, but the cleaner source is the User-Agent header on the request, because it's one less thing a client can lie to you about.
So your endpoint reads both of those off the request and stores them alongside everything the browser sent:
The code above pulls the IP out of the forwarding header, falls back to the connection IP if there's no proxy in front of it, reads the user agent off the request, and saves the whole lot down as one record.
The ordering in there is deliberate and worth copying. Write the event down first, acknowledge it, and only then try to forward it on to OpenAI. If you send first and store second, then any failure in the forwarding, a timeout or just a bad minute at OpenAI's end, loses the conversion entirely with nothing left to retry from. Store it first and the worst case is a conversion that arrives a bit late.
Once this is done, the record now has everything the next 3 steps need, so let's turn it into something OpenAI will accept.
Step 6: Normalise and hash the email on your server
With everything now sitting on your server, the first job is turning the visitor's email address into the hash OpenAI expects.
Out of everything in that table earlier, the email is the only field that gets hashed. You lowercase it, trim the whitespace off it, and run it through SHA-256:
The code above bails out and returns null if there's nothing usable there, otherwise it tidies up the address, checks that it actually looks like an email, and only then hashes it. And that shape check in the middle is doing far more work than it appears to be, which brings us to the thing you really need to understand about this API.
Your validation is the only validation
Back in the data table we mentioned that the user object isn't validated. Here's what that means in practice.
We tested this against the live API, and every single one of the following came back as a successful 200 {"accepted_events":1}:
- An unknown field inside
userthat OpenAI has never heard of email_sha256set to the literal string"nothex"email_sha256holding a raw, unhashed email addressobrefset to the number123- A country of
"NOT_A_COUNTRY", an IP address of"not.an.ip", and a 500-character city name
Sit with that one for a second, because the consequences are genuinely nasty. You could ship an integration that sends raw unhashed emails to OpenAI, watch it return successful responses forever, see a perfect delivery rate on your own dashboard, and it would match precisely zero conversions (and nothing anywhere in the system would ever tell you).
And as we covered earlier, there's no Event Match Quality score here to catch it either, because the identifier coverage percentage in Ads Manager only reflects whether a field was present, not whether what was in it was valid.
So the rule is this. Every identifier you send has to be checked by your own code before it goes out the door, because OpenAI will not check it for you and will not tell you when it's wrong. That's why the shape check happens before the hash rather than after it, because an incorrectly formatted email address (or an empty email) produces a perfectly valid-looking 64-character hash that will never match a single conversion.
It's also why a test that asserts "the API returned a 200" proves absolutely nothing here. It is the least meaningful assertion you can possibly write against this API.
Step 7: Build the payload
With the email hashed and the identifiers gathered up, you can put the actual event together. Here's a function that assembles the whole thing:
There are a few deliberate choices baked into that which are worth calling out.
- Every field is added conditionally - Nothing gets set unless there's a real value for it, because an empty string is still a value as far as this API is concerned, and it'll take one without complaining. If you haven't got something, omit the key entirely rather than sending it empty.
- The click ID sits at the event level and the browser ID sits inside
user- This is that awkward pairing we flagged under the data table earlier.opprefgoes on the event itself,obrefgoes inside theuserobject, and the 2 are very easy to type the wrong way round when you're moving quickly. The comments in the code are there as a reminder, because puttingopprefin the wrong place still returns a 200 but matches nobody. - An event with neither a click ID nor an email returns
null- There's nothing for OpenAI to match it against, so there's no sense burning a request on it.
The conversion value, and the 100x mistake waiting to happen
If you want revenue showing up in your reporting, you send amount and currency, and both of them live inside the data object. Put them at the event level and they're rejected as unknown fields.
But here's the trap. The amount field is an integer in the currency's ISO 4217 minor unit, so for US dollars that's cents rather than dollars.
That payload is $129.99, not $12,999.
This catches people out because every other conversion API you've ever used takes a decimal. Meta CAPI, GA4 and the Google Ads gtag all accept 129.99 and do the sensible thing with it. OpenAI wants 12999. So if you pass your dollar figure straight through the way you would for every other platform, you'll report a hundredth of your actual revenue and your ROAS will look catastrophic. Do it the other way round and you'll look like a genius right up until somebody checks.
Nothing warns you about any of this. Sending 129.99 at least gets you a 400, because it isn't an integer, so that one you'll know about. But sending 129 when you meant $129.99 is a perfectly valid event, and it will quietly report $1.29.
There are 2 more details worth knowing about the value fields:
- Currency becomes required the moment you include an amount - Sending an amount on its own gets you a 400 with a
missing_currencyerror. Sending a currency on its own is fine and just gets ignored. - Not every currency has 2 decimal places - Japanese Yen has none, so ¥1000 is
1000rather than100000, and Bahraini Dinar has 3. If you just multiply everything by 100, you'll be wrong for a decent chunk of the world.
So the conversion needs to be done off a proper ISO 4217 exponent table rather than a blanket multiplication. Here's what that looks like:
It checks the currency code looks sane, looks up how many decimal places that particular currency actually uses, and shifts the value across by the right amount.
The bit to pay attention to is what happens when the conversion isn't safe. It returns null, and back in buildEvent the caller then sends the conversion without a value attached rather than guessing at one. A lead that counts but carries no revenue figure is far better than a lead carrying a wrong one, because a wrong number will poison every ROAS decision anyone makes off the back of it.
One last gap here. OpenAI will accept negative amounts with a 200, so there's nothing at their end stopping you from reporting minus four thousand dollars of revenue. That's another one you'll need to guard against yourself.
Step 8: Send it to the Conversions API
With a valid event built, all that's left is posting it. The endpoint takes your data source ID as a query parameter and your Conversions API key as a bearer token:
That User-Agent header is not optional decoration, and it's probably the single most frustrating thing to debug on this whole integration. If you send a default Node or Python user agent, Cloudflare sitting in front of the API blocks the request with a 403 and error code 1010, before it ever reaches OpenAI. It looks exactly like an authentication failure, so you'll go off and regenerate a perfectly good API key, deploy it, and watch it fail in exactly the same way. Set an explicit, identifiable user agent and the problem disappears.
There are a handful of other behaviours here worth designing around:
- Batching is all or nothing - Send 3 events where one of them is invalid and you get a 400 naming the bad index, and none of the 3 are accepted. So don't write code that assumes partial success.
- Duplicate IDs inside a single batch are accepted - The response won't tell you that you've double-sent something, so you can't lean on the API to catch it for you.
- Timestamps outside a 7-day past window, or more than 10 minutes into the future, get a 422 - It's worth checking that locally before you send, so that a delayed event fails with a useful error of your own rather than burning through retries.
- There are no rate limit headers at all - What you do get back is an
x-request-id, which is the only handle OpenAI support can use to correlate anything, so log it.
Beyond that, the usual retry rules apply. Network blips and 5xx errors are temporary and worth retrying with a growing delay, whereas most 4xx errors mean you've sent something wrong and retrying will just fail identically forever.
Step 9: Test that it works
Before you point any of this at real campaigns, you want proof that OpenAI is receiving your events and reading every field correctly. There are 2 test mechanisms available, and you want both of them.
The first is validate_only. Setting it to true runs the whole validation path and writes nothing, which makes it perfect for checking your payload shape in CI without polluting a real account (and remember from Step 0 that nothing you create in a real account can ever be deleted, so not polluting them matters more here than usual).
The second is the Event Stream, which is the live view of events arriving. You'll find it in Ads Manager under Tools, then Conversions, then Event Stream. Pick your data source, hit Start polling, and then trigger a genuine conversion by submitting your form the way a real visitor would. It should appear within a minute or so, showing you the event type, the API channel it came through, and the raw JSON you sent.
Use the Event Stream to confirm things are working, rather than your own logs. Your logs will tell you that you got a 200 back, and after Step 6 you know exactly how little that actually means.
One caveat to be aware of while you're testing is that reporting lags ingestion by hours. The Event Stream is close to real-time, but don't expect a fresh conversion to show up in campaign reporting the same afternoon. If you're debugging, that lag will absolutely convince you something is broken when it isn't.
Things to think about
The 9 steps above will get a conversion into ChatGPT Ads. Turning that into something you can actually run in production, trust, and not get burned by later is a separate set of concerns. So here they are:
Deduplication
You're sending every conversion twice on purpose, once from the browser and once from your server. OpenAI collapses those back into one using the event ID and the event type, so both of those have to match exactly across the 2 legs. The way we do it in Converly is to generate the ID once (when the form is submitted) and then send that same ID with both the browser pixel and the server call, so the 2 are guaranteed to line up. Get either of them wrong and every conversion gets counted twice, which inflates your numbers and misleads the algorithm at the same time.
Idempotency
This one is separate from deduplication, and it's your own protection rather than OpenAI's. It stops you from processing the same conversion twice on your own side, which happens far more easily than you'd think. A client retries a dropped request, a beacon fires twice, a webhook gets delivered more than once. If you don't guard against it, you end up creating 2 events with 2 different IDs, and OpenAI can't dedupe those for you, because the IDs don't match.
The fix is to derive your event ID deterministically from the conversion itself (the submission ID, say) rather than generating a fresh random one on every attempt, and then to reject anything you've already seen at your own endpoint before you do anything else with it.
The ambiguous timeout
If your request to OpenAI times out, you genuinely do not know whether the event landed or not. There's no way to ask, and there are no rate limit headers or delivery receipts to consult. With a stable event ID this is survivable, because a retry that does land will just dedupe against the first attempt. Without one, you're choosing between double-counting your conversions and losing them, and neither of those is a great option to be picking between in production.
Your own validation layer
By this point in the article this should be obvious, but it's worth restating as a thing to build first rather than last. Every field validated before it goes out, with a test covering the accept case and the reject case, because the API will never do it for you and will never tell you it hasn't. Any test you write that asserts on the response status is testing nothing.
timestamp_ms correctness
This one field has 3 different ways of biting you. It's in milliseconds rather than seconds, which is the opposite of Meta CAPI and catches everyone who's done that integration first. It has to fall within a 7-day past window and no more than 10 minutes into the future. And if you're enriching events with details that arrive later from an API, the timestamp still has to be the moment the conversion actually happened, not the moment your code finally got around to sending it.
Auditability
When a conversion doesn't show up, or the marketing team asks whether their lead from Tuesday actually got tracked, you need to be able to give them a real answer. That means storing what you received, the exact payload you sent (with the email already hashed), and what came back, including that x-request-id. Keep all 3 together and timestamped, and ideally show them somewhere readable so that someone who isn't a developer can follow a single conversion all the way through. On this API in particular, it's the only way to ever prove anything, because the responses themselves tell you so little.
Security
Your Conversions API key has to live on your server and only on your server. That's the whole reason this is a server-side integration in the first place, and if the key ever leaks into browser code then anybody can fire events into your data source. Store it in a secret manager rather than hardcoding it, and be careful about logging full requests while you're debugging, because it's very easy to accidentally write an API key or a raw email address into your logs forever.
Your own tracking endpoint needs looking after too. It's public to the whole internet, so without an origin check and a sanity check on the payload, anybody can POST fake conversions straight into your ChatGPT Ads account and poison the optimisation.
Key rotation
Revoking the Ads API key invalidates every Conversions API key that was minted through it, which is a surprisingly large blast radius for what feels like a routine bit of housekeeping. If your conversions suddenly start coming back with a 401, the first thing to check is whether somebody rotated the parent key.
Permanence
Everything you create in a ChatGPT Ads account is forever. No deletes, no archiving, no updates, on data sources, conversion events or API keys. So design your setup once, deliberately, rather than iterating your way towards it inside a real account.
Bot and spam filtering
If your forms get spam, and most forms do, then every fake submission turns into a fake conversion. That's worse than just inflating your numbers, because fake conversions actively mislead the optimisation and teach it to go chasing exactly the wrong people. Filter the obvious junk out before you send anything. Honeypot fields, submission-rate checks and known-bad email domains all help.
Alternatively, you can use Converly
Everything above is buildable, but it's a lot of small details to get exactly right, and the many ways it can fail will do so without telling you what went wrong.
Converly is a SaaS tool that makes it easy. You simply select a trigger (e.g. a form being submitted on your site) and then select the actions you want to take (e.g. send a conversion to ChatGPT Ads, send a conversion to Google Ads, send a conversion to Meta, and so on).
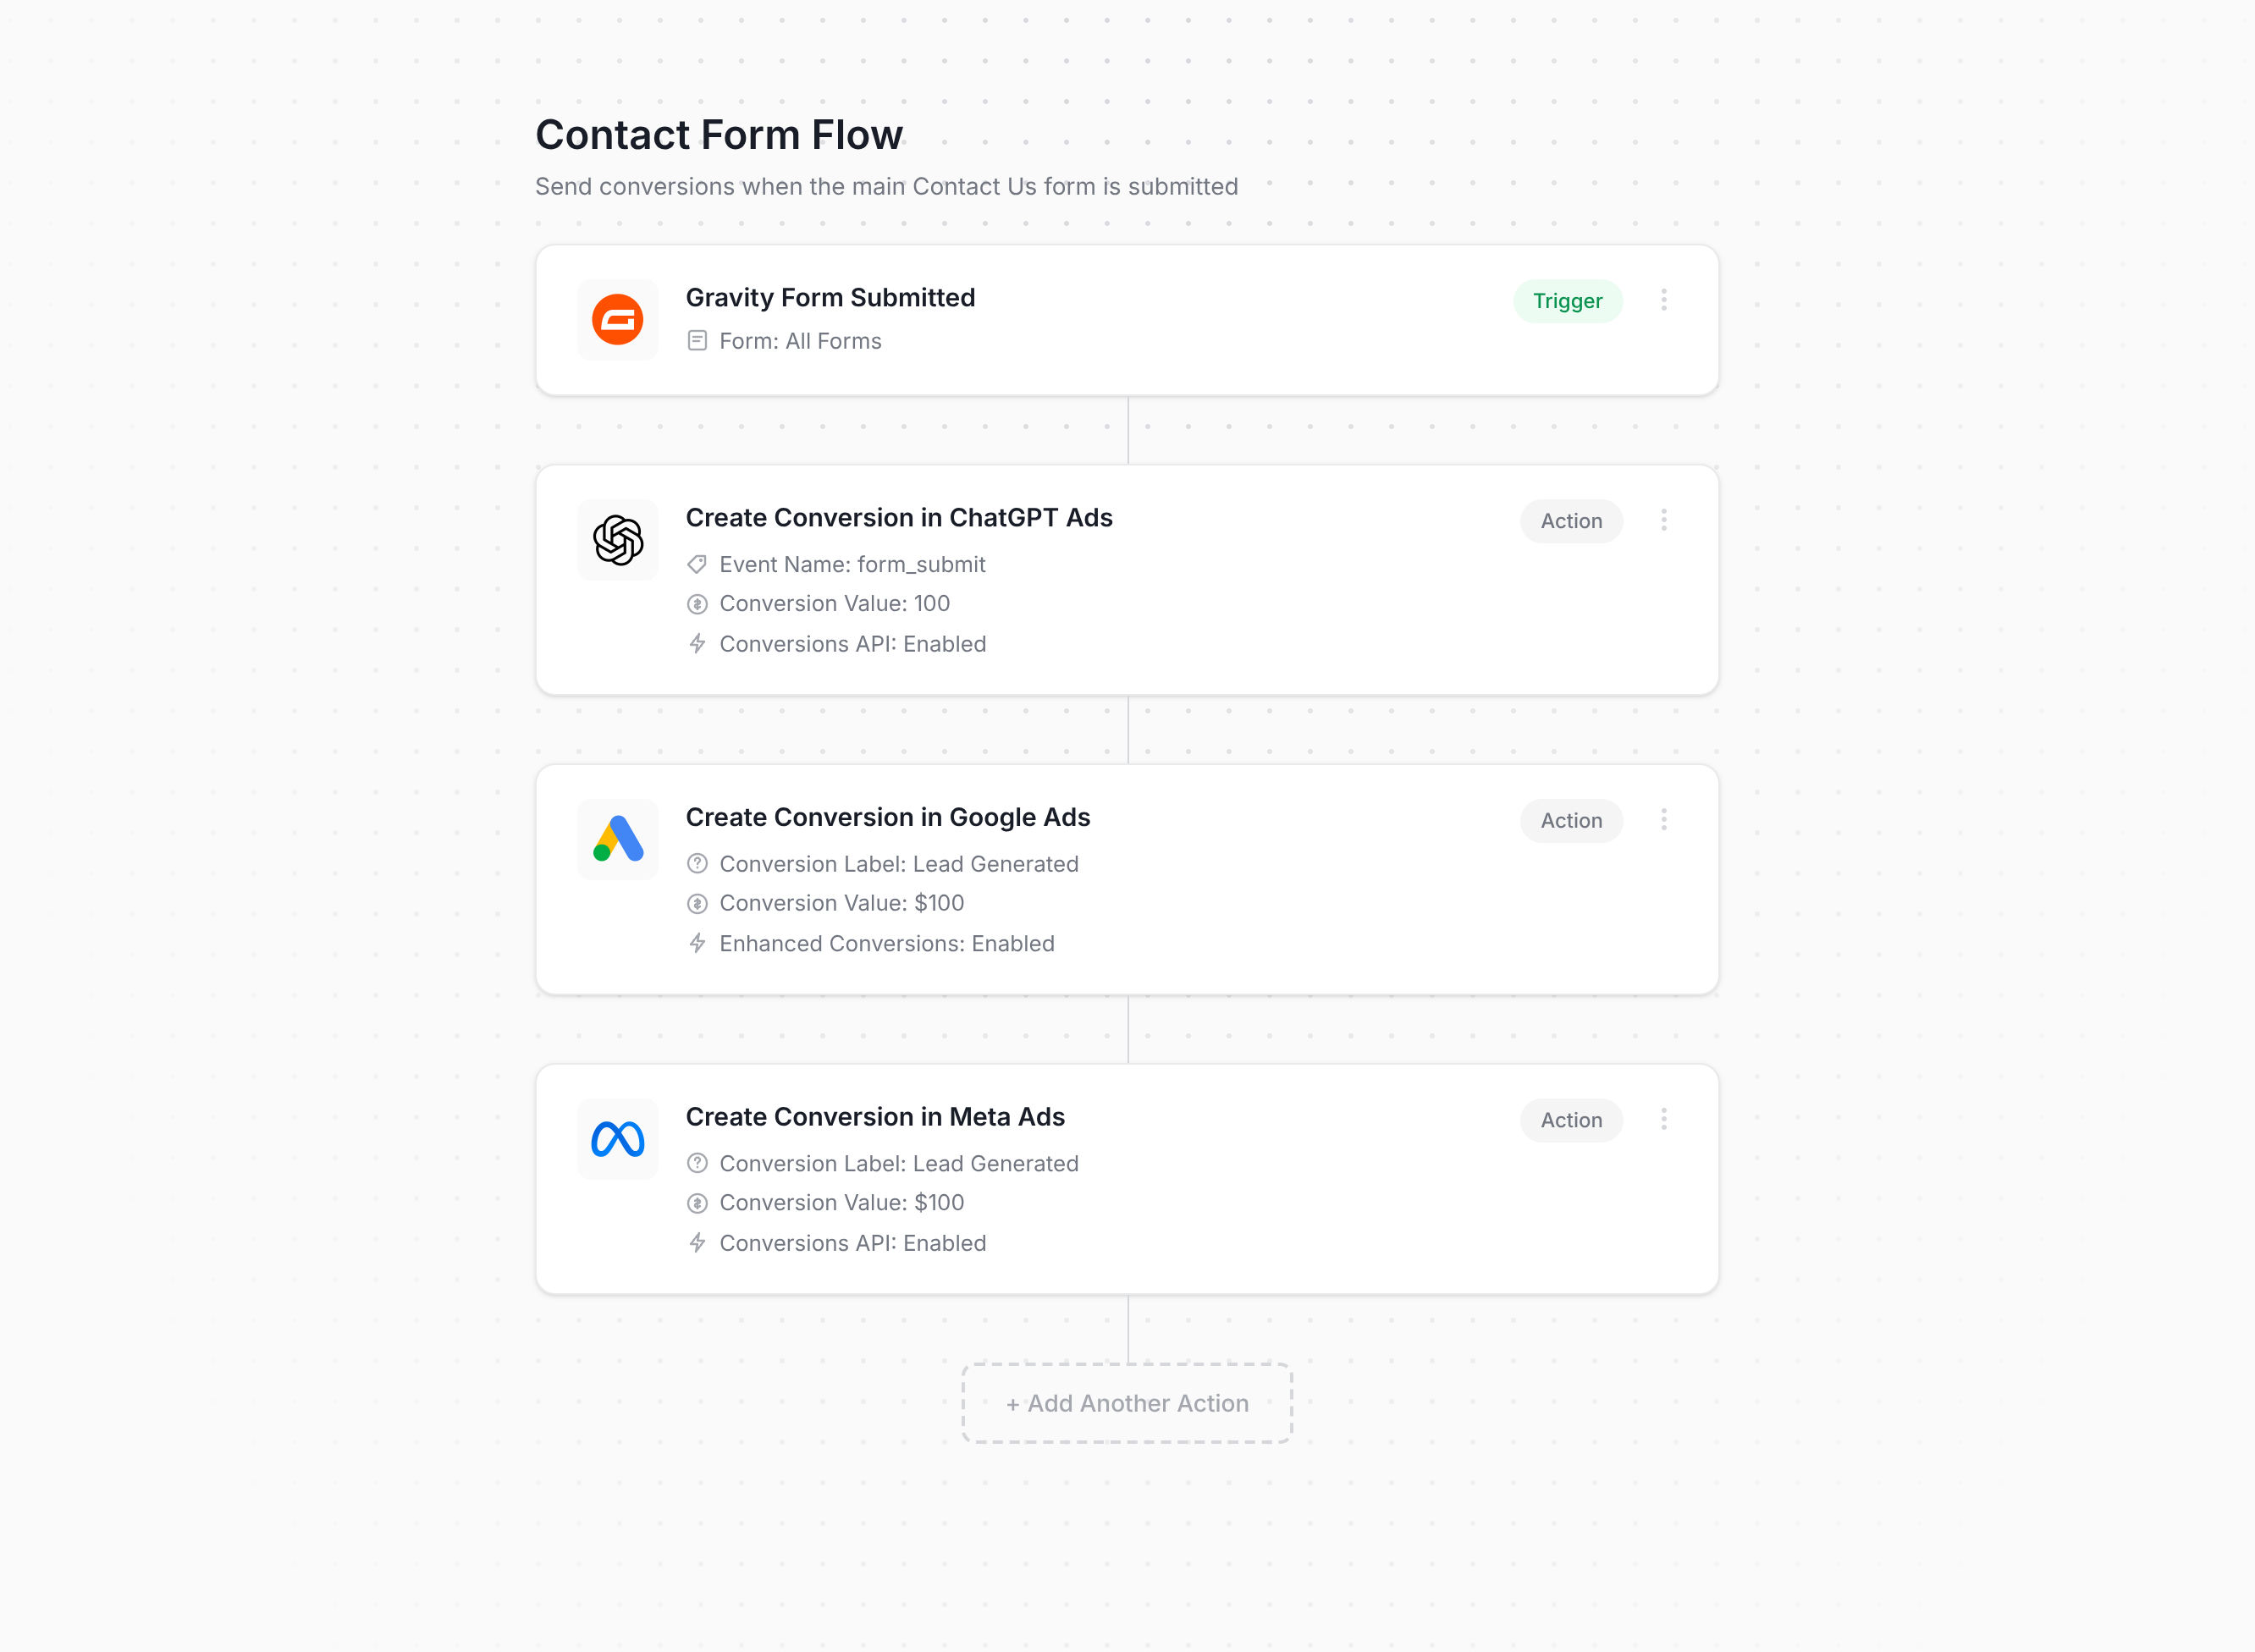
Converly then gives you a snippet of code to place on your website, and it takes care of everything else for you, including:
- Captures the
opprefclick ID and theobrefbrowser cookie automatically, along with the IP address and user agent. This is the browser-side advantage that pure server-to-server tools just can't match, because they never saw the visitor's browser in the first place. - Validates every identifier before it goes out. Since OpenAI validates nothing inside the
userobject, this is genuinely the difference between an integration that works and one that returns successful responses forever while your conversion count sits at 0. - Converts your conversion value into the right minor unit, including for the currencies that don't use 2 decimal places, and drops the value entirely rather than sending a wrong one.
- Sets up the data source, conversion event and Conversions API key for you, so you never have to work out which of the 2 identically-prefixed keys you're holding, or create permanent objects by trial and error.
- Handles deduplication, idempotency and retries, so nothing gets double-counted and nothing gets lost when OpenAI has a bad minute.
- Gives you a readable log of what was received, what was sent and what OpenAI sent back, for every single conversion.
- Fires the same conversion to ChatGPT Ads as well as Google Ads, Meta, GA4 and other platforms from one setup, so the work you'd do for ChatGPT Ads on its own ends up covering everything.
- Comes with real support. OpenAI, Google and Meta don't help you set conversion tracking up. We do.
If you're a SaaS business or similar, there's also an API integration method, which captures the browser-side information and then waits for your own backend to tell it that the signup was successful (useful if, for instance, you require email validation before creating the account). It's also the right fit for signup flows offering both a form and SSO options like Google, Microsoft and GitHub, as it also means you only report the conversion once you know the account has been successfully created (rather than the moment they clicked the signup button). There's an official Node SDK for it, @converly/sdk-node, which reads the correlation cookie off the incoming request, signs the call, retries transient failures, and dedupes on your own event ID so a retry can never double-count. It's also built to fail soft, so if the environment variables aren't set it quietly disables itself rather than taking your signup flow down with it.
And if you'd rather not click through a UI at all, there's a CLI (npm install -g @converly/cli) built for driving from Claude Code, Codex or whatever agent you're using, and every command prints a single JSON document so the agent can read what happened and carry on. There's also a hosted MCP server at app.converly.io/mcp that works with Claude and ChatGPT, with nothing to install. With either one you can just say "set up conversion tracking on my form and send it to ChatGPT Ads and Google Ads" and have it built, published and tested for you (the only step that still needs you is authorising the connection to the ad platform itself, and it gives you an OAuth link to do that, because that's a login neither we nor an agent should ever be touching).
Wrap Up
As you can see from this post, sending conversions to ChatGPT Ads looks straightforward… until it isn't. A user object that validates nothing, 2 API keys with identical prefixes, an amount field in minor units when every other platform on earth uses decimals, and objects you can never delete once you've made them.
None of it is hard once you know about it. The problem is that the API is cheerfully unhelpful about telling you, and a broken setup looks completely identical to a working one from the outside. On top of that, you've then got idempotency, auditability, security, and retries to think about before any of it is safe to run in production.
Or you can use a tool like Converly, which handles all of this for you. It sets up in a few minutes and runs on proven infrastructure with full conversion logging and support.
Best of all? It comes with a 14-day free trial, so you can try it for free, and if for some reason it doesn't work for you, then you can fall back to building it all manually yourself. So save yourself some time and headache and give Converly a try today.
About the author

Aaron is the founder of Converly. With over 15 years of experience in digital marketing and SaaS, he's passionate about helping businesses track and optimise their ad conversions.