


Track Elementor Forms submissions as conversions in Google Ads
Learn how to send server-side conversions to Google Ads whenever an Elementor Form is submitted on your WordPress site. No code required!
Google Ads can be a fantastic source of new leads and customers, but actually setting conversion tracking up correctly is surprisingly painful.
Tools like Google Tag Manager expect you to write custom JavaScript that listens for form events, then wire together a maze of Tags, Triggers, and Variables before anything actually fires.
And simpler shortcuts like counting thank you page views often miss up to 30% of your real conversions thanks to ad blockers, browser privacy features (Safari is a big offender), and people clicking your ad on one device and converting later on another.
So what's a marketer supposed to do?
In this post, we'll walk through a super simple way to set up proper, server-side conversion tracking in Google Ads when someone submits an Elementor Form on your WordPress site.
Why you need to send conversions to Google Ads server-side
Accurate conversion data is actually the foundation you need to be successful with Google Ads.
That's because Google has incredibly powerful Smart Bidding technology that looks at hundreds of signals about a searcher (where they are located, what they've bought before, what device they are on, etc) to predict whether they are a good fit for your business, and it then uses that prediction to bid higher or lower in the auction depending on how good a fit they are.
It's really powerful, but it only works if you have accurate conversion tracking set up in your account. You have to be able to accurately tell Google Ads "this person converted, this one didn't" so it can figure out which kinds of people are the right fit for your business.
The trouble with most other tracking methods (thank you page visits, Google Tag Manager, etc) is that they rely on the user's browser to deliver the conversion back to Google, and that isn't accurate for a number of reasons:
- Ad Blockers — Ad blockers stop the Google Tag from firing on your pages, which means nothing the visitor does ever gets tracked.
- Privacy Features in Browsers — Browsers like Safari limit how long the Google Tag can track a visitor (often capping it at a single day), so if someone clicks your ad on Monday but doesn't convert until Thursday, the conversion couldn't be linked back to the original ad click.
- Using multiple devices — It's common for people to click an ad on one device (I.e. their work computer) and then come back later and convert on a different device (like their phone or home computer). Because these two actions happen on different devices, it's impossible to link them together as the browser on their work computer doesn't know the conversion happened in the browser on their home computer.
Server-side tracking solves all of this. It sends the user's details (like their name, email, phone, etc) directly to Google's servers (sidestepping ad blockers and privacy-focused browsers entirely, and giving Google the data it needs to match conversions to the original ad click even if they happened on different devices).
It really helps improve conversions too. In fact, Google's own data shows that switching to server-side tracking typically produces a 23% lift in total recorded conversions and a 10% drop in cost per conversion, because the algorithms finally have the data they need to understand what a 'good' visitor looks like for you.
3 simple steps to send server-side conversions to Google Ads from Elementor Forms
Here are the 3 steps you'll need to follow to get server-side conversion tracking running between Elementor Forms and Google Ads.
Step 1: Build your Conversion Flow in Converly
Converly was built to make it simple to send server-side conversions from Elementor Forms to Google Ads.

As the screenshot above shows, Converly gives you a simple visual workflow builder that anyone who's used Zapier or HubSpot Workflows will recognise instantly.
Just choose your trigger (in this case, an Elementor Form being submitted), then pick the actions you want fired (such as sending a server-side conversion to Google Ads).
That really is the whole setup. A handful of clicks later, you've got server-side conversion tracking wired up in Google Ads.
Step 2: Add the Converly code to your website
After you publish your Conversion Flow, Converly hands you a short snippet of code that needs to go on your WordPress site.
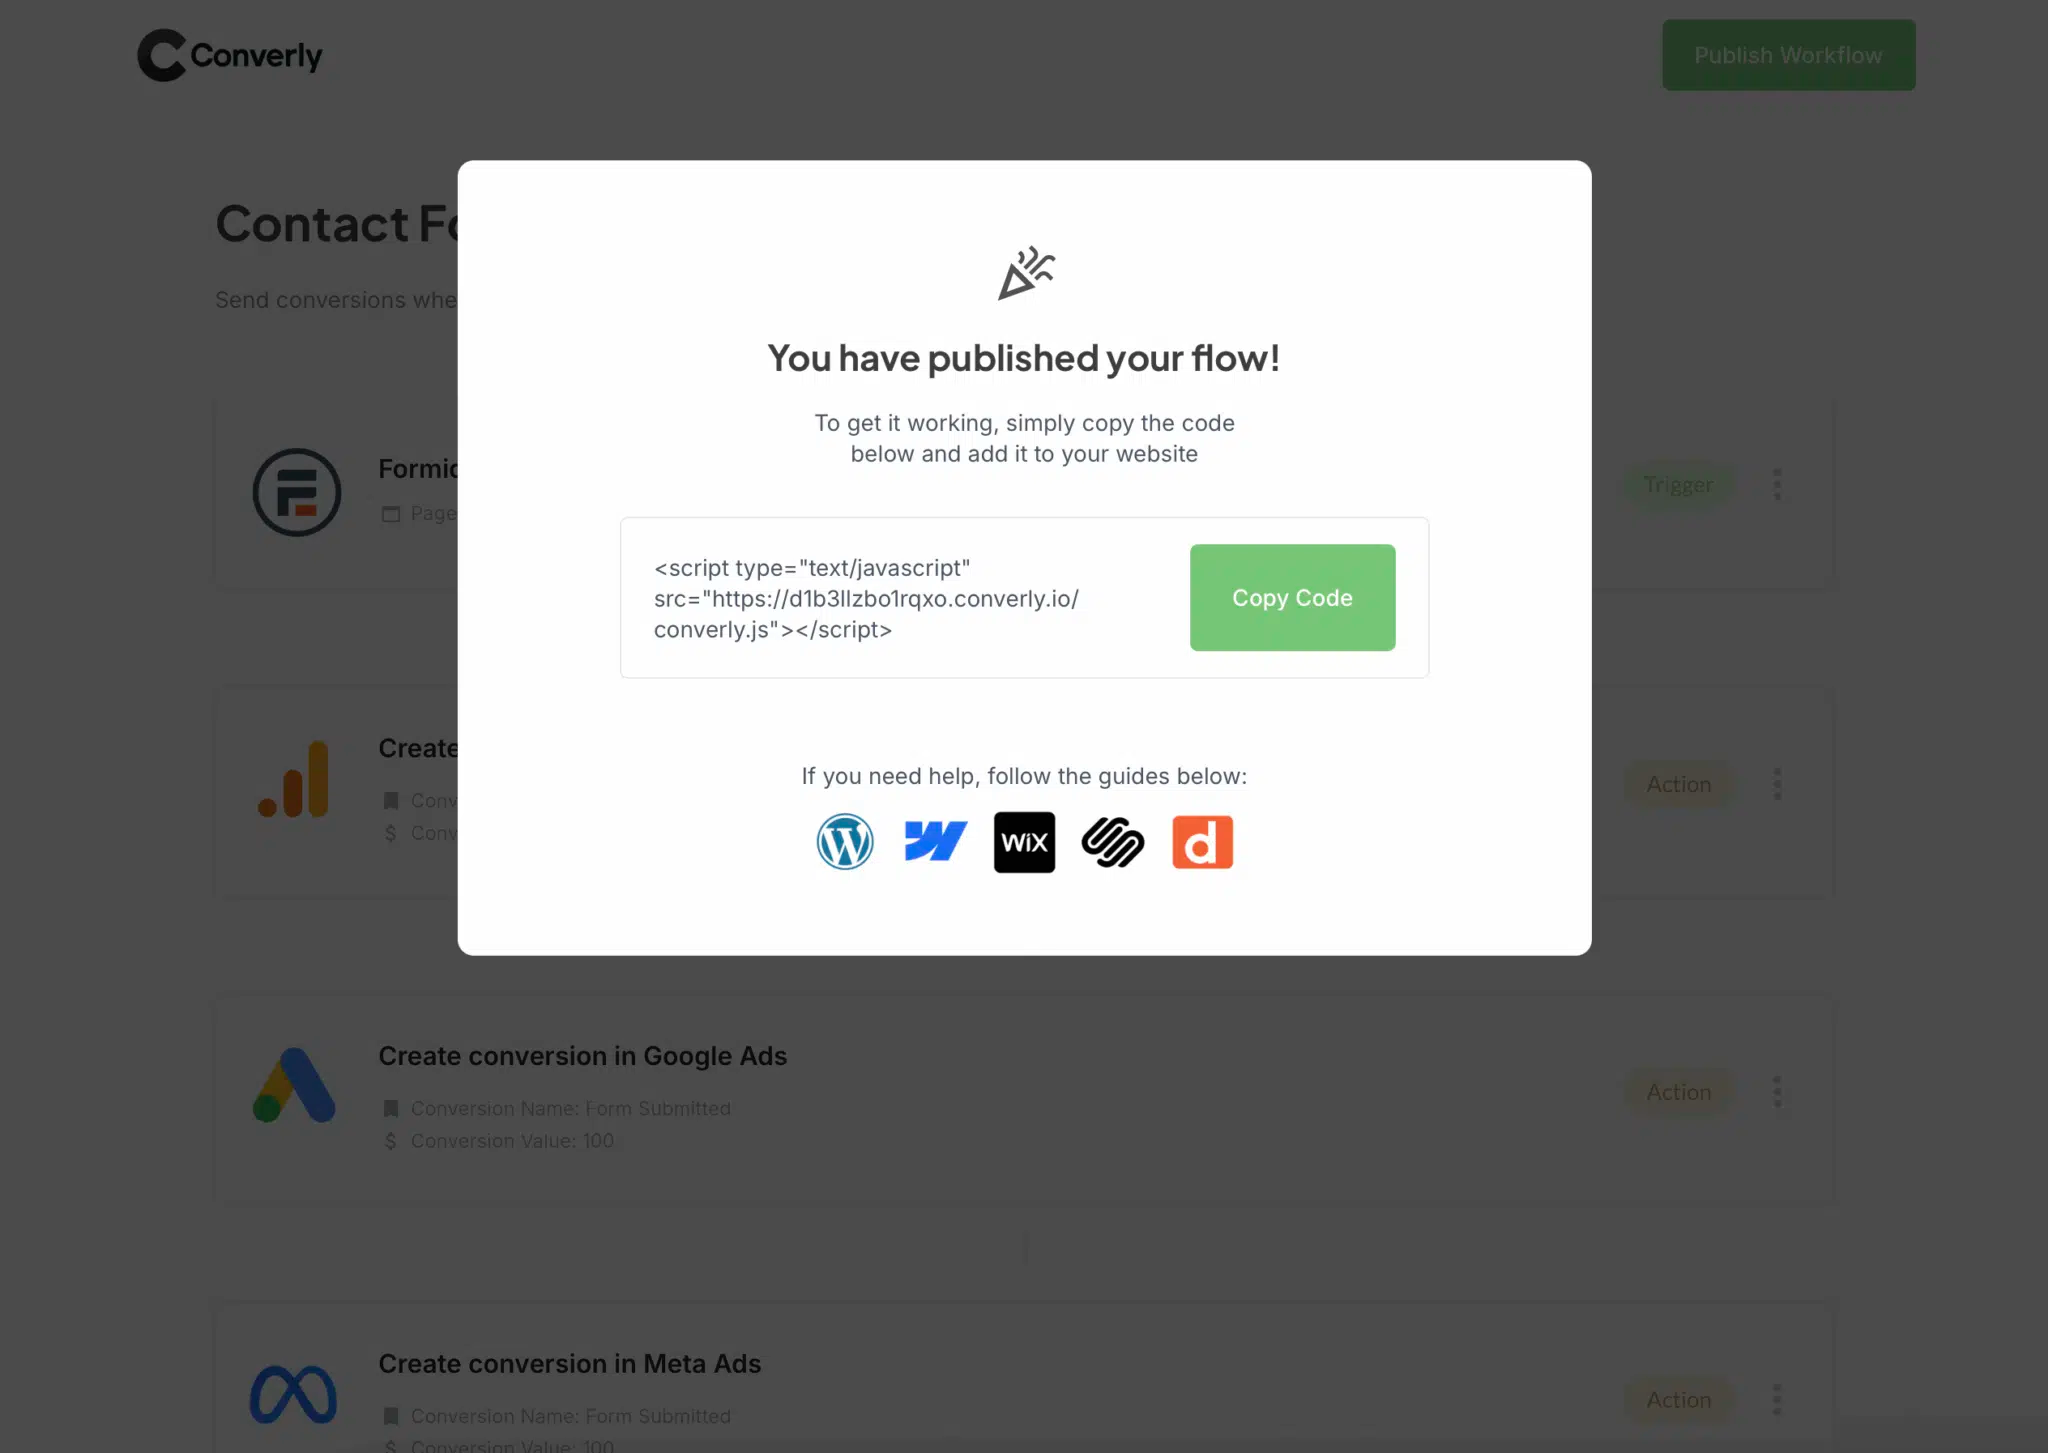
With Elementor, you've got a few options. You can add the snippet via the Theme Settings in your WordPress dashboard, install a free plugin like Insert Headers and Footers and paste it there, or add it through Google Tag Manager.
Step 3: Test it works
The last step is to head over to your website and submit one of your Elementor Forms to make sure everything fires correctly.
Then jump back into your Conversion Flow, click the 3 dots menu in the top right, and choose View Logs.
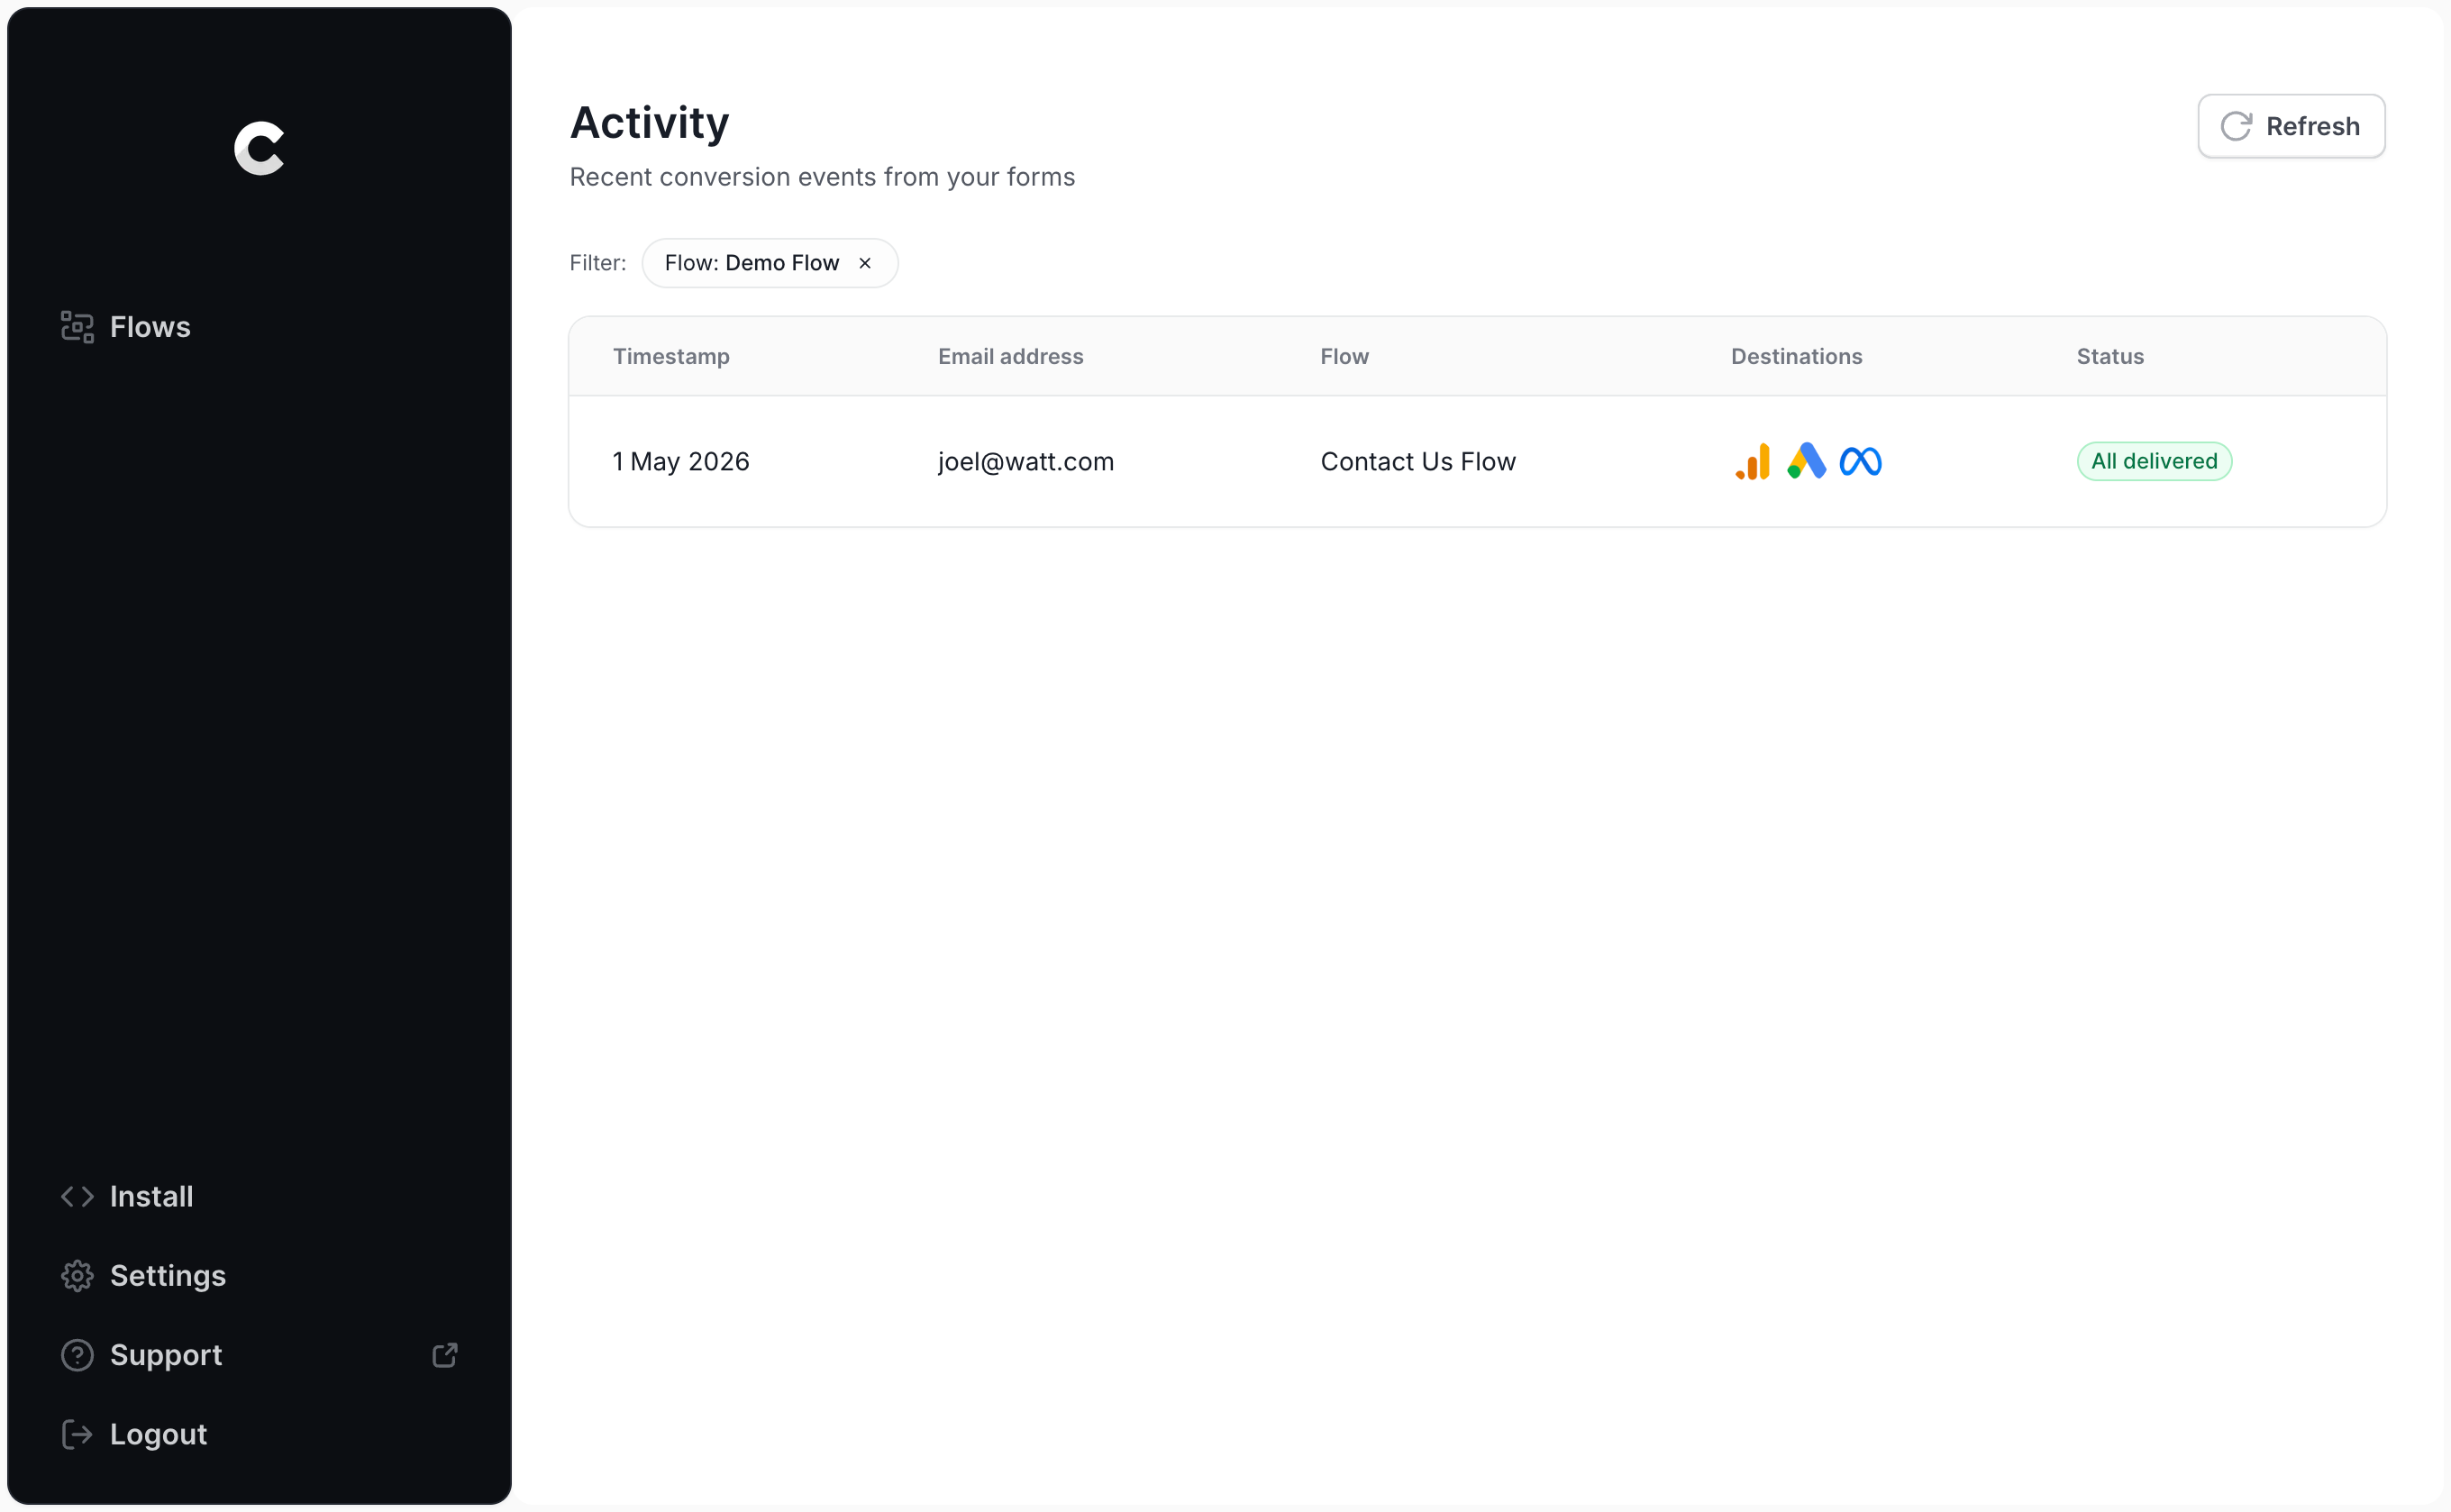
From the logs screen, click into your test entry and you'll see every detail about it, including whether the conversion was delivered to Google Ads successfully.
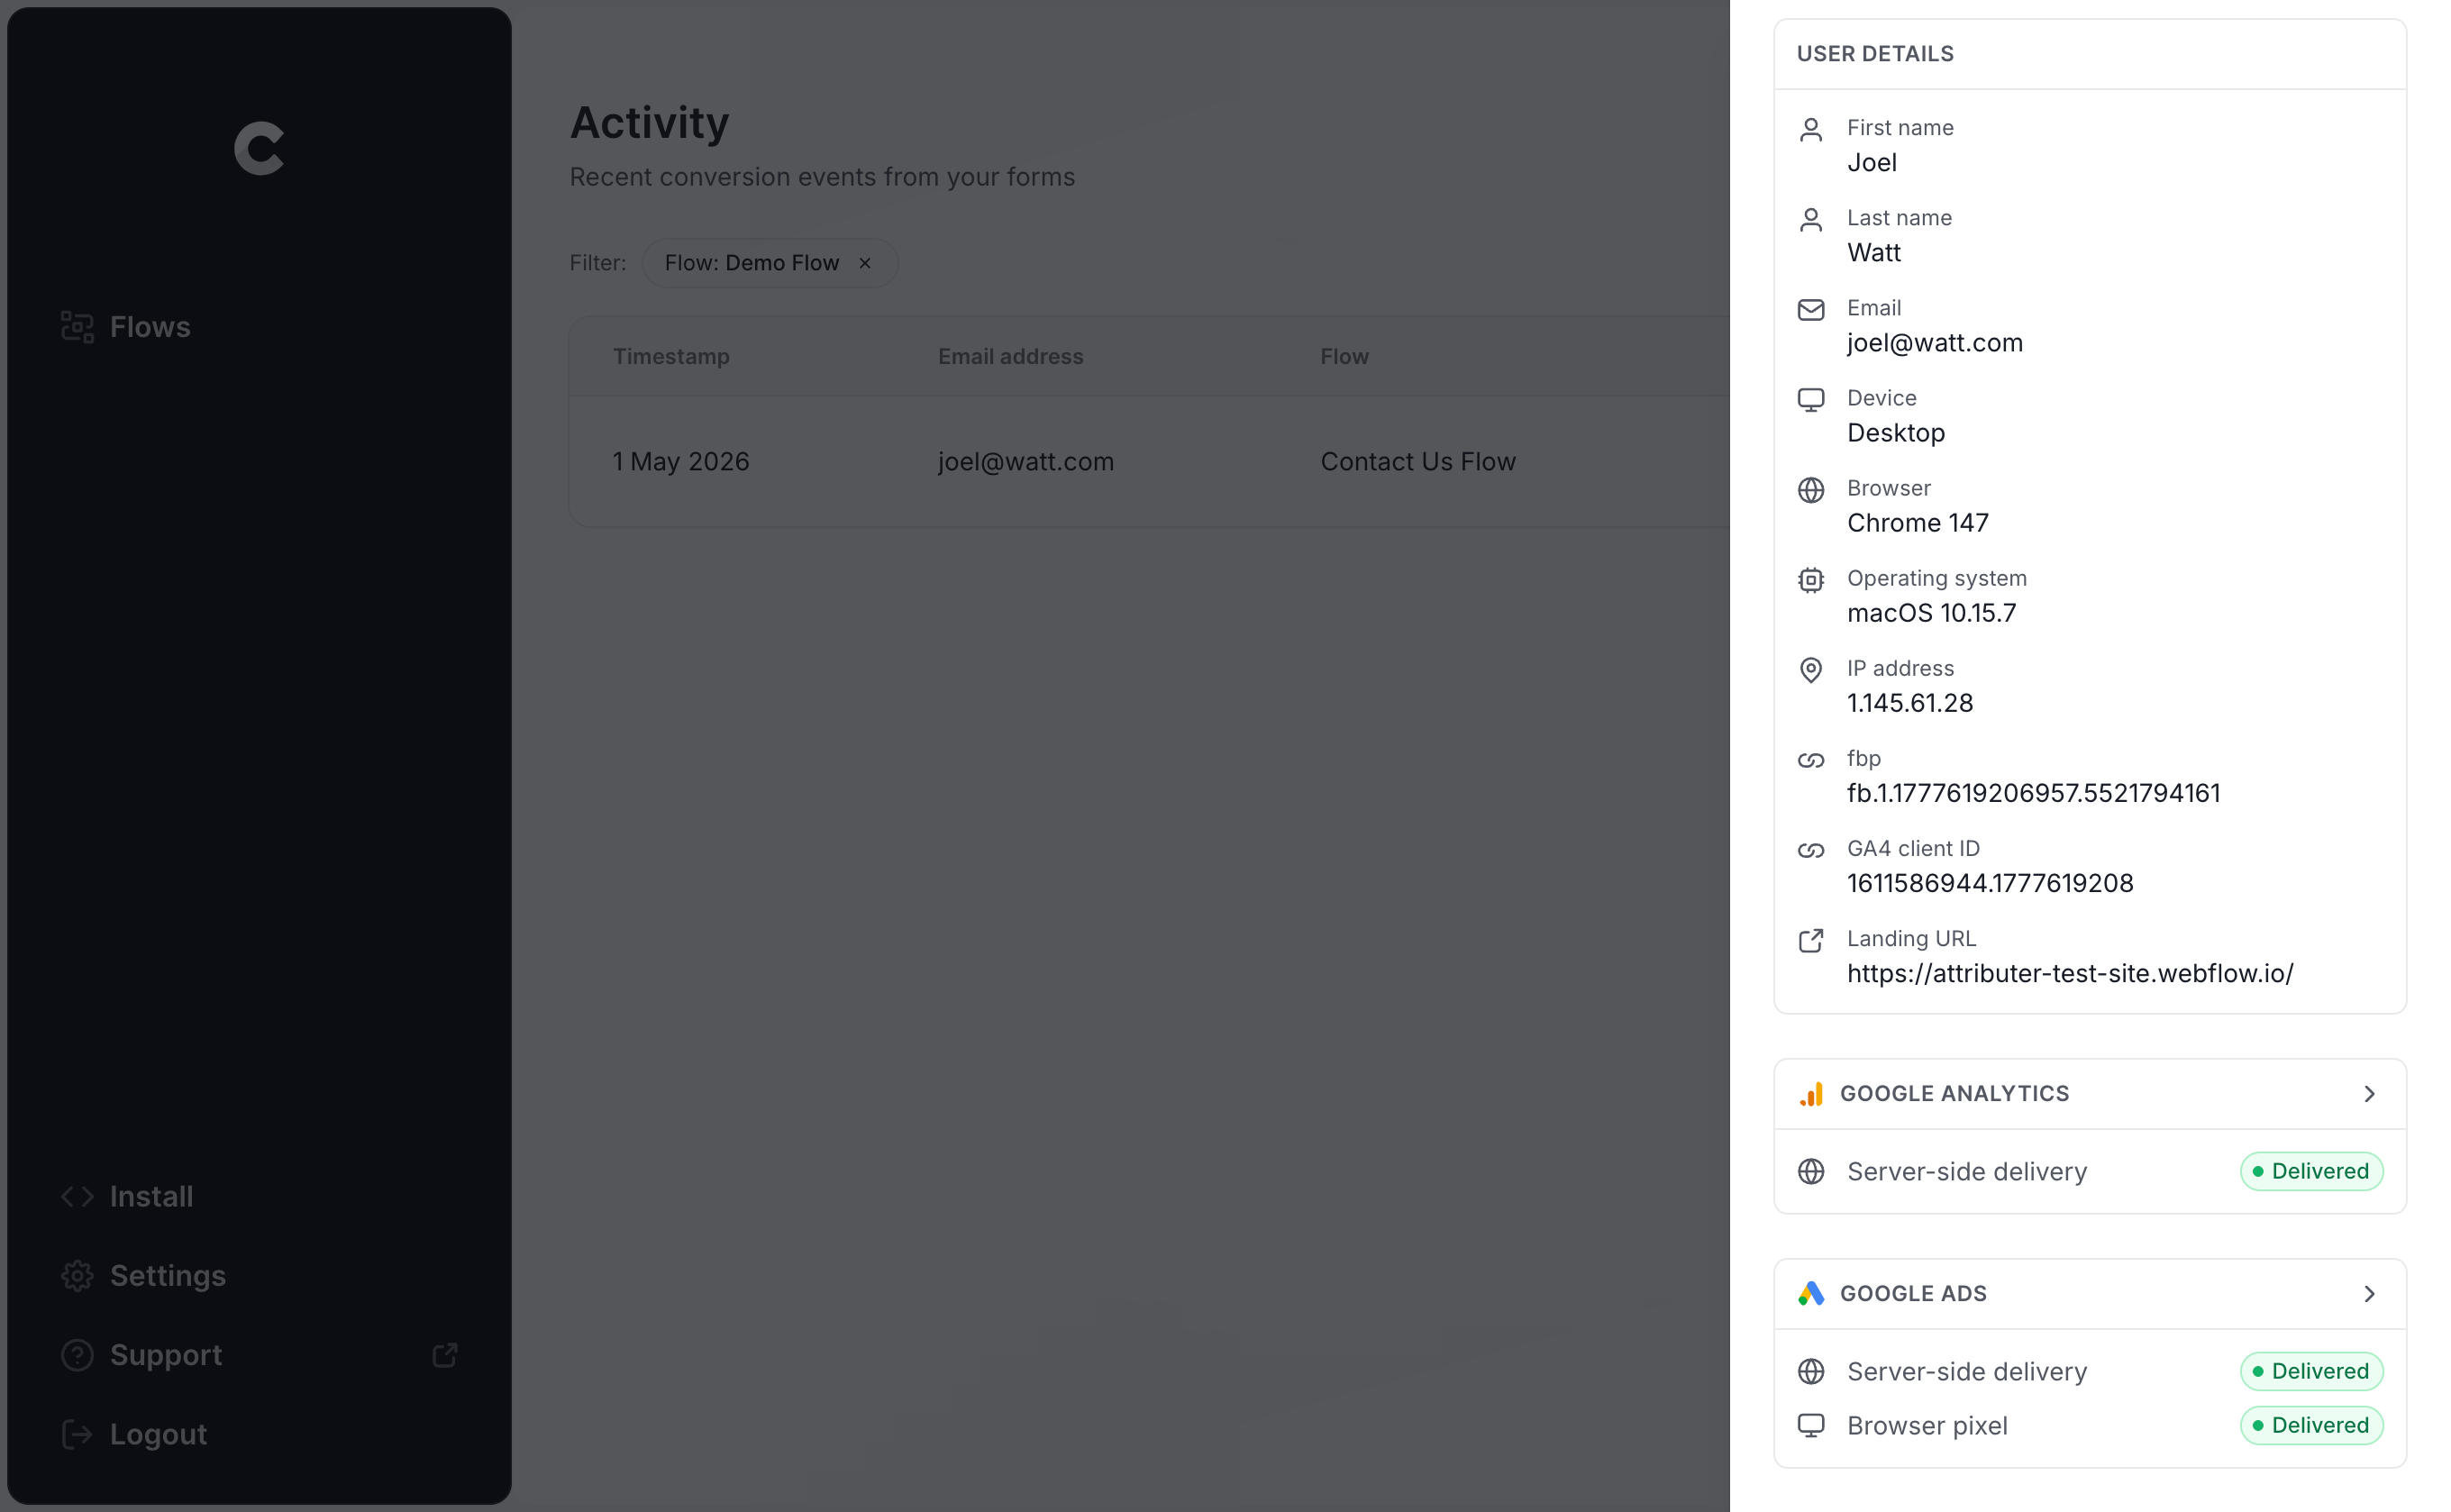
You can dig even further and inspect the exact payload that went to Google Ads, what their servers responded with, and so on.
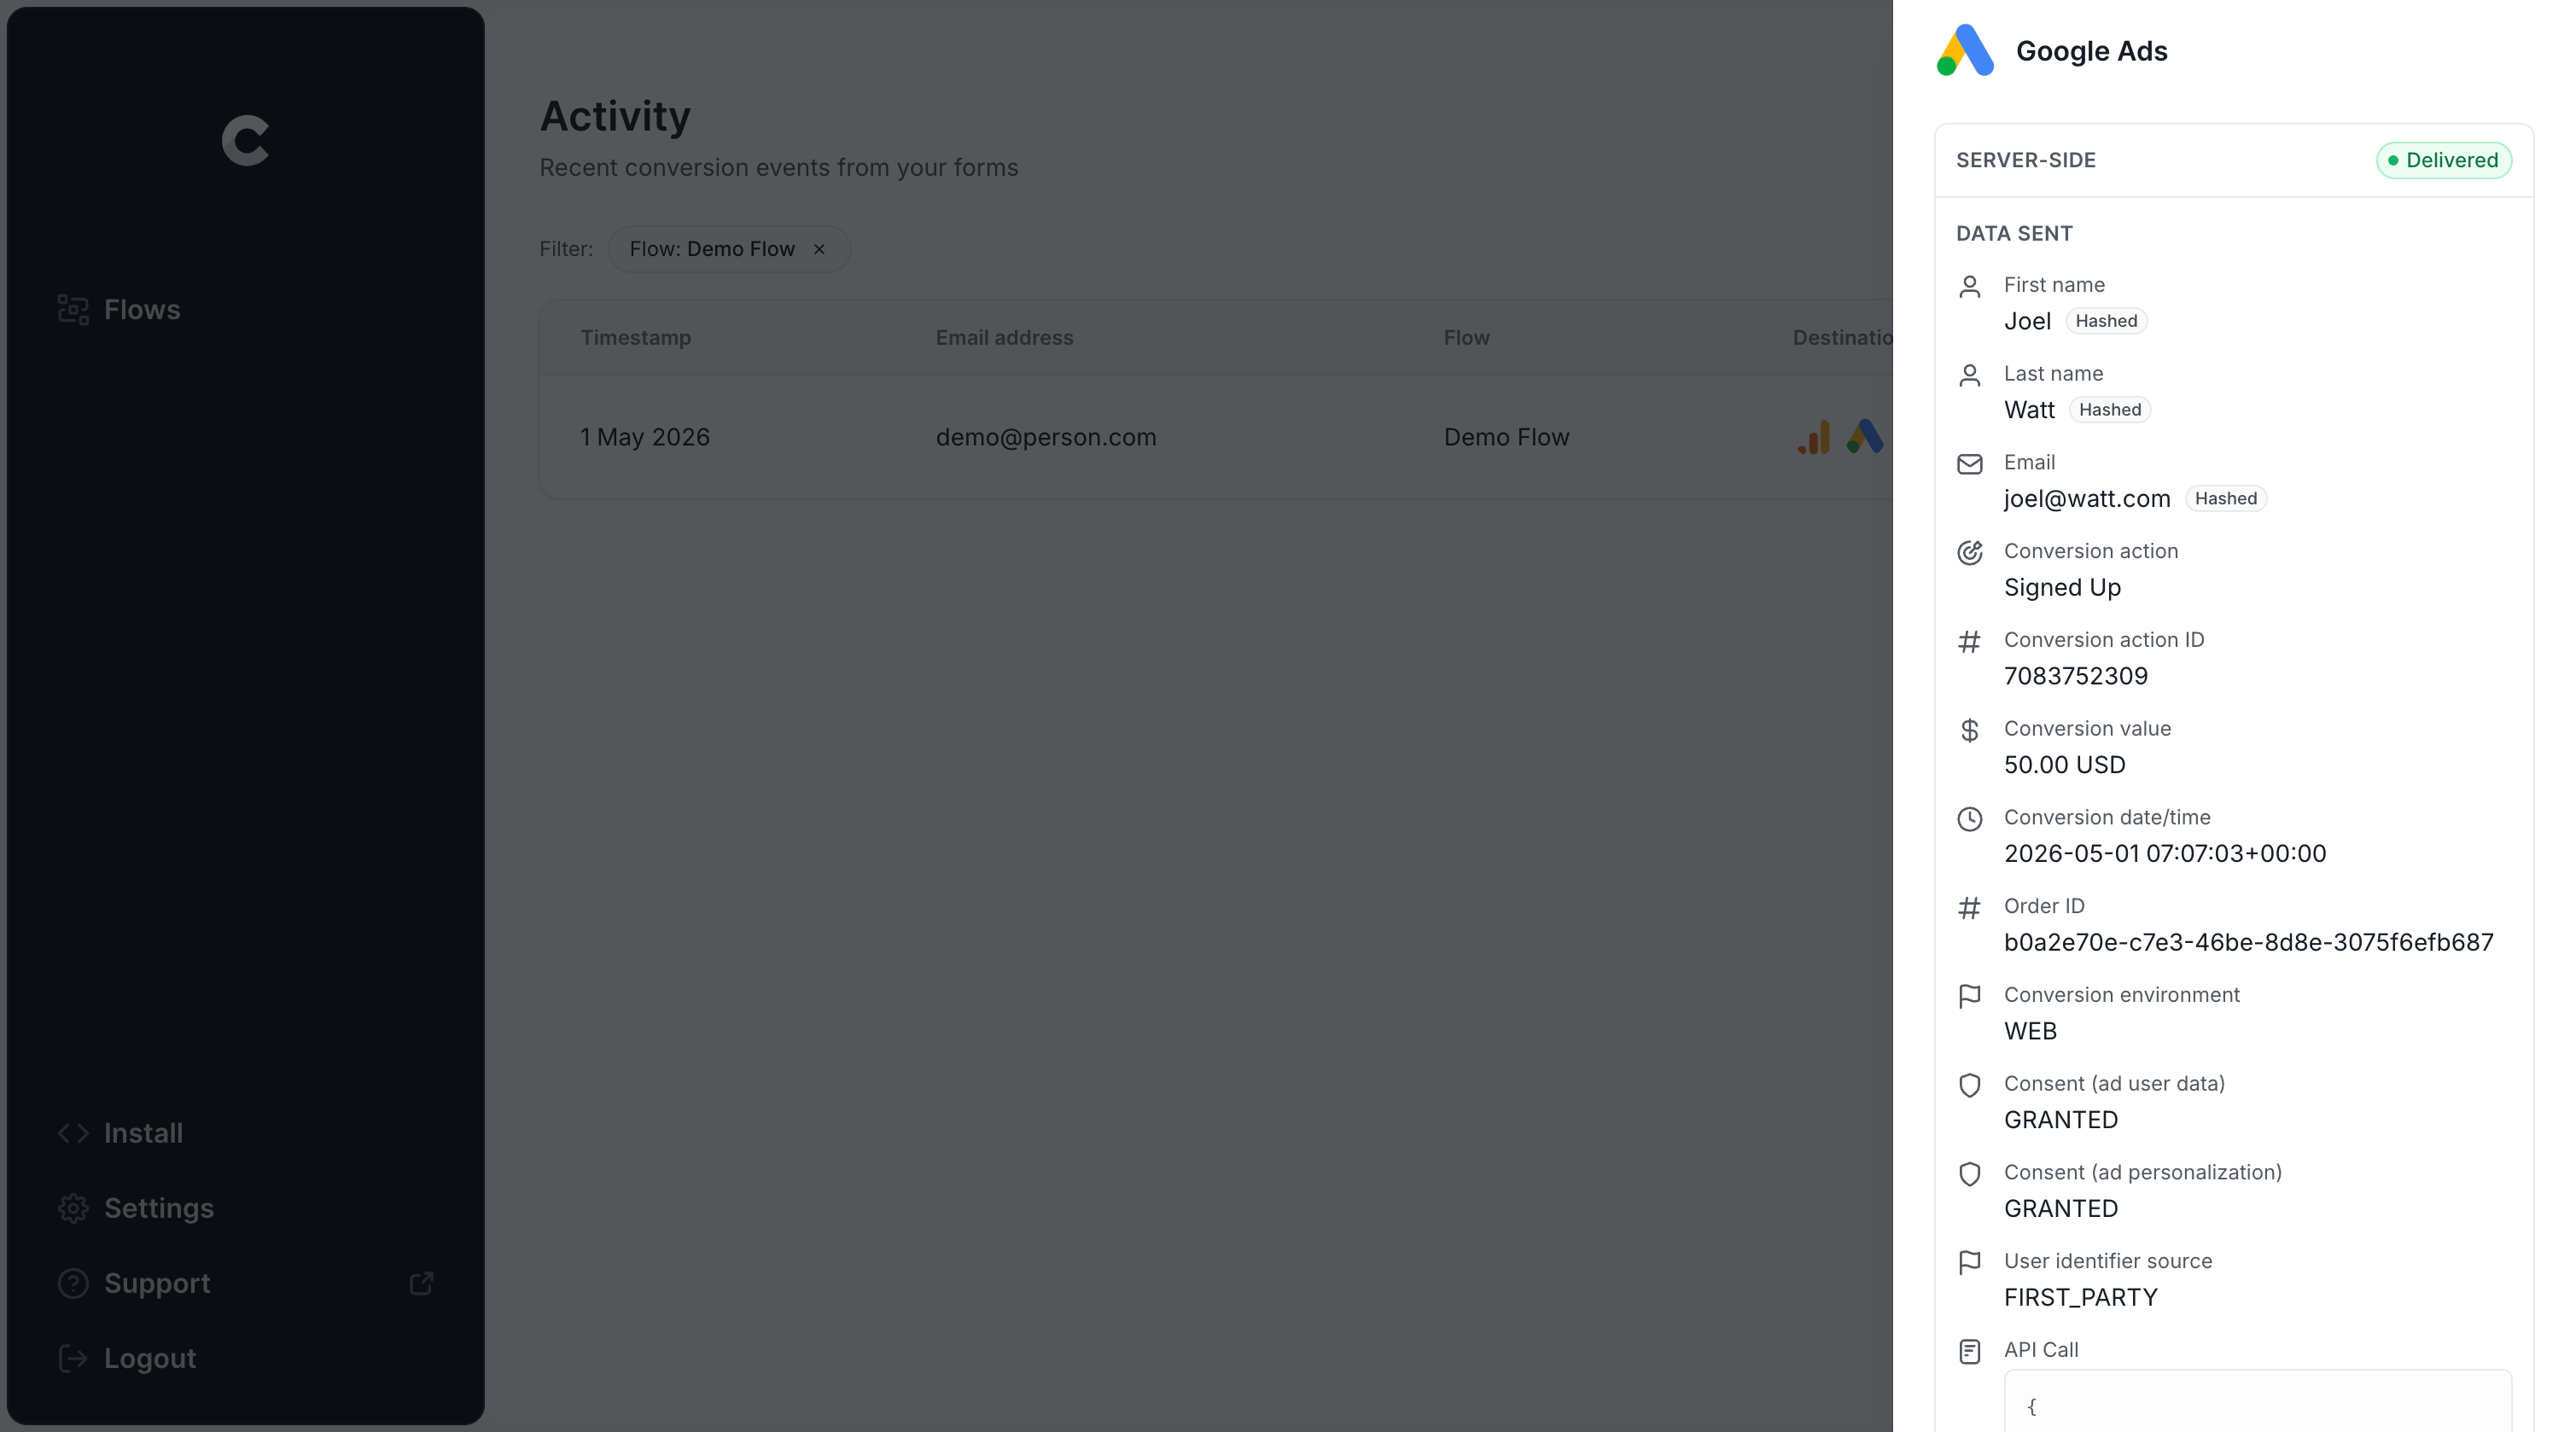
Once you can see your test submission in the logs and confirm it was successfully sent through to Google Ads, you'll know your conversion tracking is set up properly. From start to finish, it usually takes less than 5 minutes!
Why Converly is the best way to send conversions to Google Ads from Elementor Forms
There's more than one way to push conversions into Google Ads when an Elementor Form gets submitted, so why go with Converly? A handful of things make it stand out:
1. Easy to set up
Most people reach for Google Tag Manager when they need to send conversions to Google Ads.
The problem is that Elementor Forms doesn't have any sort of no-code integration with Google Tag Manager. It fires a JavaScript event called submit_success but you'd have to write custom listener code to catch it. Then you need to pull the visitor's name and email out of the form, hash them with SHA-256 (which Google requires), push everything into the DataLayer, and configure variables, triggers, and tags to send it over to Google Ads.
Unless you live and breathe GTM and can write custom JavaScript, that's a complicated project out of the reach of most marketers.
Converly makes it so much easier. You simply pick a trigger (an Elementor Form being submitted on your site) and choose what should happen as a result (a conversion being sent to Google Ads). Converly handles all the technical stuff for you, so you don't have to write custom JavaScript, wrangle with Variables and the DataLayer, or configure the correct tags and triggers.
2. Not affected by ad blockers and privacy restrictions
If you're relying on Google Tag Manager (or something more basic like thank you page tracking), a meaningful chunk of your conversions will silently vanish before they ever reach Google, blocked by ad blockers and privacy-focused browsers that prevent the Google Tag from loading when someone visits your site.
One study that reviewed more than 7 million conversions found that tag-based tracking was losing roughly 30% of conversions. About 5% of those losses came from ad blockers, and the rest (around 25%) came from browser privacy features.
But because Converly transmits conversions straight to Google's servers, none of that applies. Ad blockers and privacy settings can't get in the way, so your numbers stay accurate.
3. Works across devices
It's incredibly common for someone to first encounter your site on one device (their phone during a commute, perhaps) and then circle back later on a laptop to actually complete a form.
When conversions are sent from inside the browser (like if you use Google Tag Manager or simply track thank you page visits), there's no way to bridge those two sessions because they happen on totally separate devices.
Converly sidesteps that entirely by sending identity information (name, email, phone, and so on) directly to Google's servers, which lets Google reconnect the eventual conversion to the original ad click on the phone. That means your ads get the credit they deserve for the leads they actually generated.
4. Sends more data
Beyond the lead's name, email, and phone number, Converly also captures the technical signals that Google cares about (the GCLID, the visitor's IP address, their User Agent, and more) and ships those along with each conversion.
The benefit is that Google Ads ends up with a rich picture of the user who converted, which dramatically improves its odds of matching the conversion to the right ad click (even if that click happened on a different device weeks ago).
That means that Google's smart bidding algorithms have a lot more data about people who converted, and can serve your ads to people who meet that same profile in the future.
5. Supports multiple tools and platforms
Converly works with over 100 different form builders, scheduling apps, chat widgets, and other lead-capture tools.
And on the destination side, it can fire conversion events into Google Analytics, Google Ads, Meta Ads, LinkedIn Ads, Microsoft Ads, and plenty of other platforms.
So if you ever add a new tool to your website (like a scheduling app), or start running ads somewhere new, you're not rebuilding your tracking from zero. Just open Converly, click a few times, and you're connected.
6. Gives you a full conversion log and email alerts
When you push conversions to Google Ads using a tool like Google Tag Manager, you've got no reliable way to know whether it's still working. You can test it a few times when you first set it up, but unless you go back and re-test every week, your tracking can break without warning (someone changes the Elementor Form, edits a tag in Google Tag Manager, or adjusts something in Google Ads) and you'd be none the wiser.
Converly takes the guesswork out of it. You get a full conversion log showing every conversion that fired, exactly what data Converly captured, what it sent to Google Ads, the response Google Ads returned, and more.
You can also switch on email notifications. Get one every time a conversion is sent to Google Ads, or set them to only fire when a send fails, so the moment your tracking breaks you'll hear about it.
3 things you can do when you properly send conversions to Google Ads from Elementor Forms
Once you've got reliable conversion data flowing into Google Ads, a whole set of capabilities opens up that simply weren't possible before. You can:
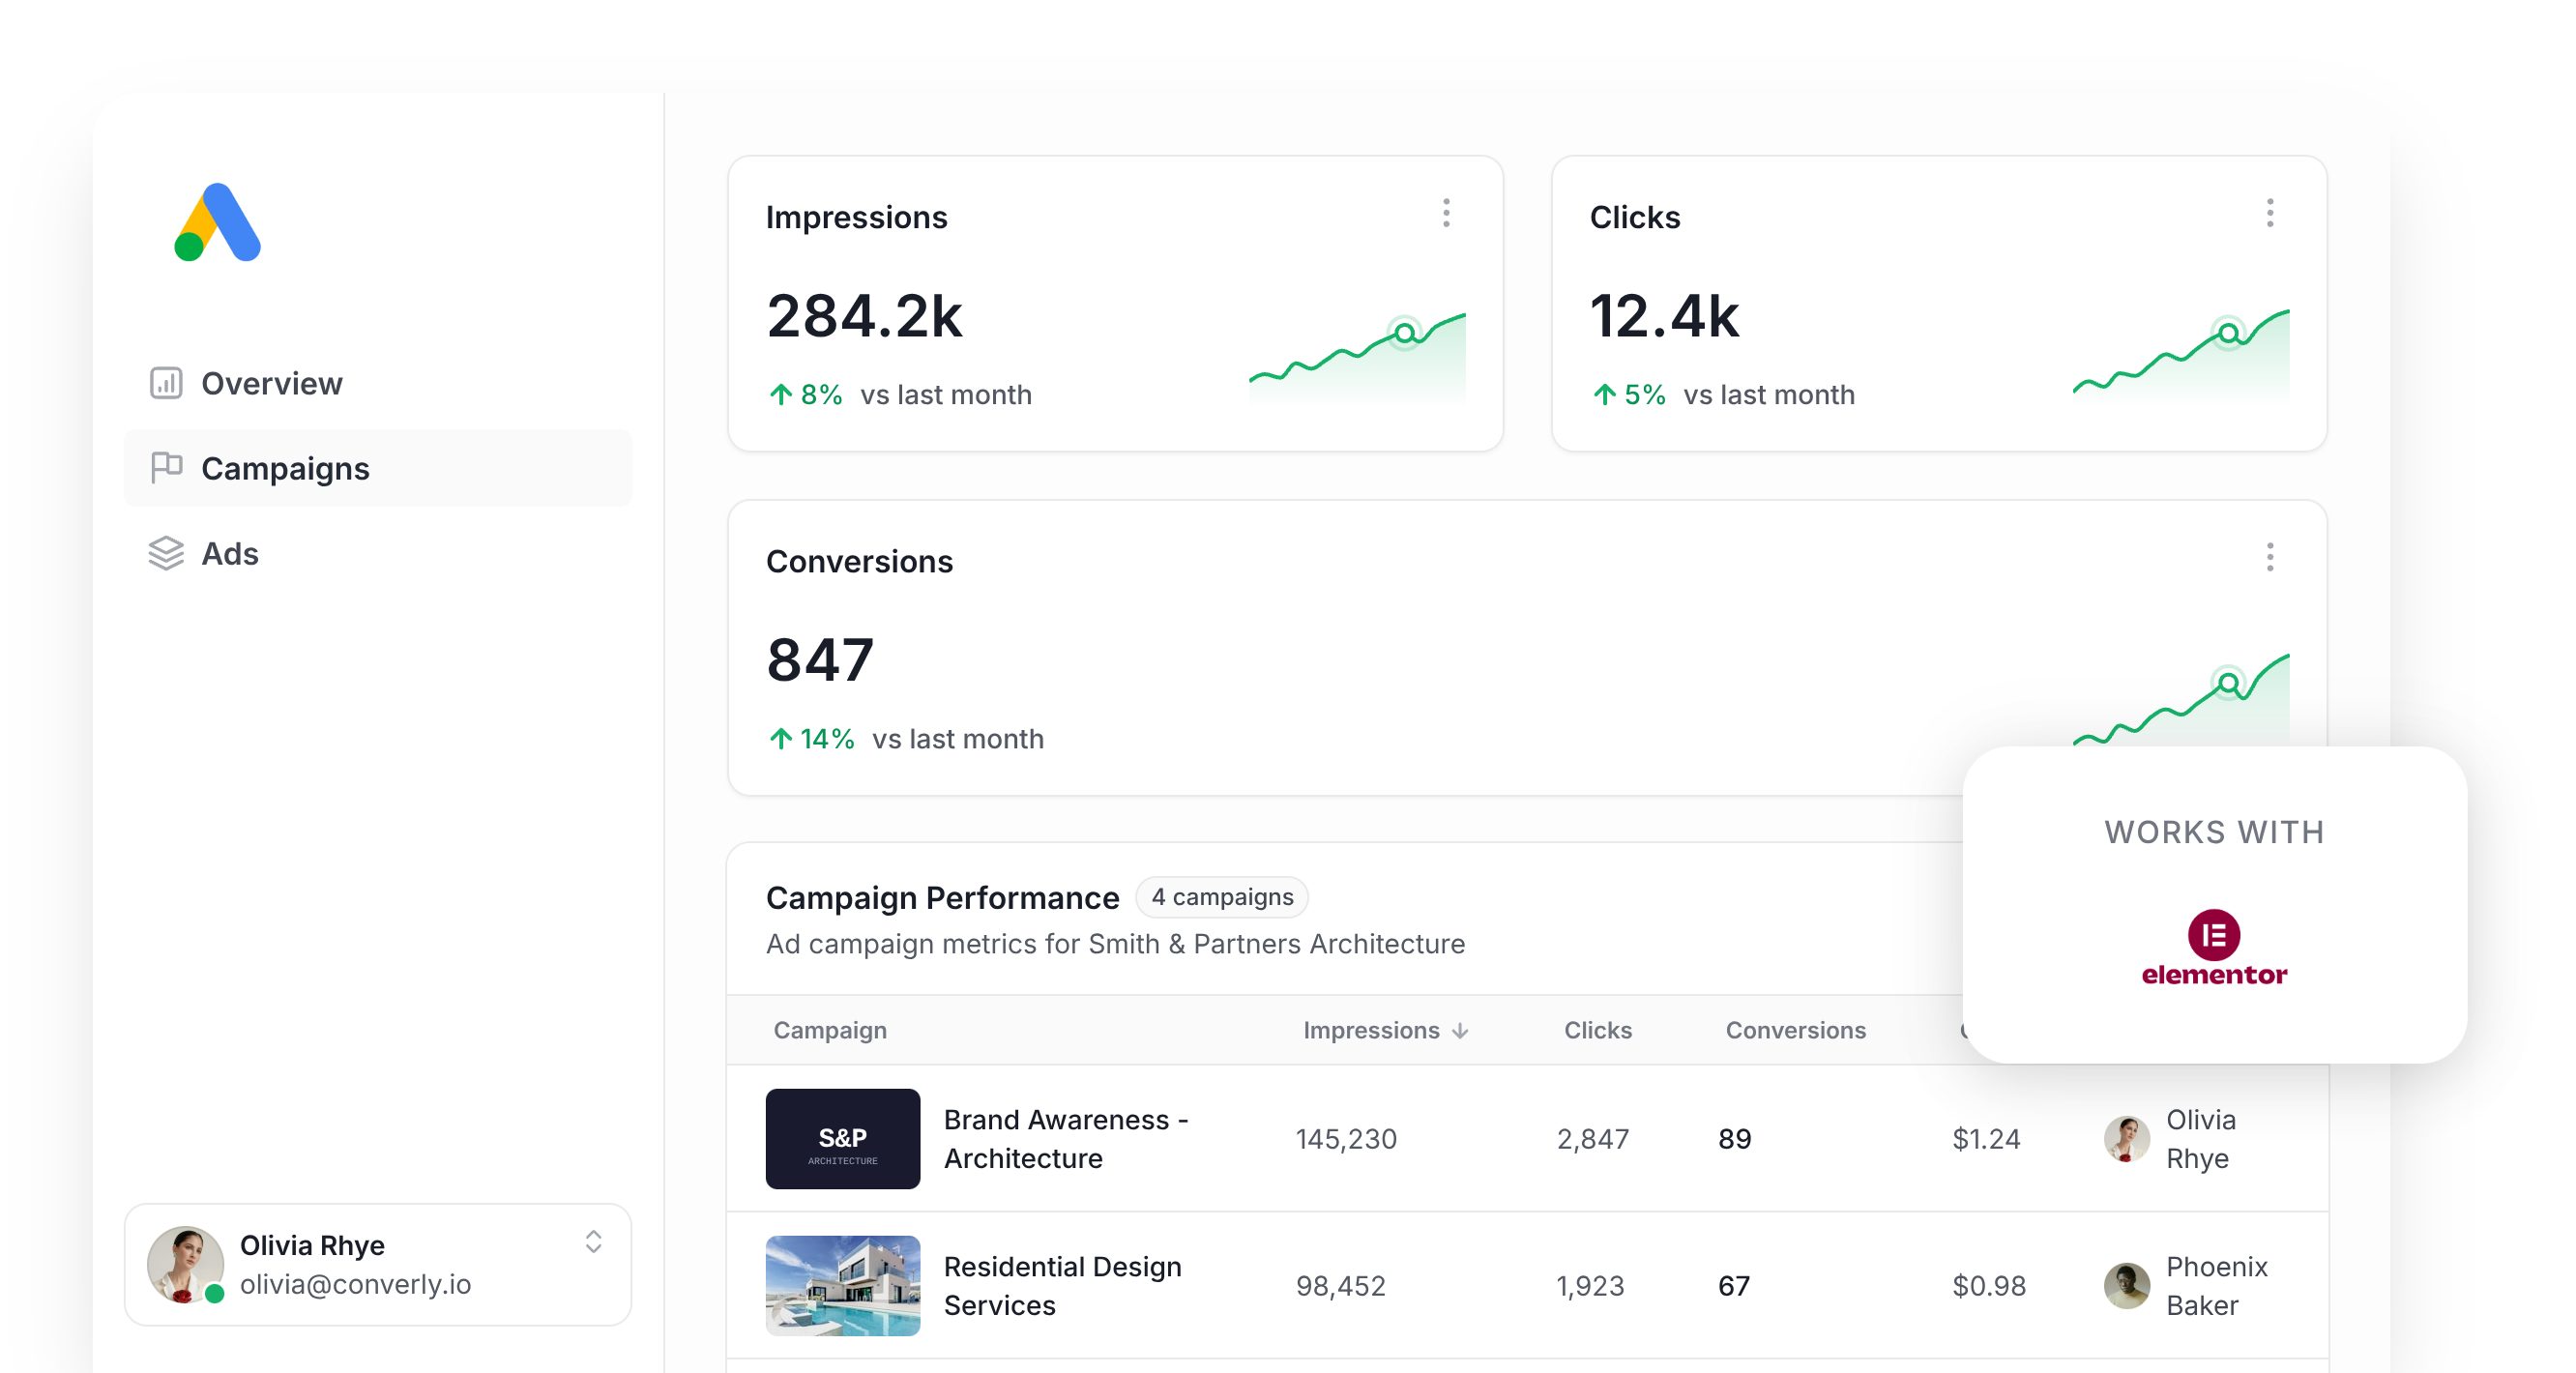
1. Report on conversions by campaign, ad group, keyword, etc.

With proper conversion tracking in place, your Google Ads reports stop being about impressions and clicks alone. You can now see conversions, conversion rate, cost per conversion, return on ad spend, and a stack of other meaningful metrics.
Even better, you can break all of that down by campaign, ad group, keyword, individual ad, country, and plenty more dimensions.
That kind of reporting allows you to see exactly how your ads are performing, and which campaigns, ads, keywords, etc have the most opportunity for growth.
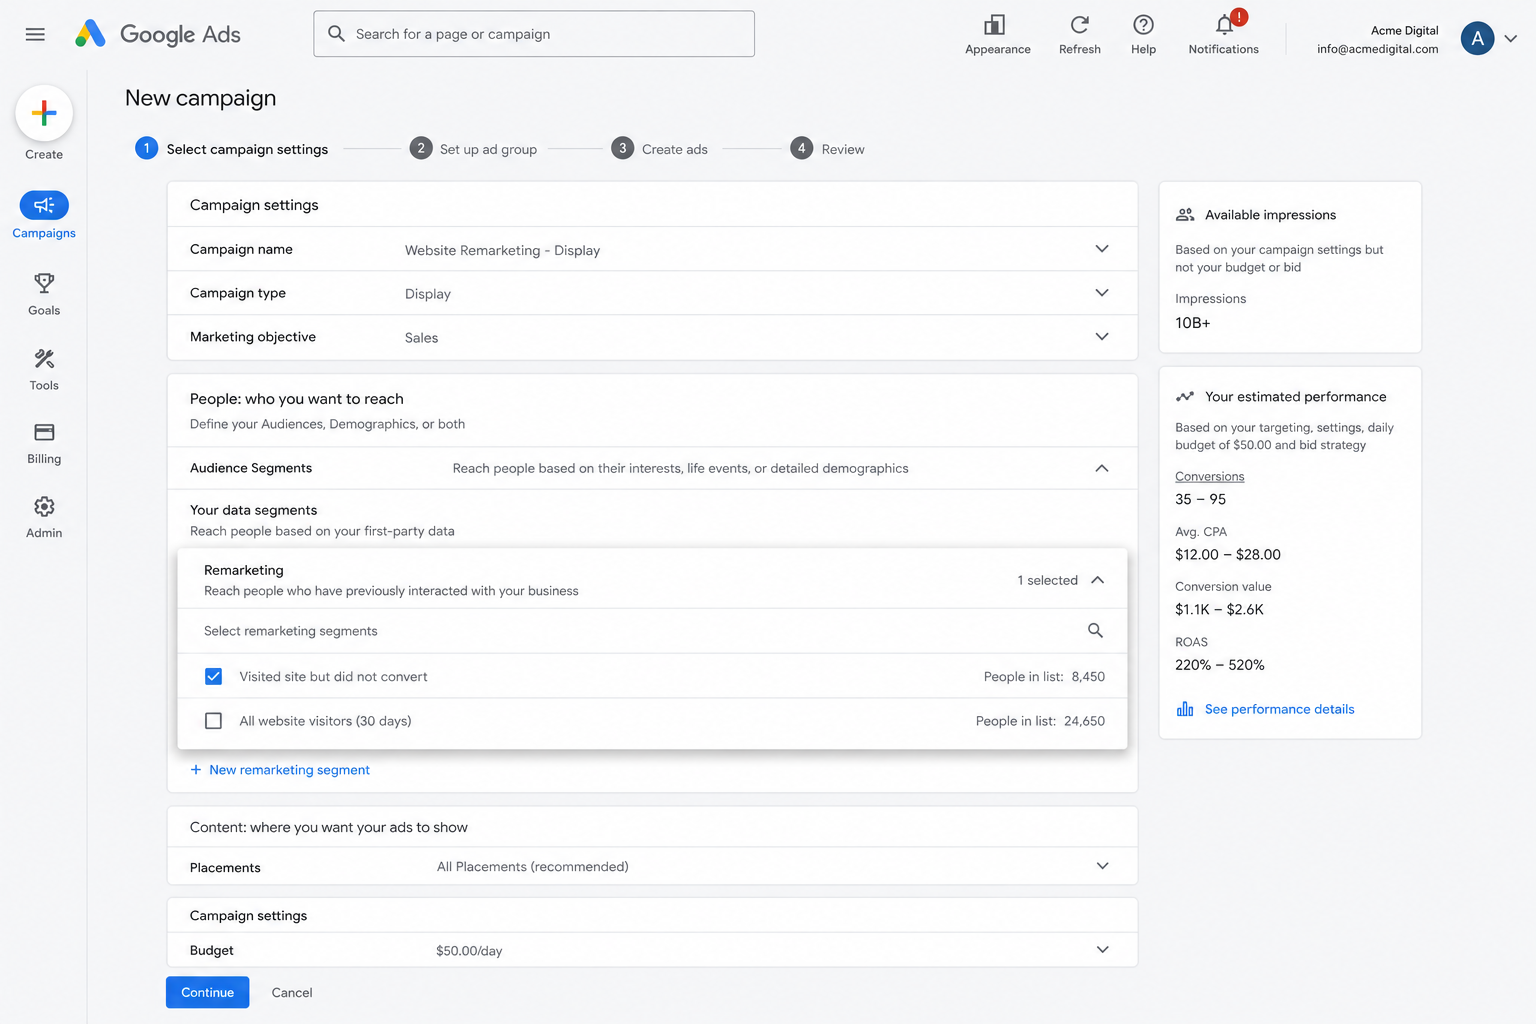
2. Use Google's Smart Bidding technology
With manual bidding, you're essentially saying "I'll pay up to $3 per click." Smart bidding flips that on its head. You tell Google your real goal (like a $45 target cost per conversion) and Google handles the auction bids for you.

Google then weighs up everything it knows about the searcher (age, location, device, browsing history, and more) to decide whether to bid high or low based on how likely they are to convert for you.
It's super powerful, but it only works when your conversion data is solid. Without it, Google has no idea what a good searcher looks like for you, so it ends up bidding aggressively on the wrong people, which drains your budget and pushes your costs higher.
By using Converly to feed Google clean, server-side conversion data, you can help the algorithms understand what a good website visitor looks like for you, and enable Google to go out and find more of them for you.
3. Retarget people who visited your site but didn't convert
Accurate conversion data also gives you the ability to build remarketing audiences out of people who landed on your site but didn't fill out a form.
You can then re-engage those visitors in a few different ways, such as:
- Search — Bid more (or less) for these people whenever they search your keywords again.
- Display — Show display ads to this exact group as they browse the rest of the web on Google's Display network.
- YouTube — Run YouTube Ads aimed only at these visitors so your brand keeps showing up in their feed.
Wrap Up
If you want a conversion sent to Google Ads every time someone submits an Elementor Form on your WordPress site, Converly is a really solid way to make that happen.
It pushes conversions straight to Google's servers (so ad blockers and privacy-focused browsers can't interfere) and bundles in a rich set of lead details (name, email, phone, IP address, User Agent, GCLID, and more) so Google has every chance of correctly tying the conversion back to the original ad click.
The best part is that the whole thing can be up and running in a matter of minutes, and there's a 14-day free trial waiting, so give it a try today!
About the author

Aaron is the founder of Converly. With over 15 years of experience in digital marketing and SaaS, he's passionate about helping businesses track and optimise their ad conversions.